Create Your Own Branded Travel Portal
Set up your portal, showcase your services, and start accepting bookings under your own brand.
Overview
This guide will walk you through the process of creating and managing your own whitelabel travel booking portal on the Flying Carpet platform. Your portal will be a fully branded experience where your customers can browse and book travel activities directly.
The setup process takes approximately 30-60 minutes to complete, and once approved, your portal will be live and ready to accept bookings.
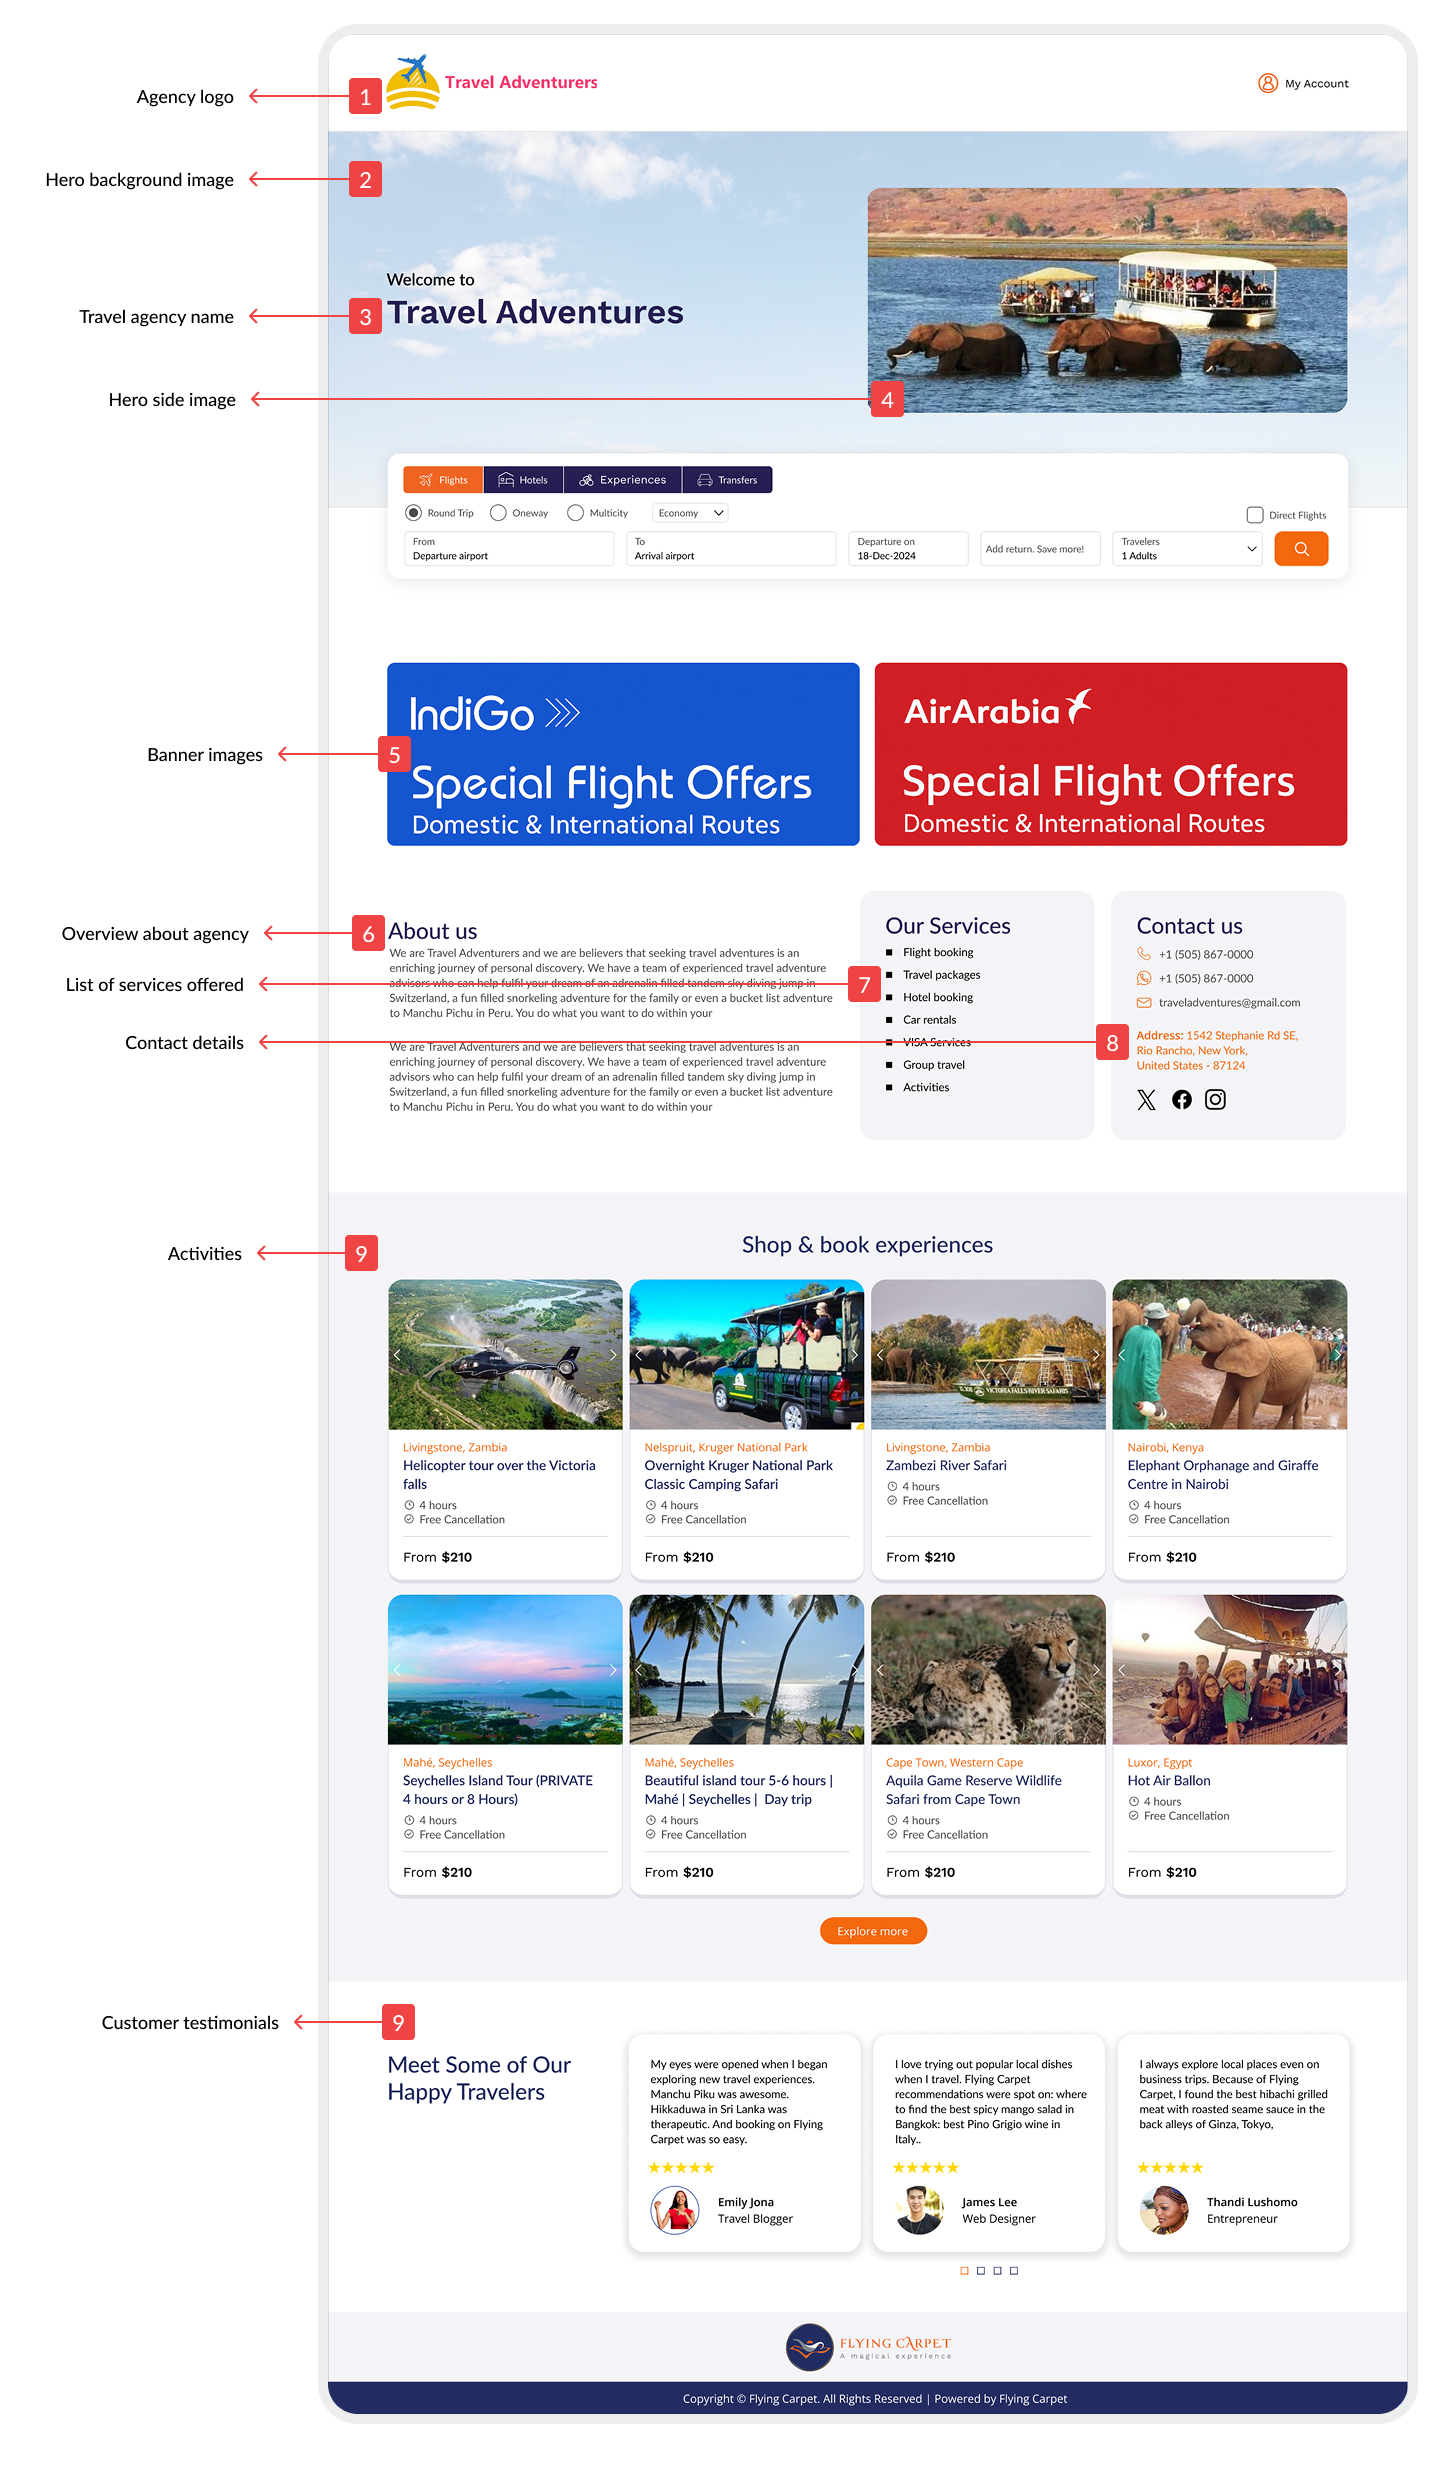
Portal Home Page Layout
Your portal home page consists of several customizable components. The numbered labels below identify each section that you can personalize during setup. These numbers will be referenced throughout this guide.
Step-by-Step Setup
Step 1: Accept Your Invitation
You'll receive an invitation email from Flying Carpet with a unique setup link. Click the link in the email to begin the setup process.
Example invitation email:
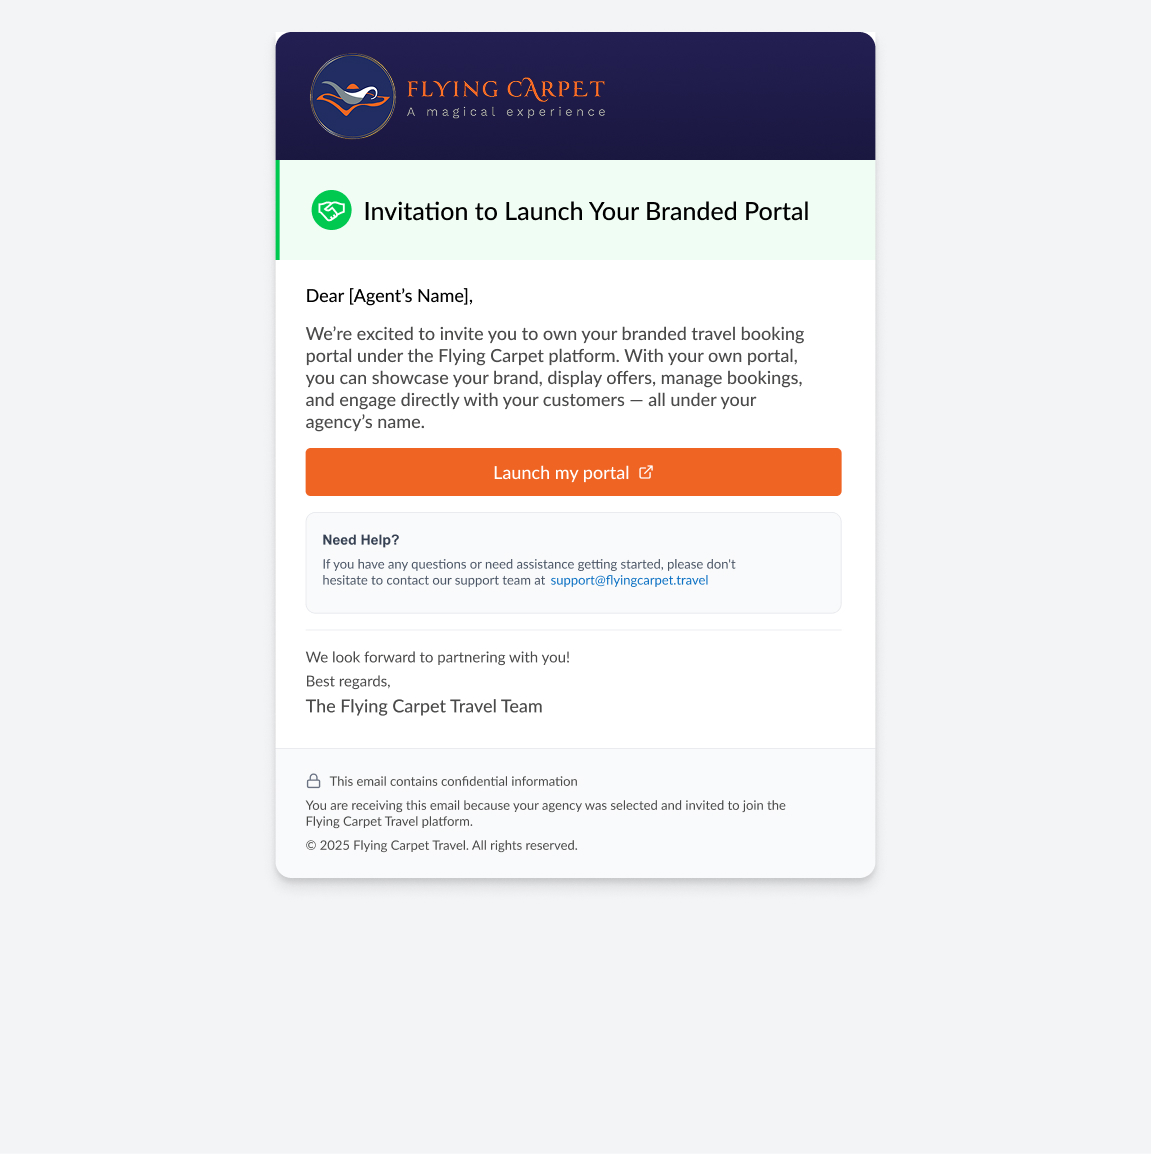
Note: After clicking the invitation link, you will be prompted to log in to your agency account using your existing credentials.
Step 2: Choose Your Web Address
Select a unique subdomain for your portal. This will be your permanent web address that you'll share with customers.
After clicking the invitation link, you may see an introduction modal:
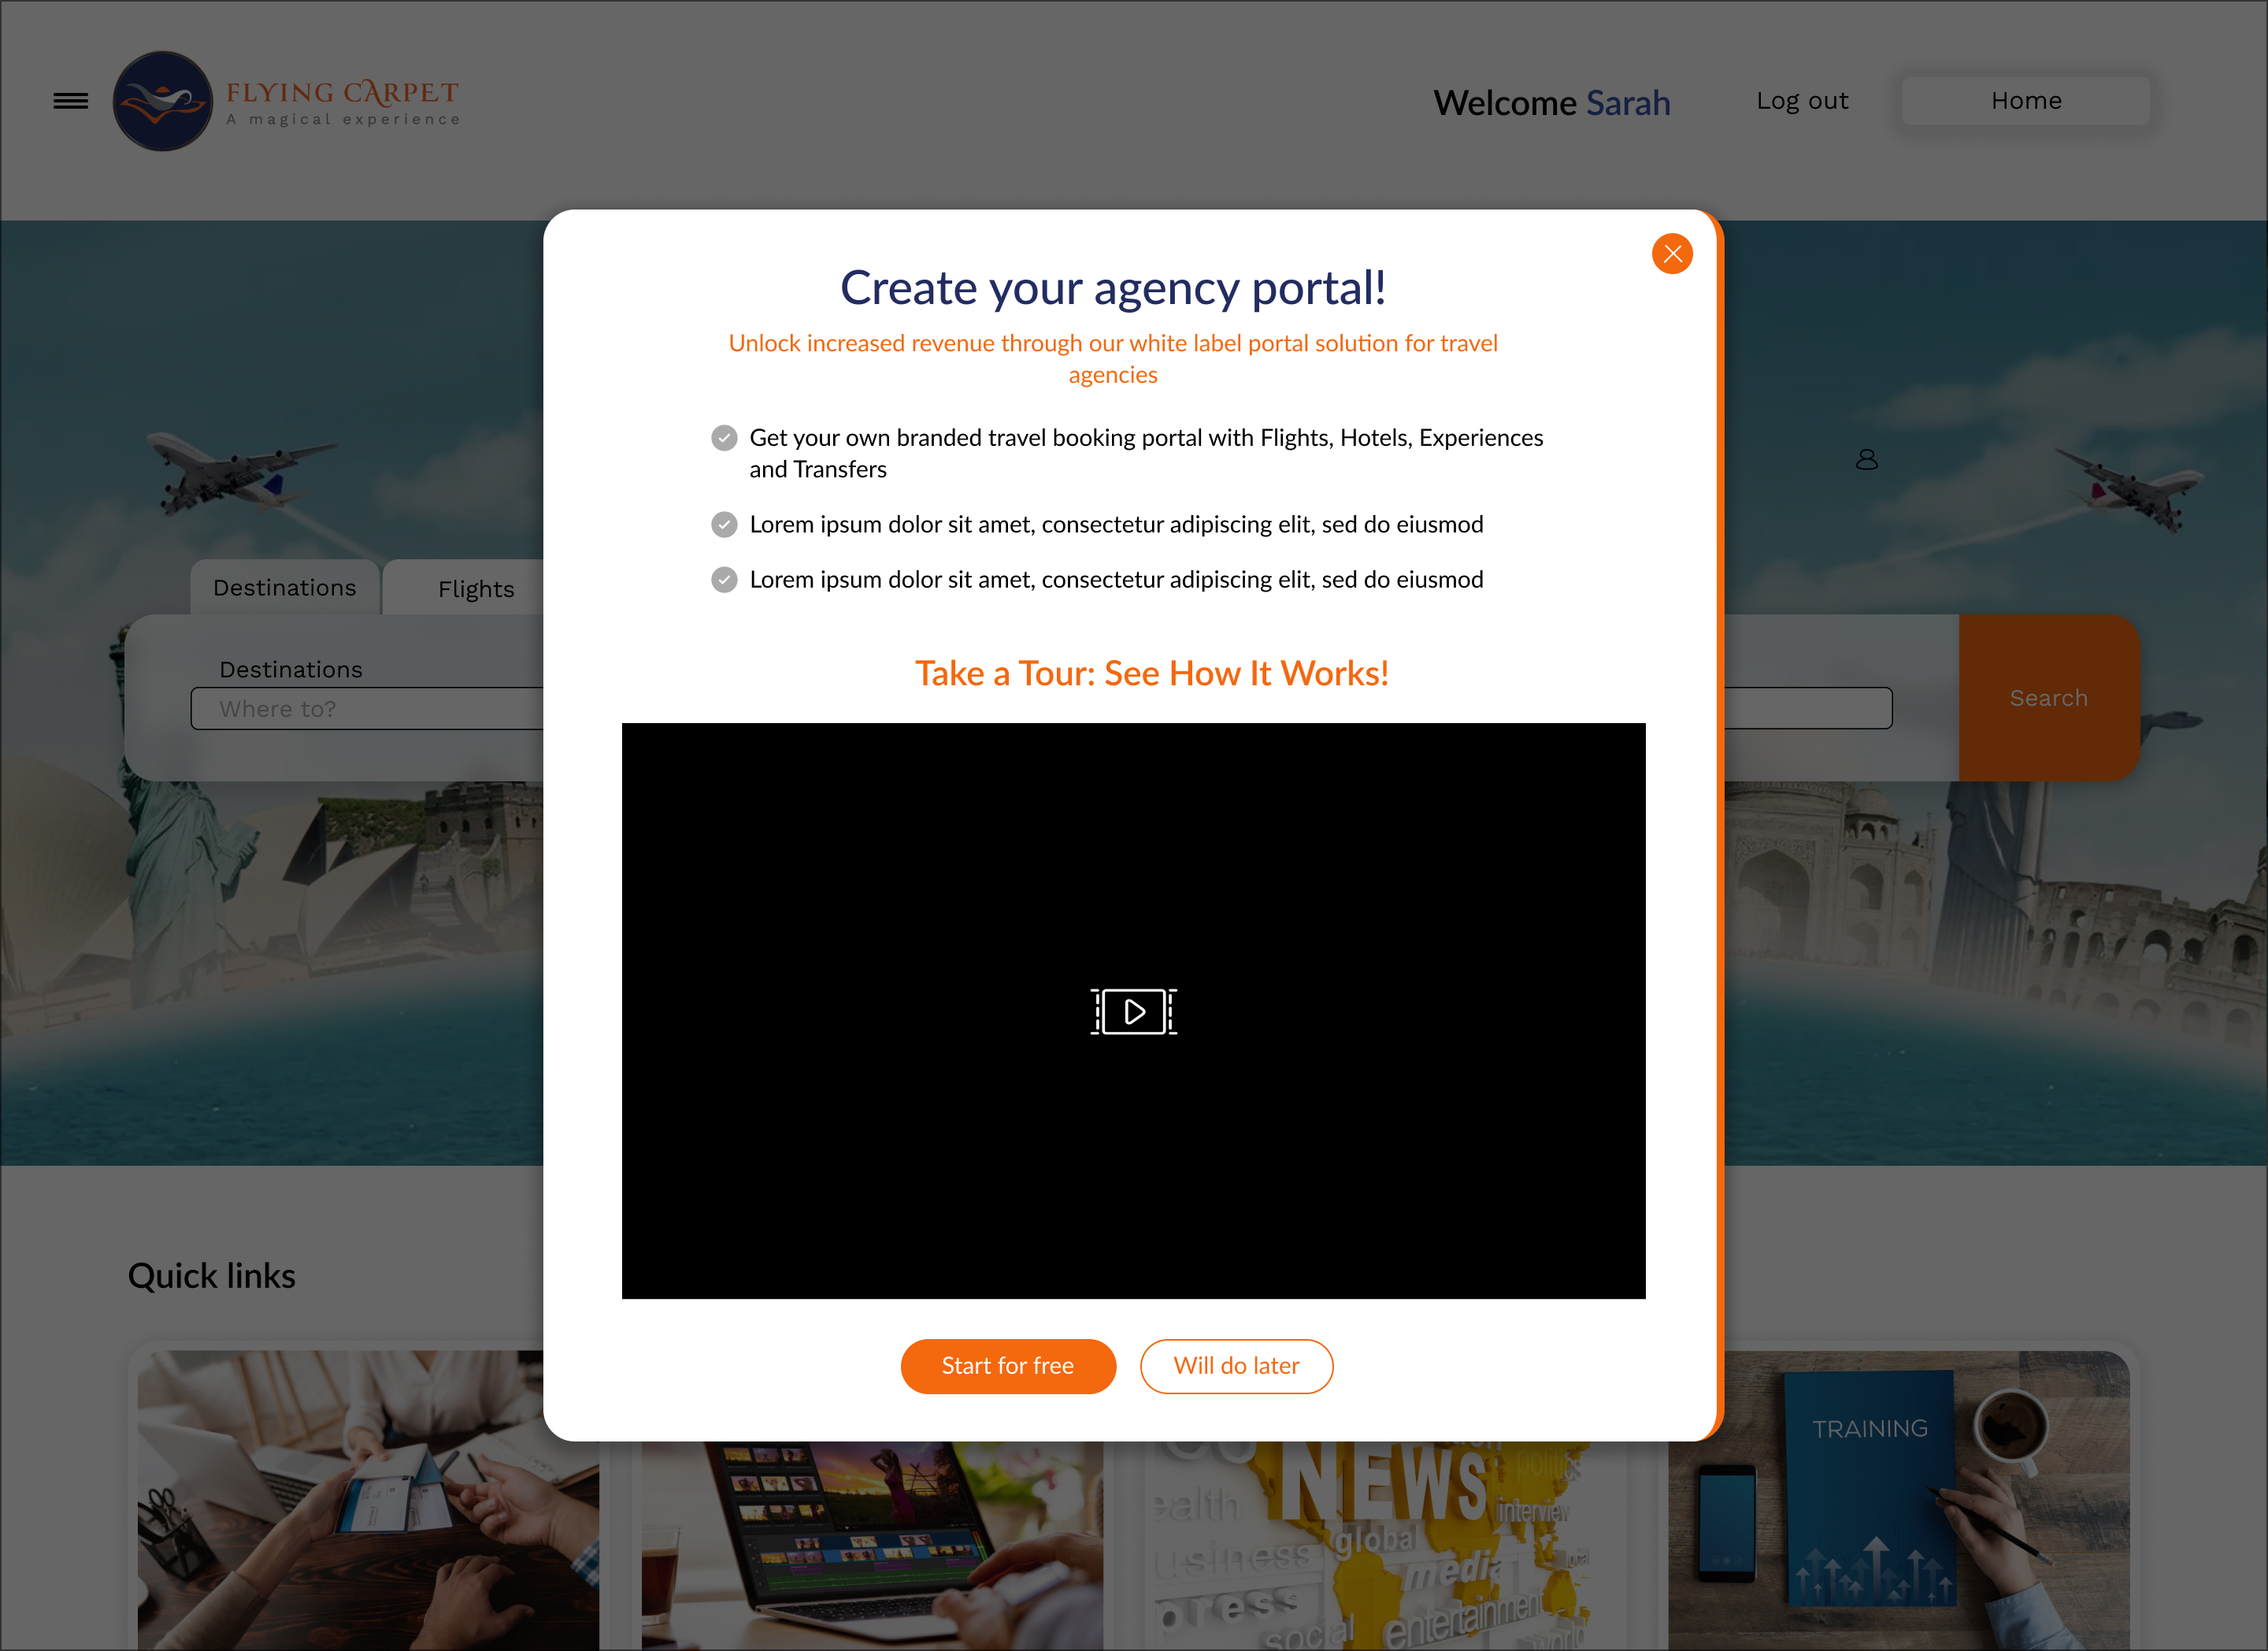
Start your free 30-day trial:

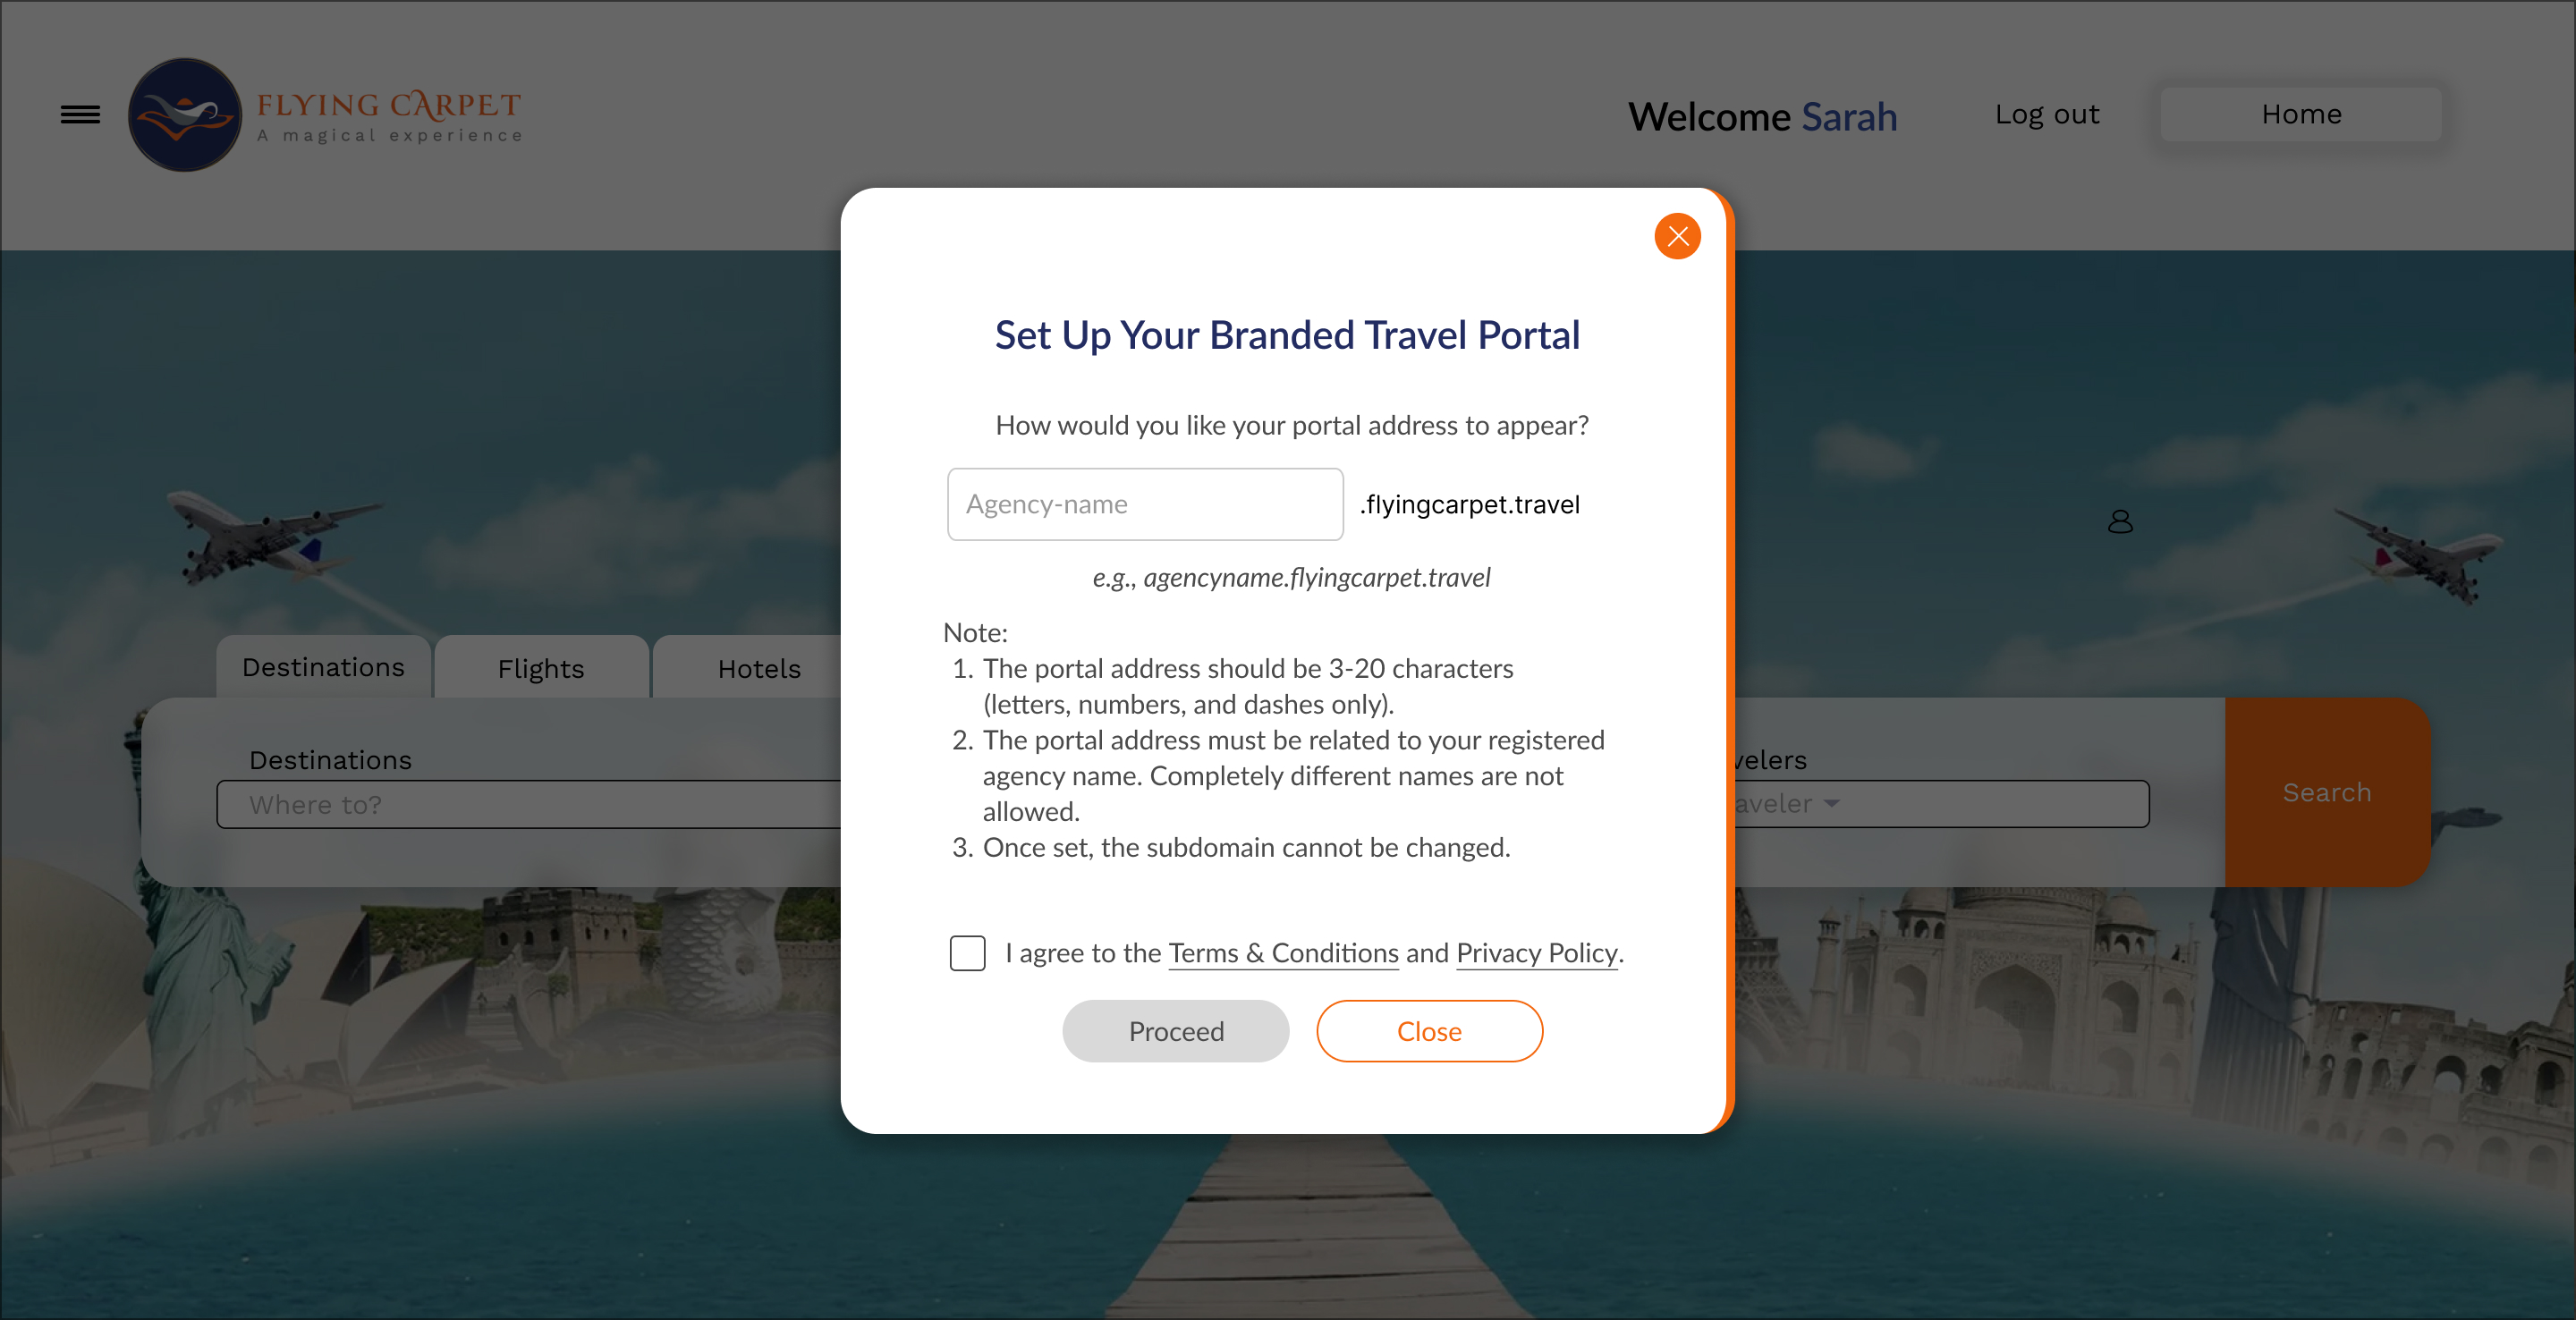
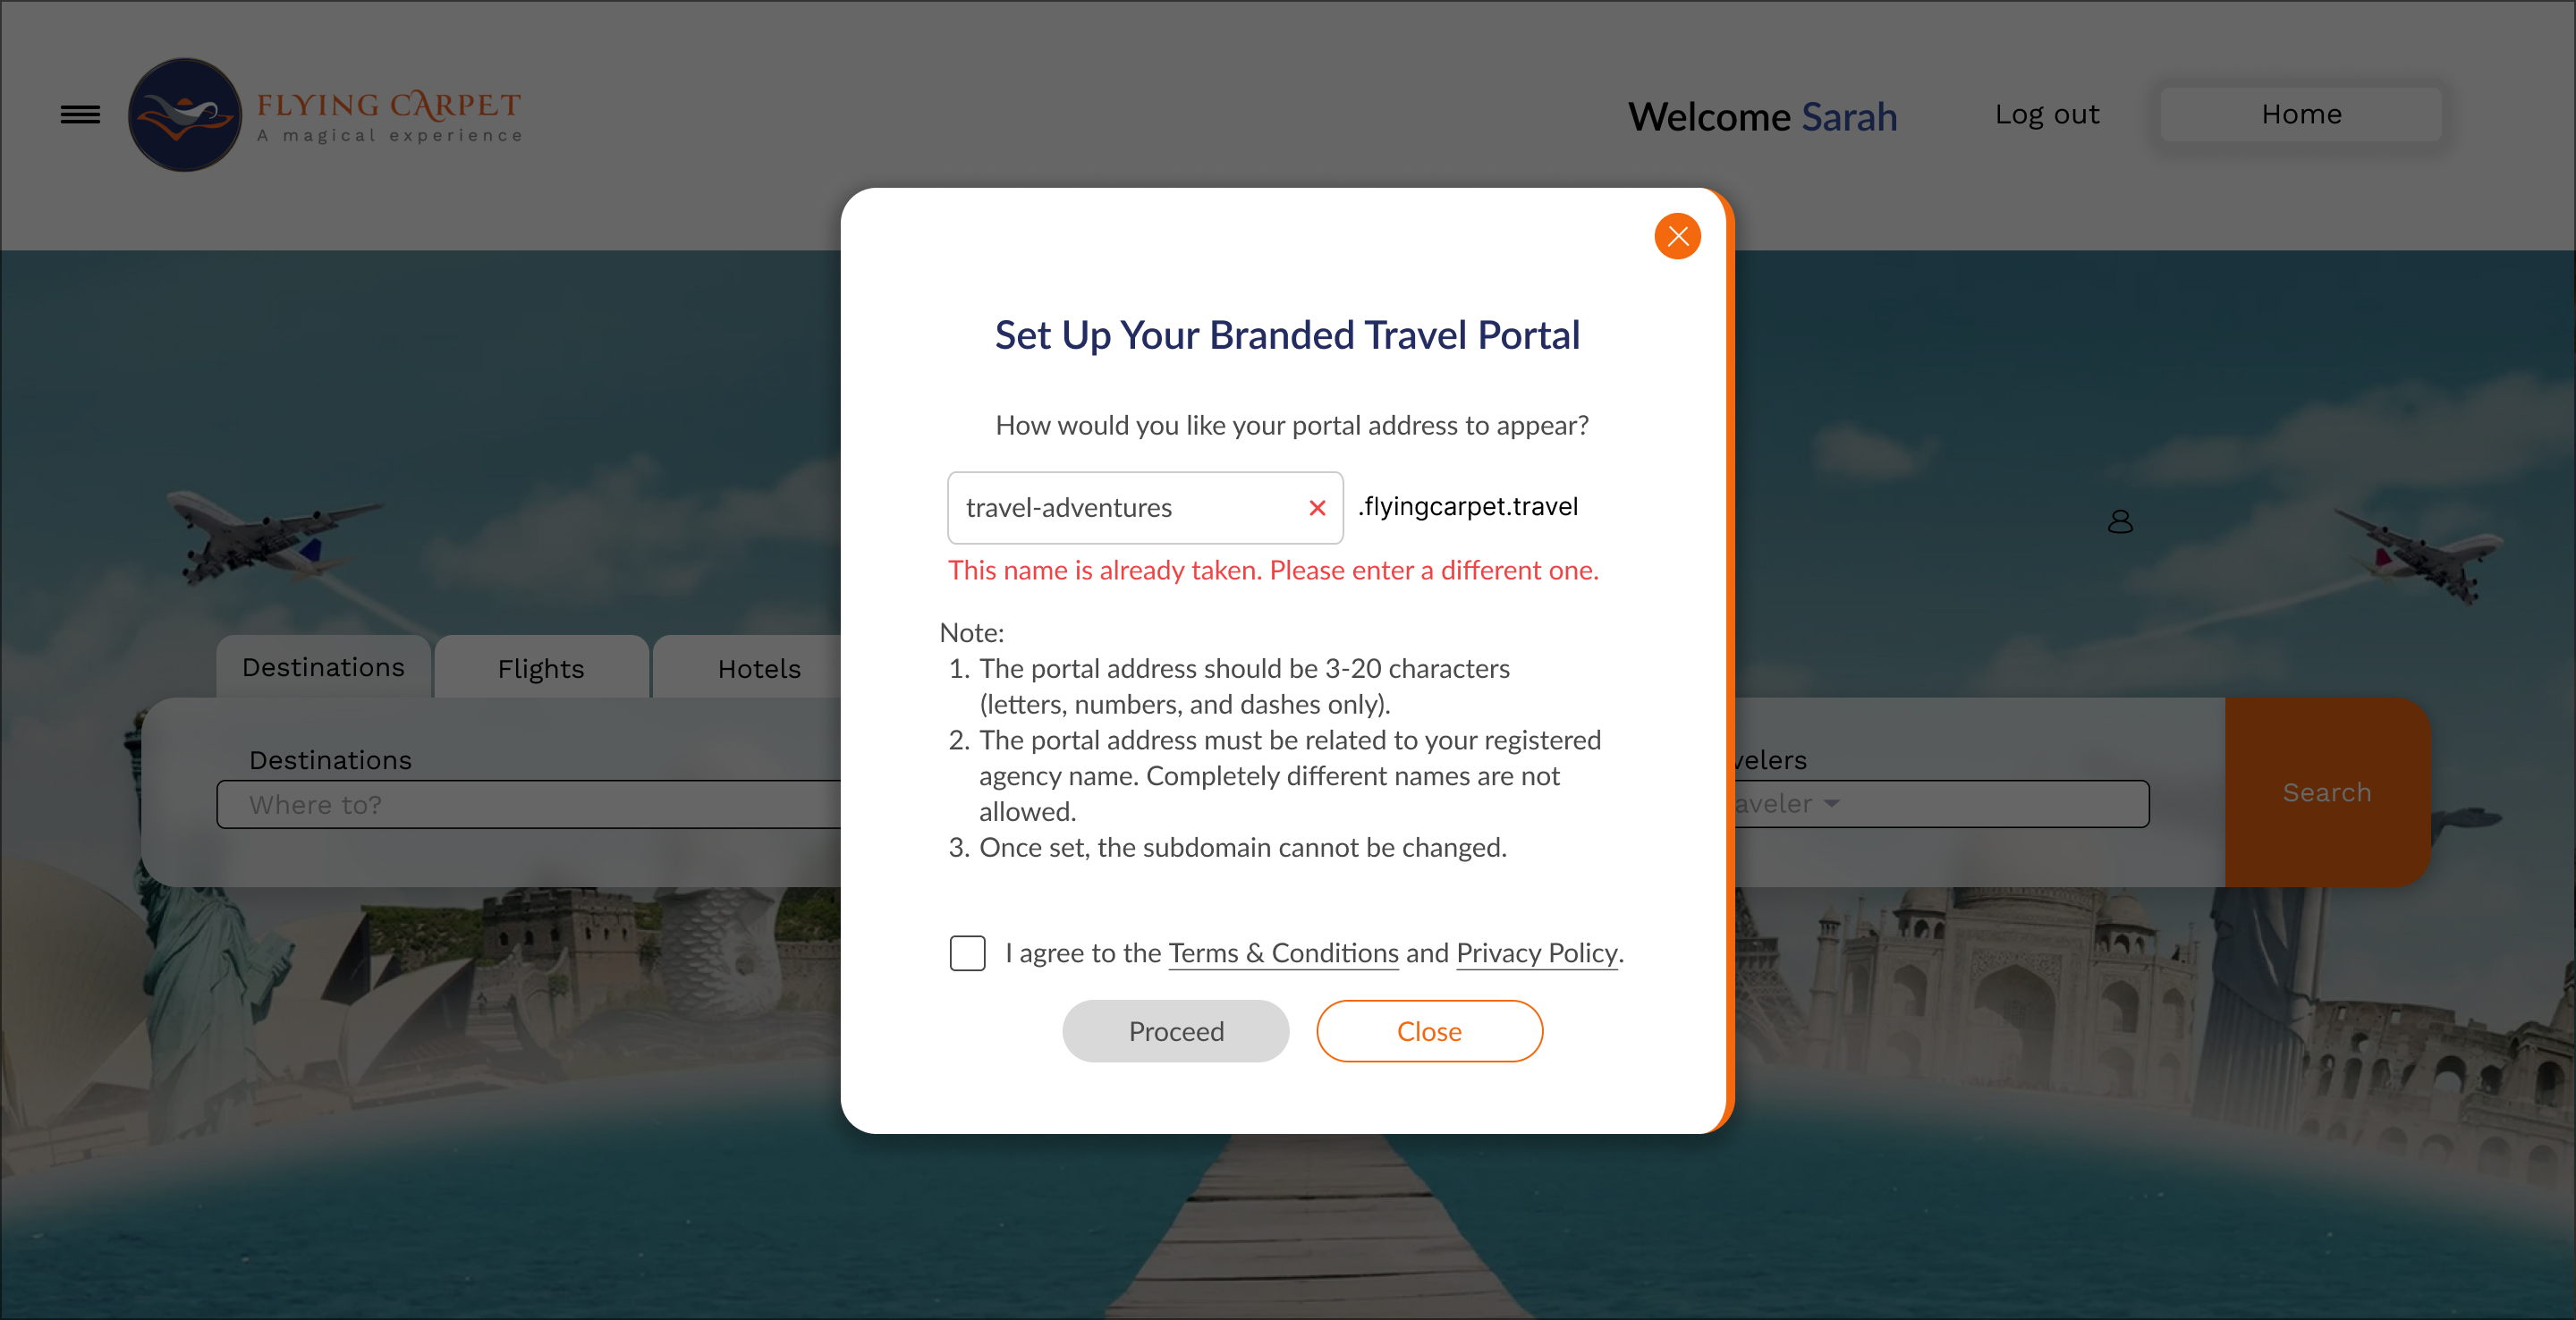
Enter your desired subdomain:
The system will validate your chosen subdomain in real-time.
If the name is already taken, you'll see an error:
When available, you'll see a success indicator:
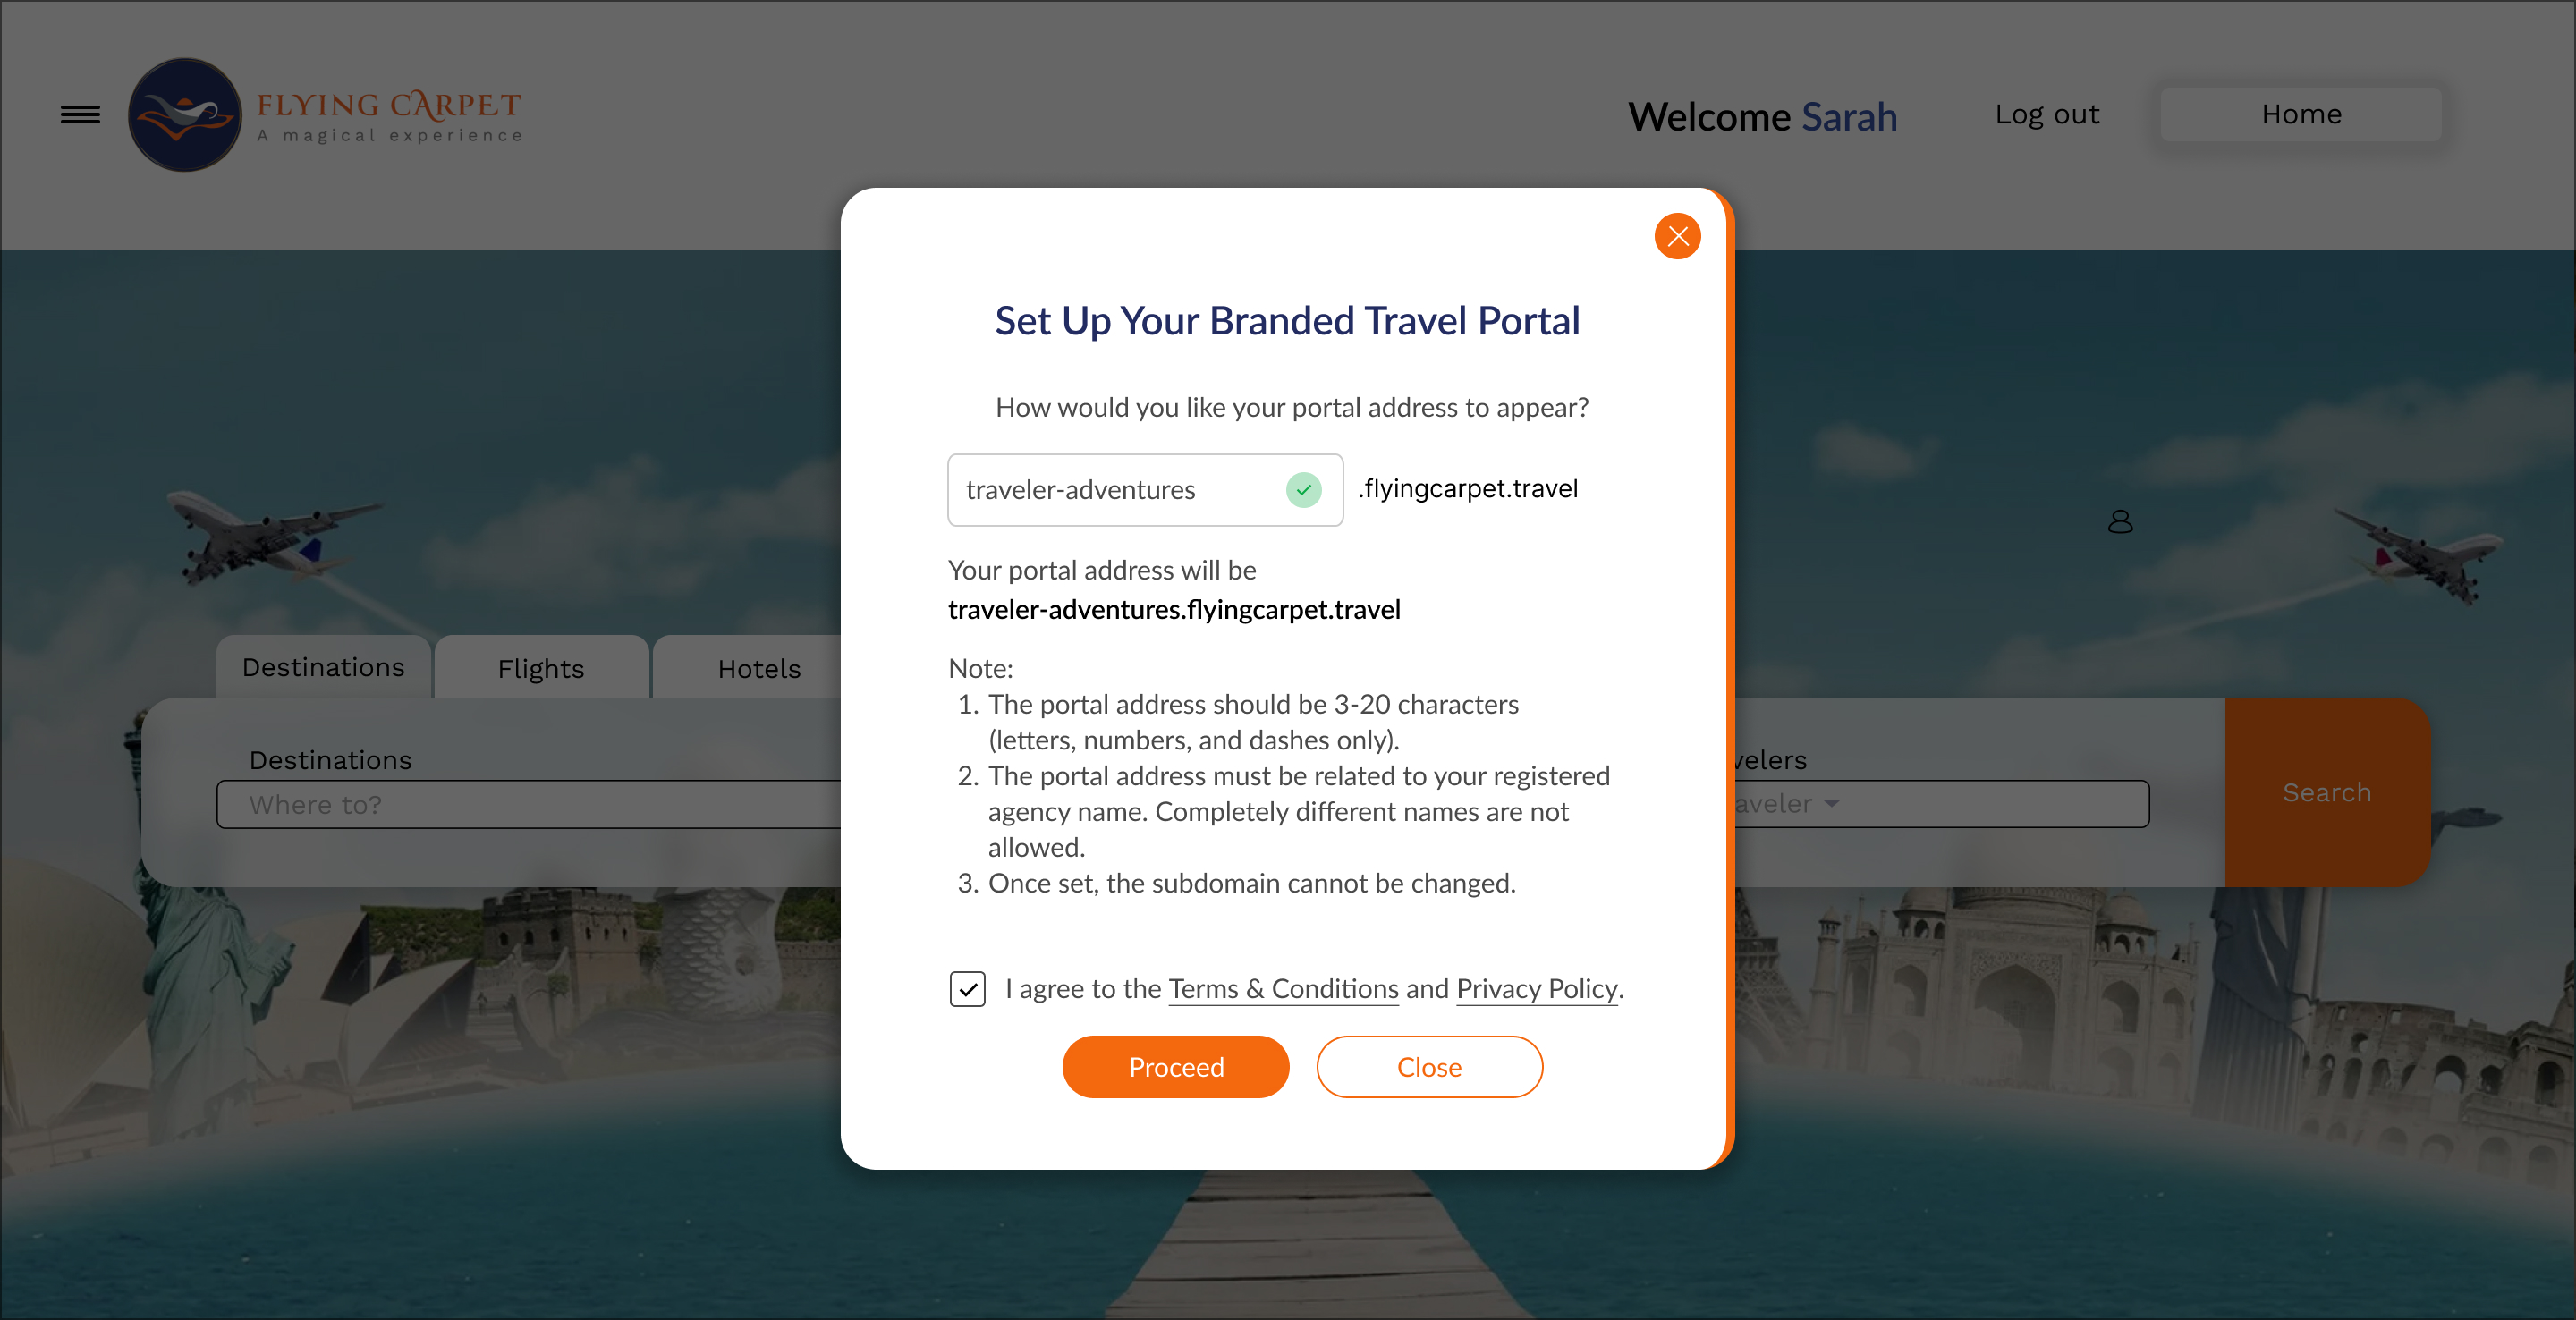
Example:
youragency.flyingcarpet.com
Tip: Choose something simple and easy to remember. Your agency name or a descriptive keyword works best.
Important Notes:
- The portal address should be 3-20 characters (letters, numbers, and dashes only)
- The portal address must be related to your registered agency name
- Completely different names are not allowed
- Once set, the subdomain cannot be changed
Step 3: Customize Your Portal
Personalize your portal with your brand identity and content. This step involves several sub-sections that you'll complete in the portal customization wizard.
3.1 Basic Information
This section covers your agency's basic details and contact information.
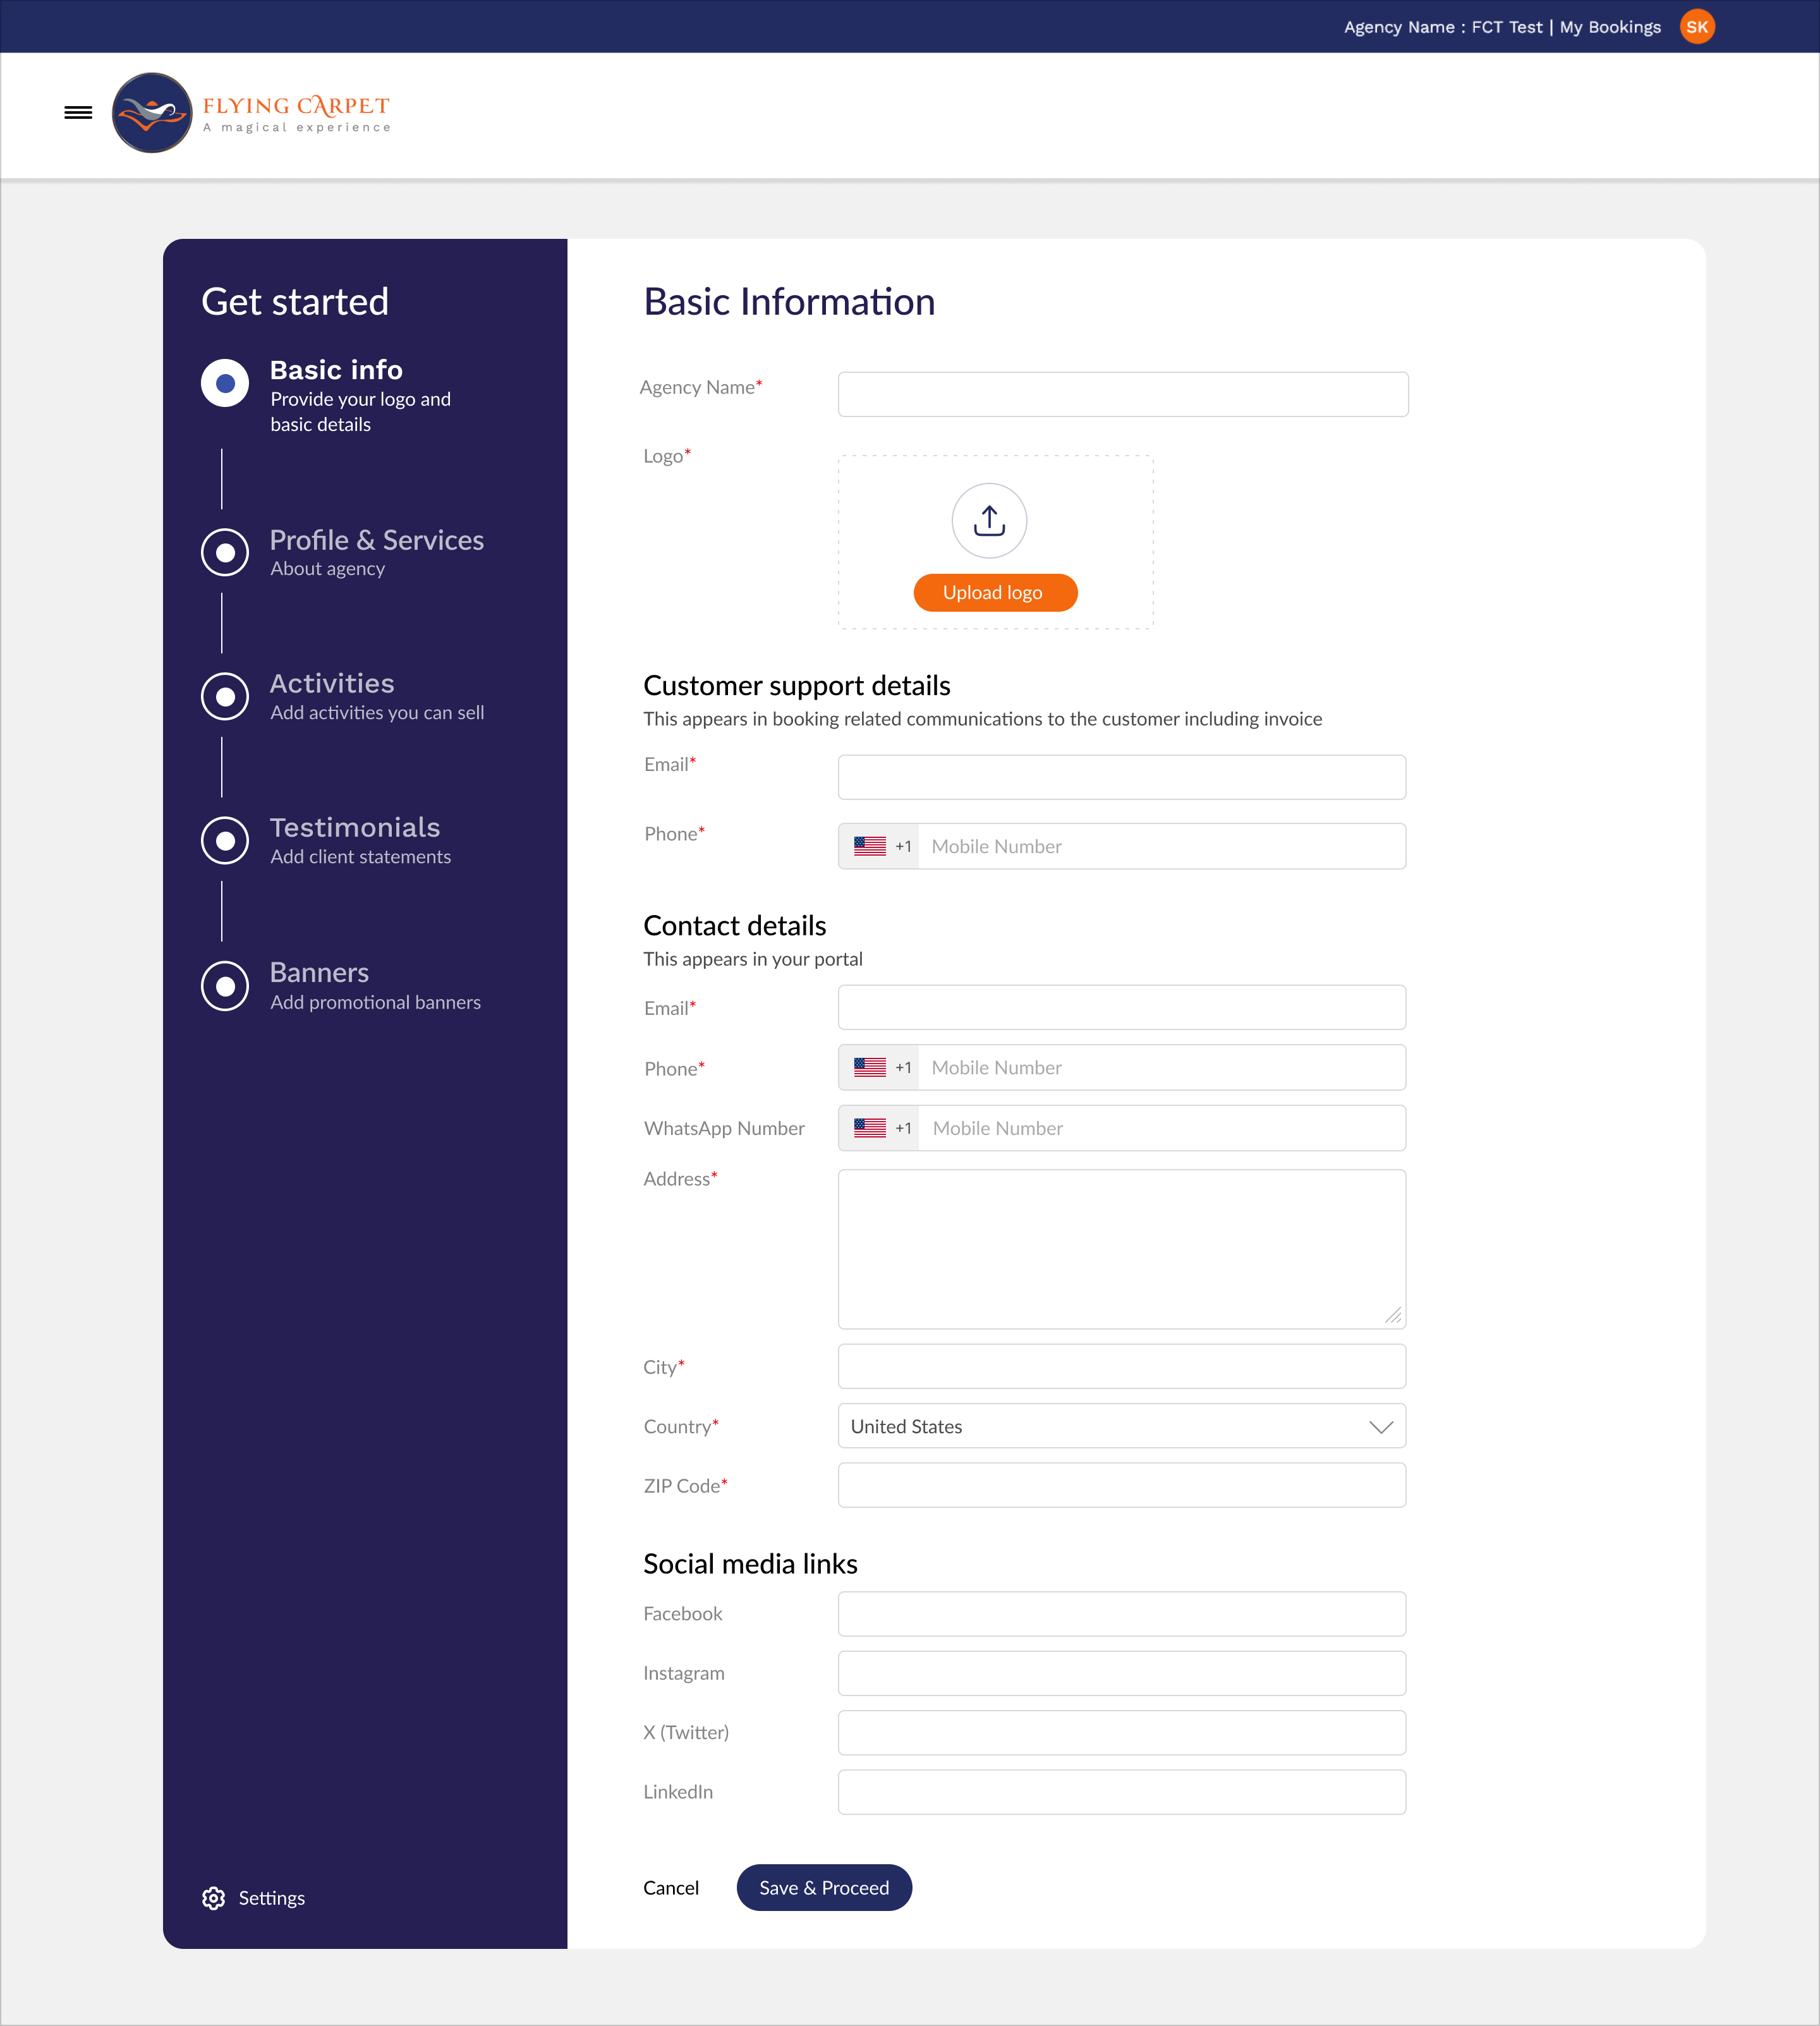
Agency Logo: Upload your brand logo. This appears in the portal header and in customer communications.
Customer Support Details:
- Email address for booking-related communications
- Phone number for customer inquiries
- These appear in booking confirmations and invoices
Contact Details: Information displayed on your portal:
- Portal display email
- Portal display phone number
- WhatsApp number (optional)
- Physical address, city, country, and ZIP code
- Social media links: Facebook, Instagram, X (Twitter), and LinkedIn
3.2 Profile & Services
Add information about your agency, upload hero images, and list your services.
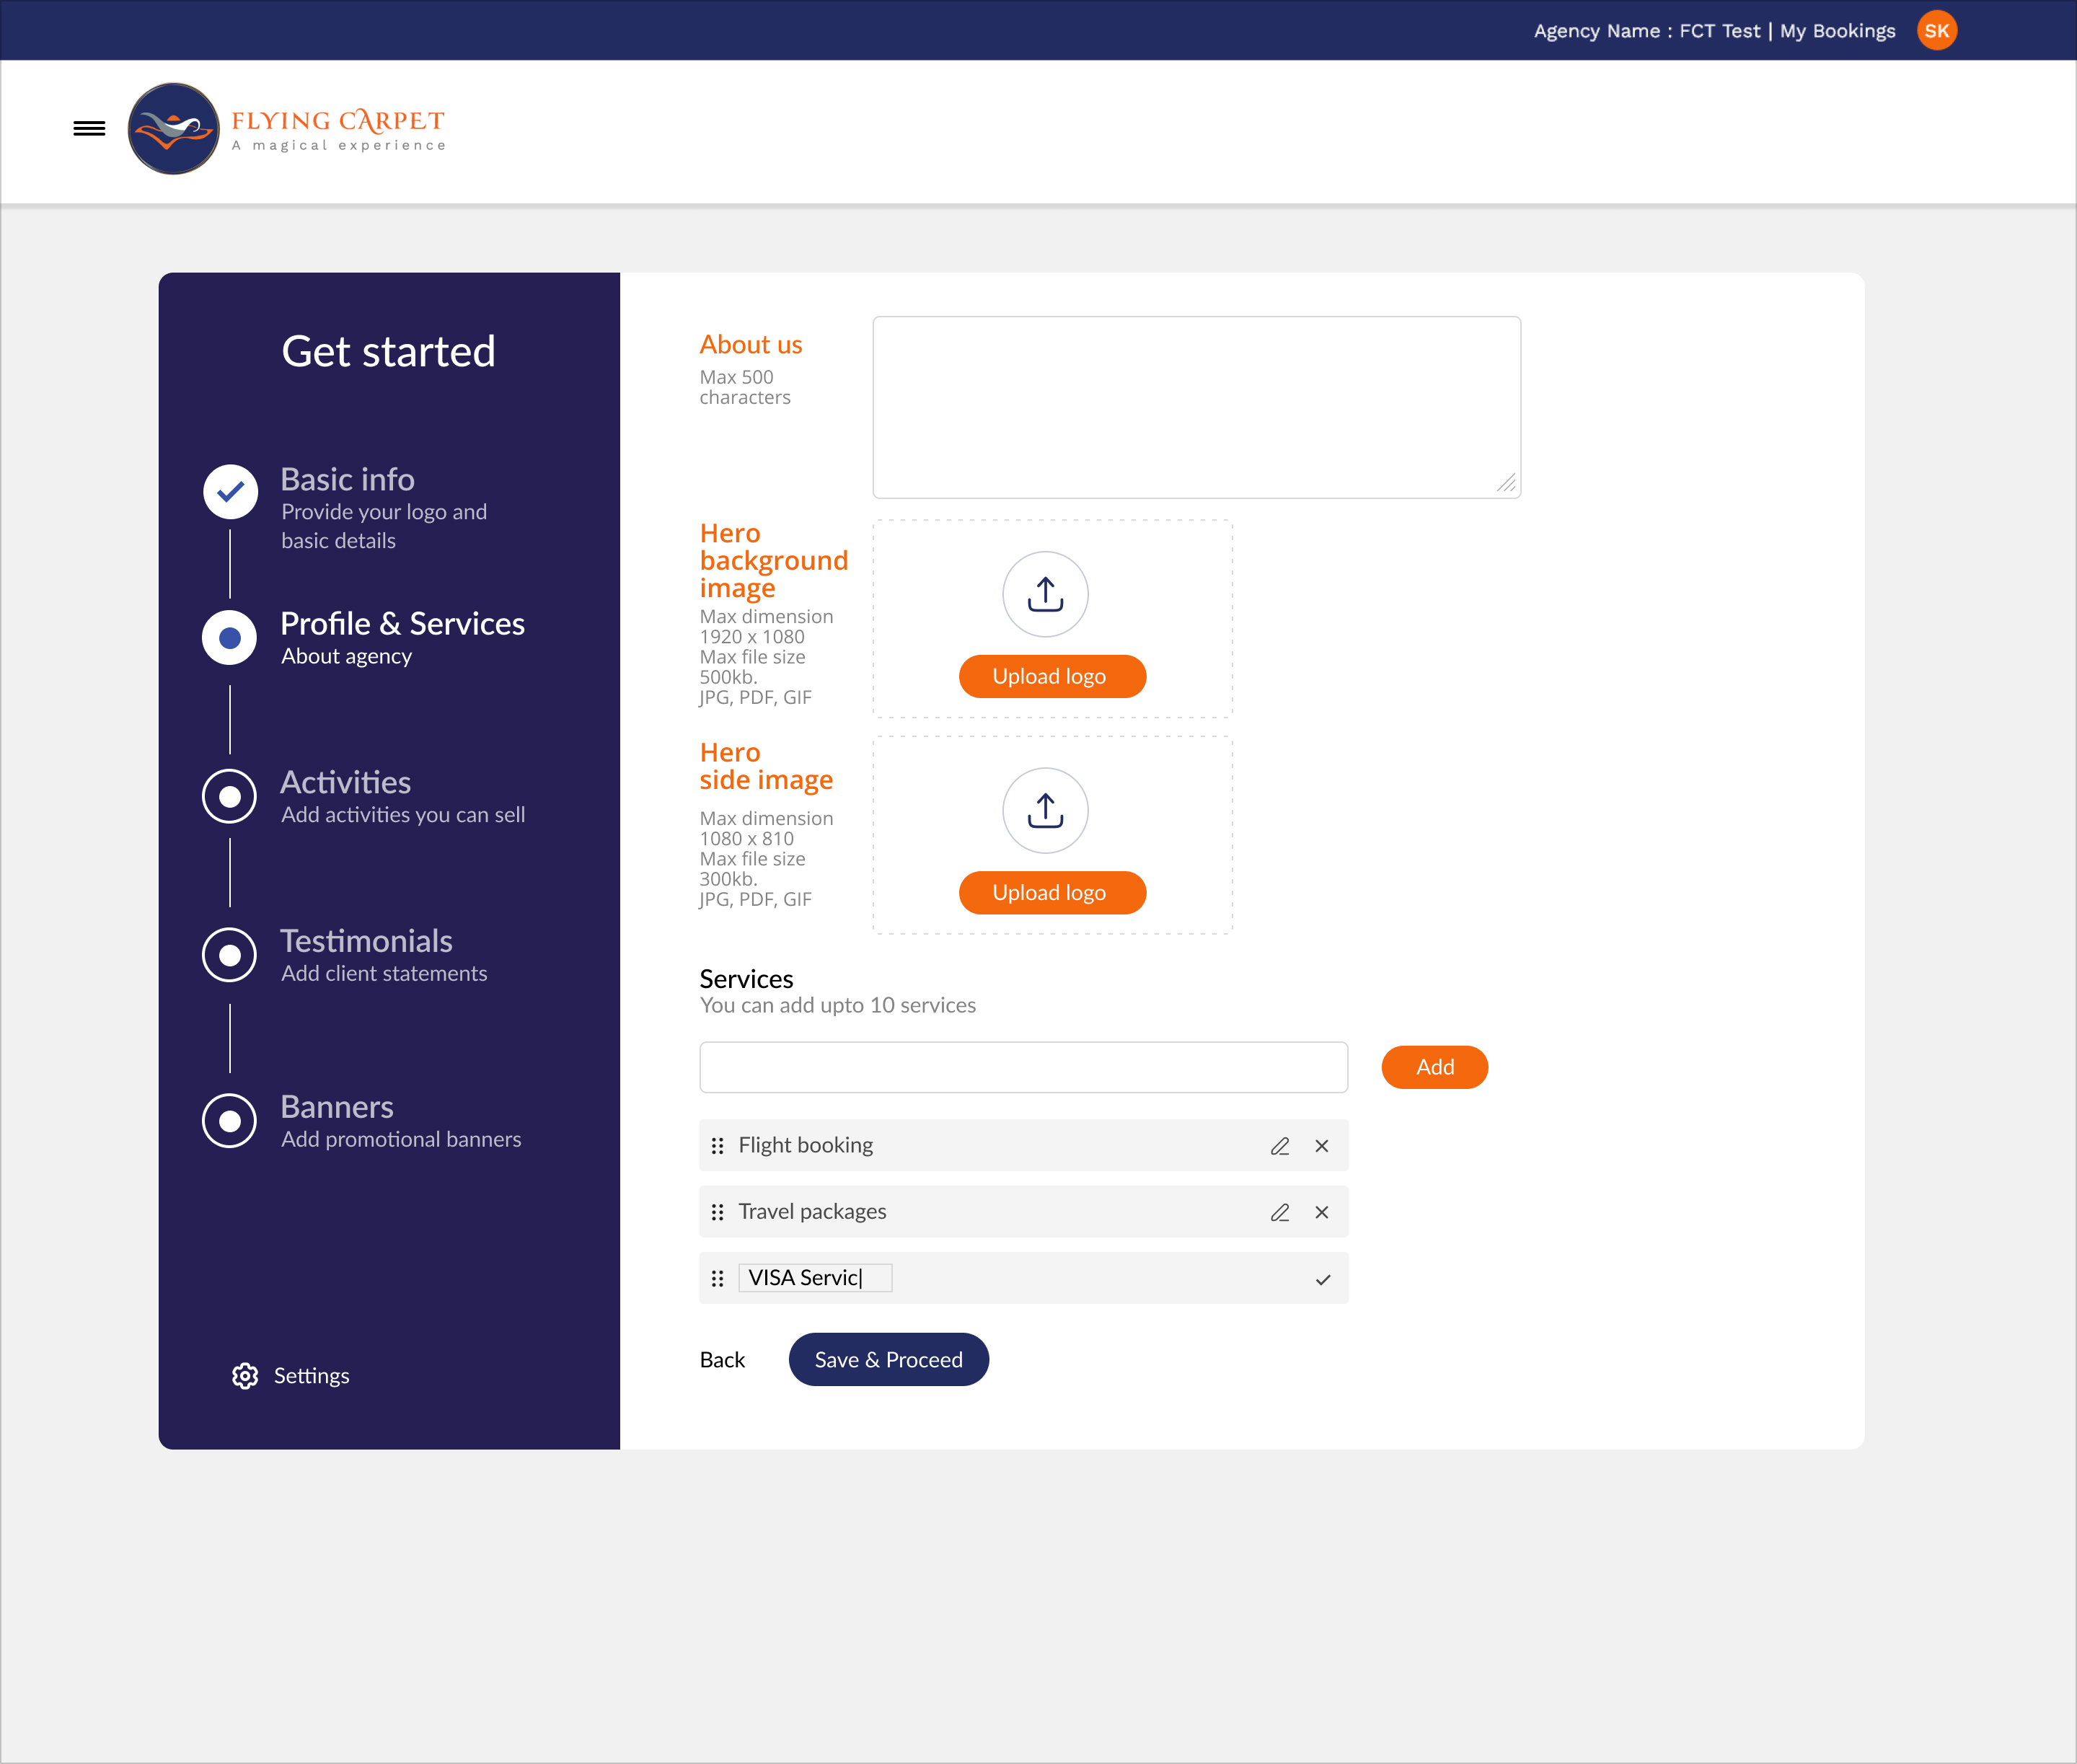
About us: Write a description of your agency (max 500 characters).
Hero background image: Upload the main background image.
- Max dimension: 1680 x 810 pixels
- Max file size: 500kb
- Formats: JPG, PDF, GIF
Hero side image: Featured image on the right side.
- Max dimension: 1080 x 810 pixels
- Max file size: 300kb
- Formats: JPG, PDF, GIF
Services: List key services (up to 10).
- Examples: Flight booking, Travel packages, VISA Services
- Use the drag handle to reorder services
3.3 Activities
Select activities from the Flying Carpet platform to feature on your portal.
Starting point - Click "+Add activities":

Search for activities:
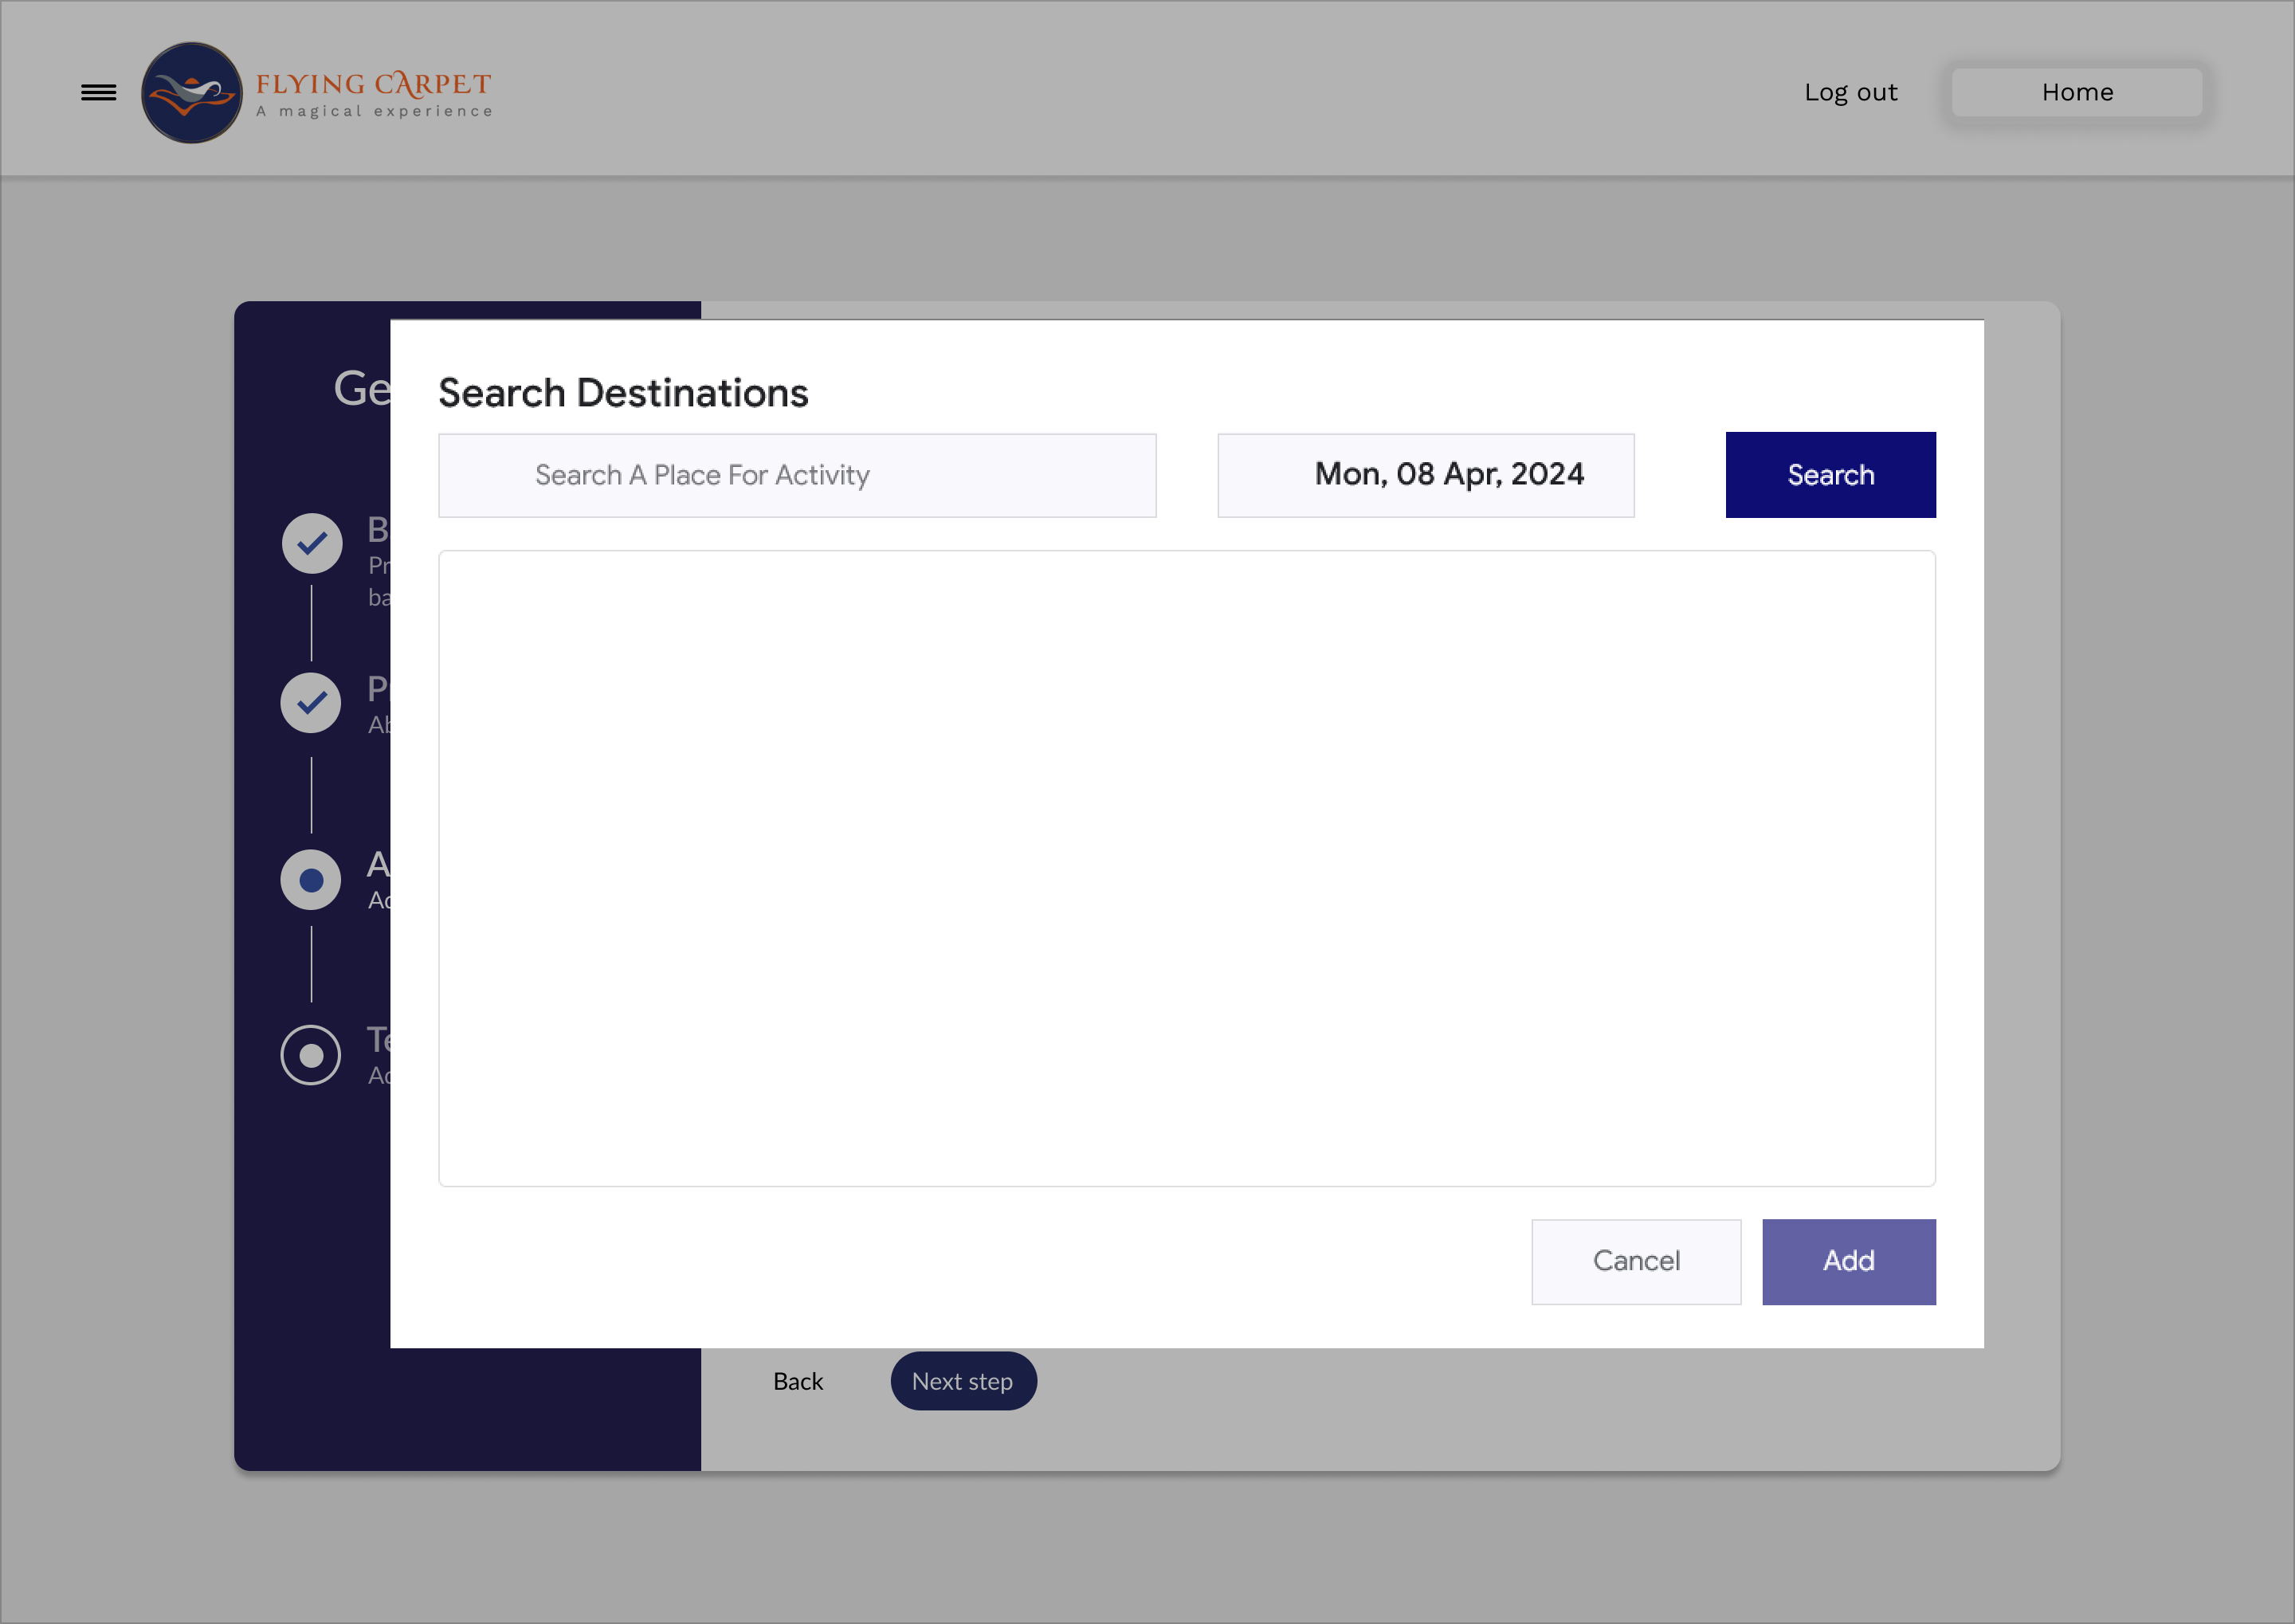
Browse search results:
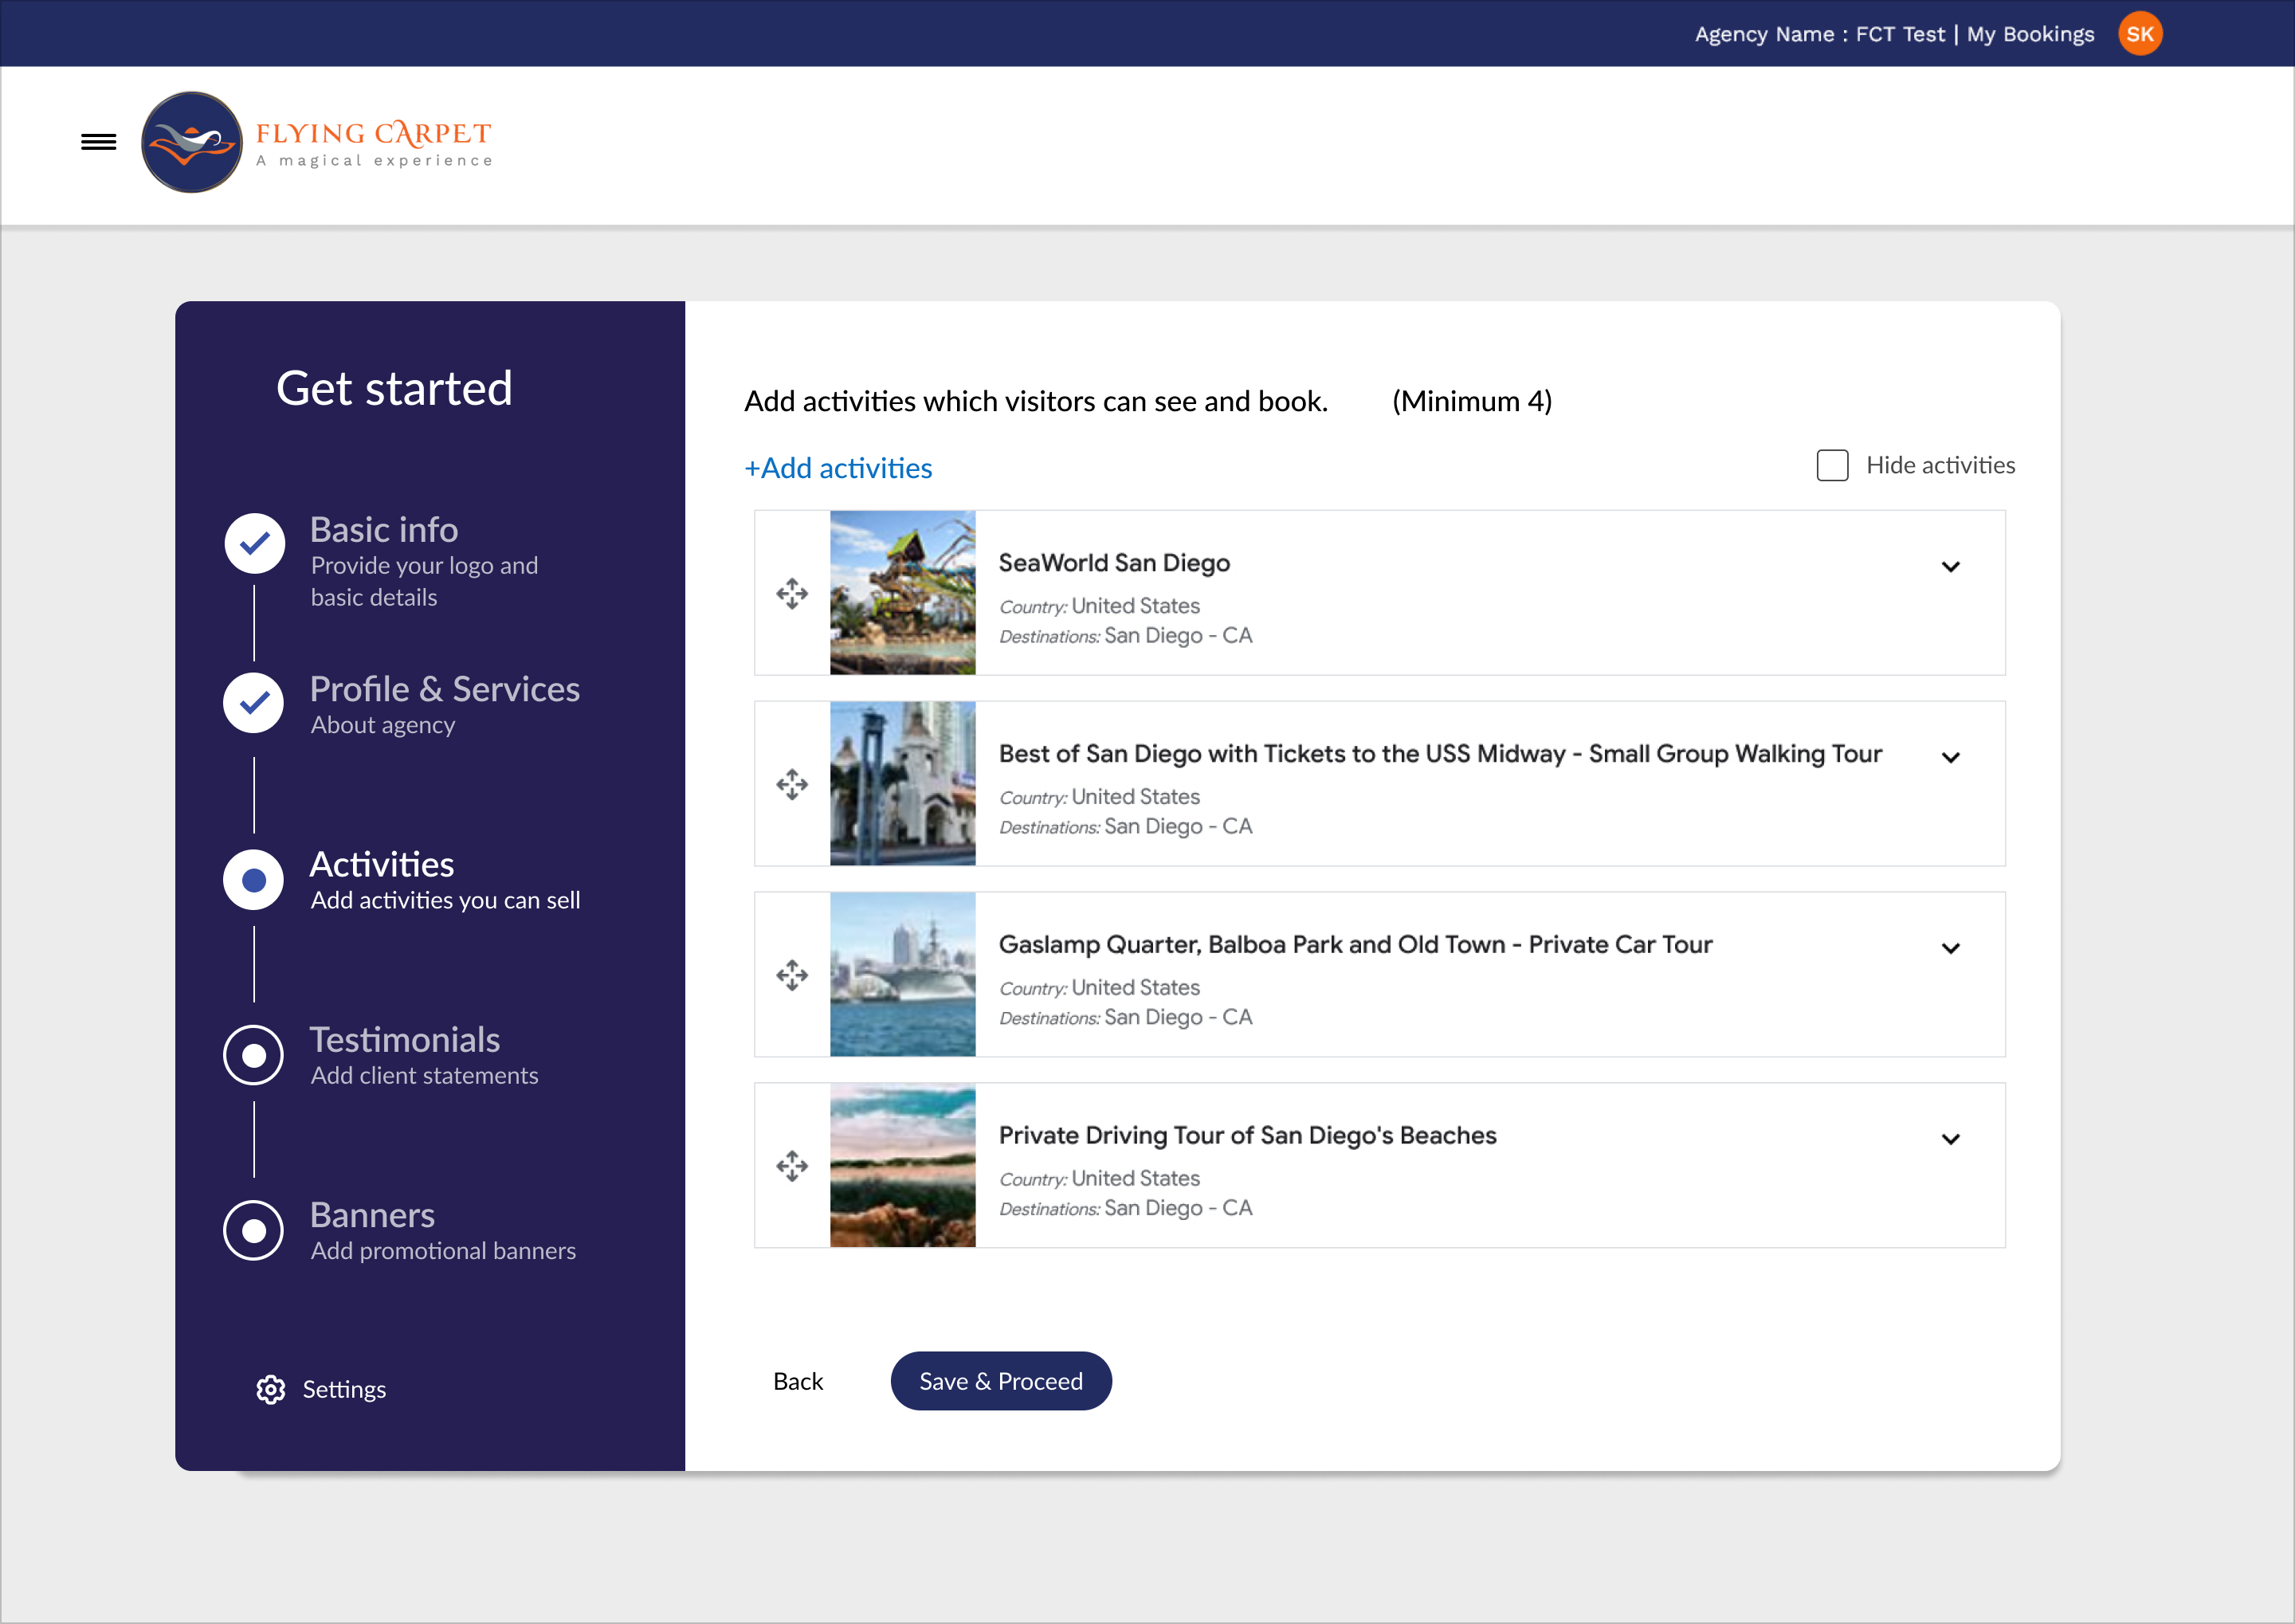
Added activities:
Activities: Feature bookable experiences.
- Minimum 4 activities required
- Maximum 8 activities recommended
- Search by destination and date
- Use drag handles to reorder
Tip: Choose a diverse mix of activities at different price points.
3.4 Testimonials
Add customer reviews to build trust and credibility.
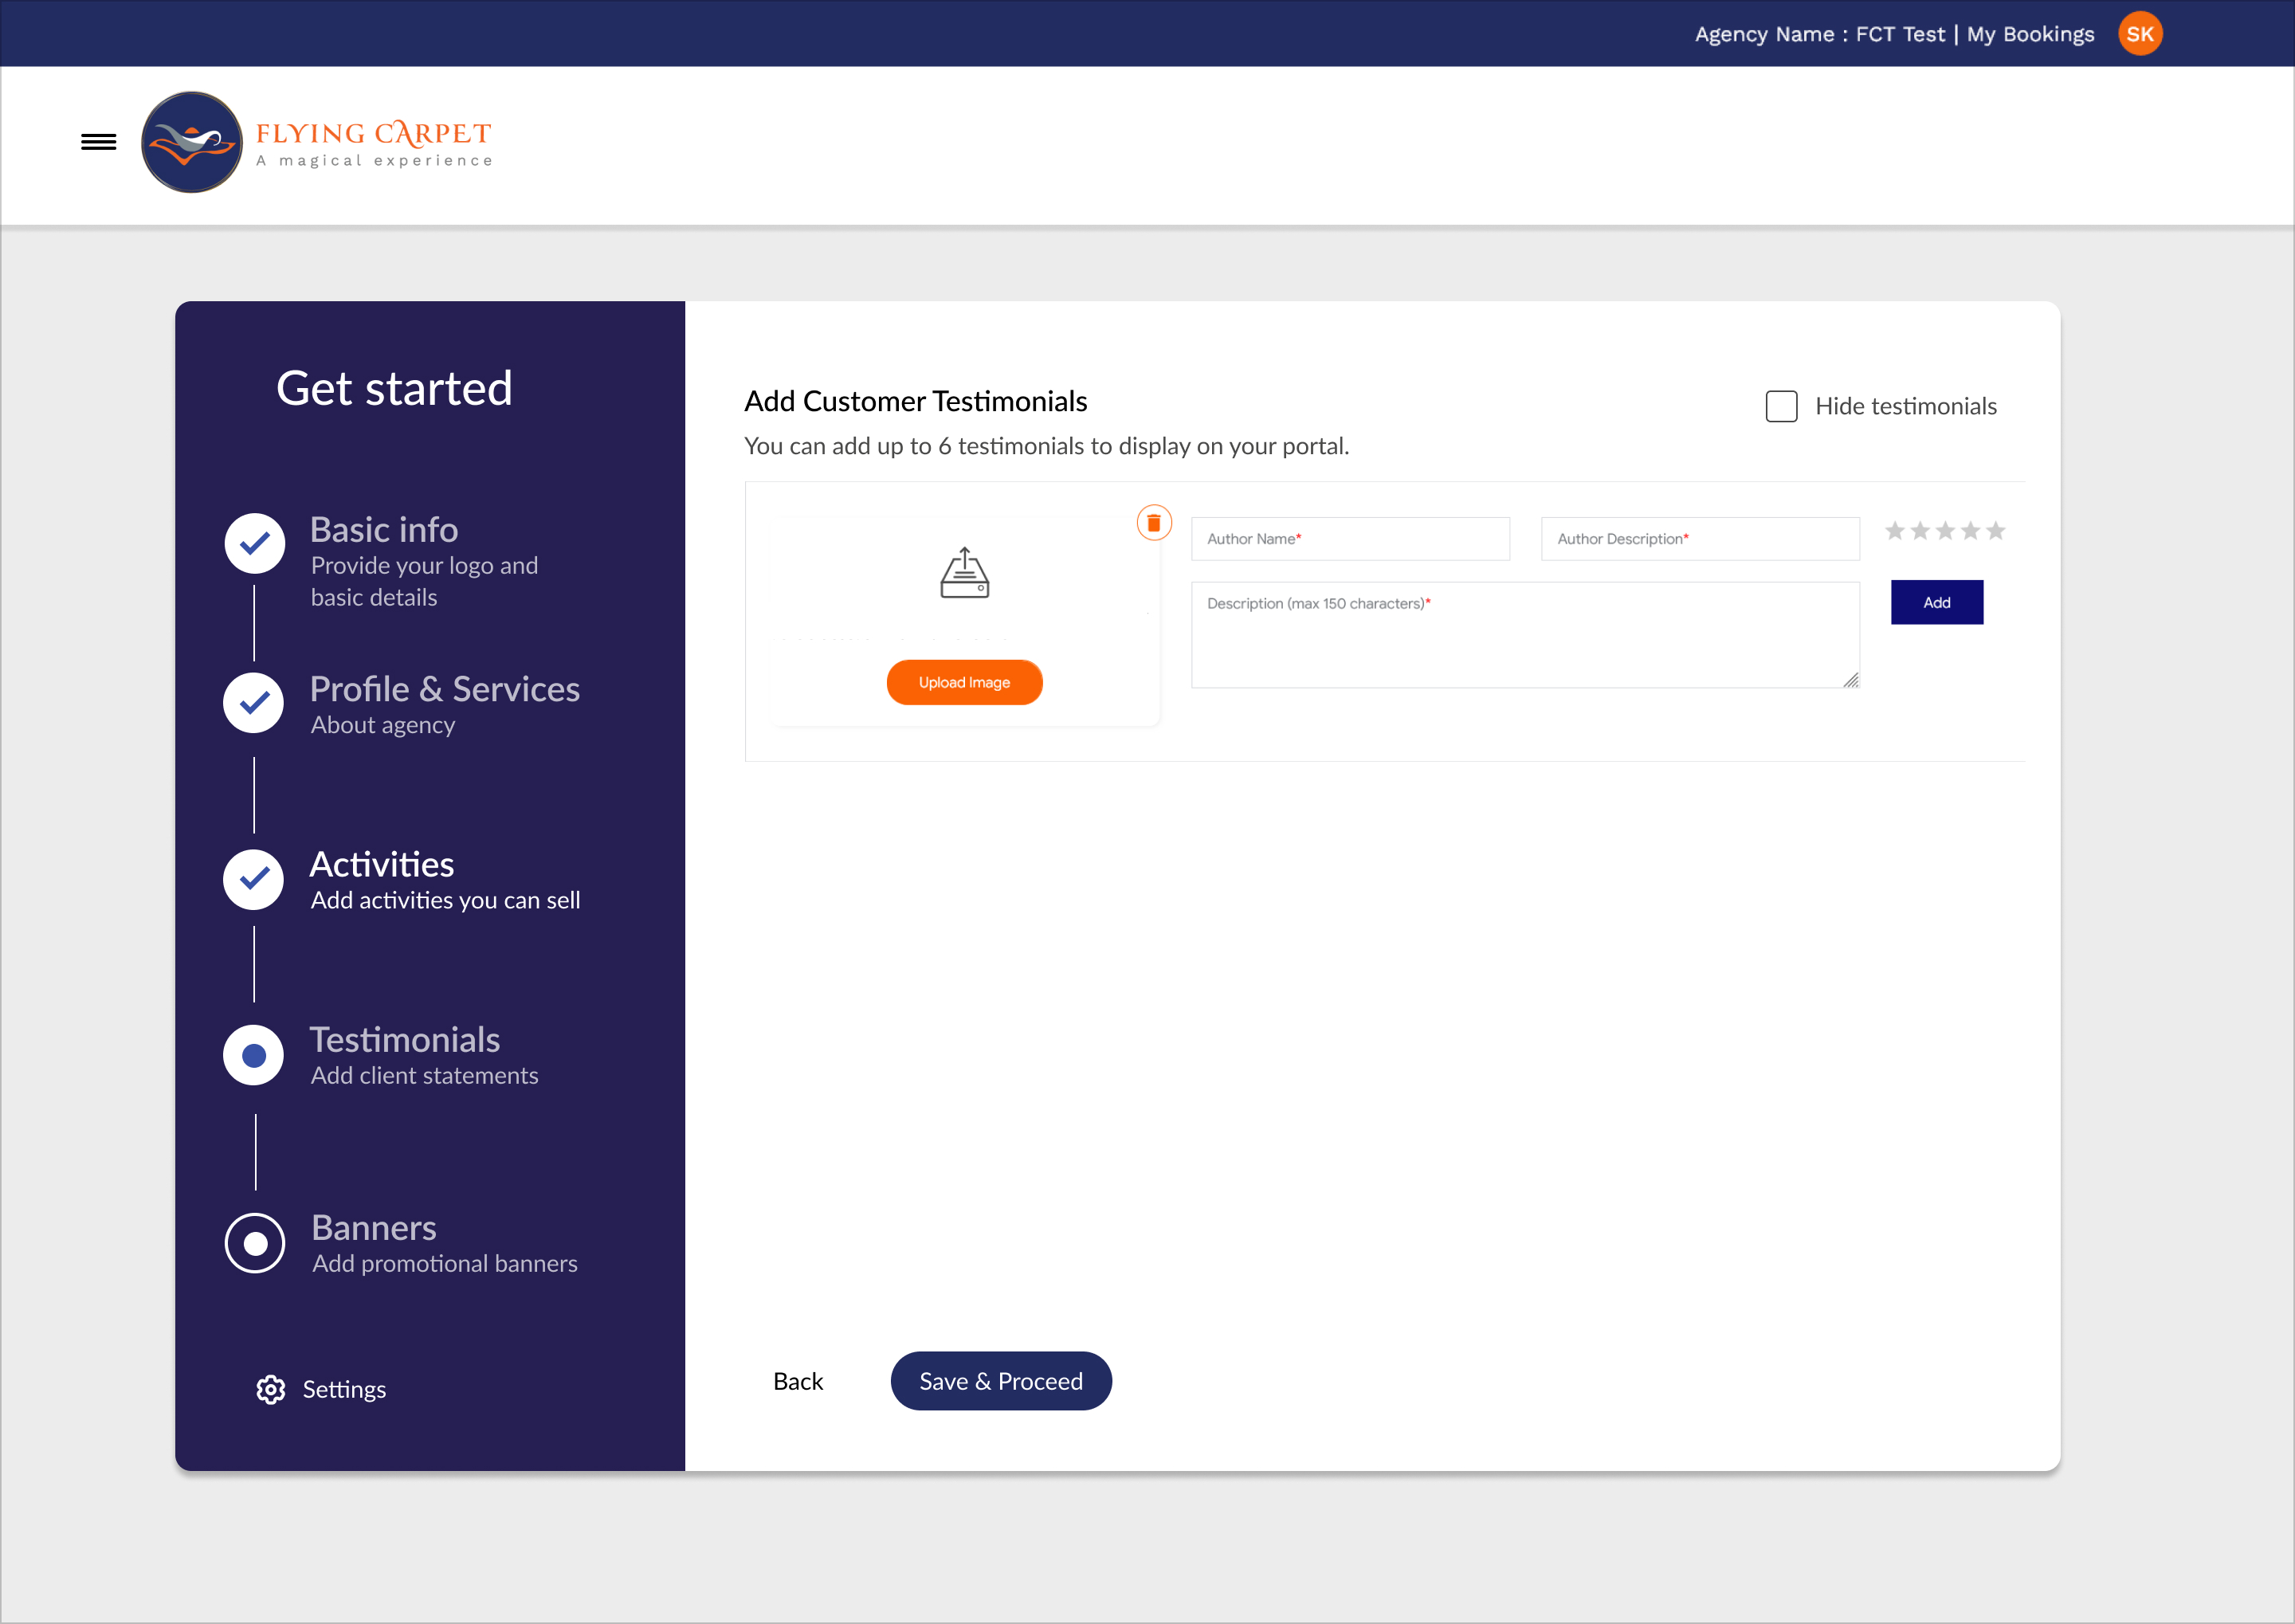
Customer Testimonials: Showcase reviews.
- Add up to 6 testimonials
- Include author name and description
- Review text (max 180 characters)
- Star rating (1-5 stars)
Tip: Use authentic reviews from real customers.
3.5 Promotional Banners
Enhance your portal with eye-catching promotional banners.
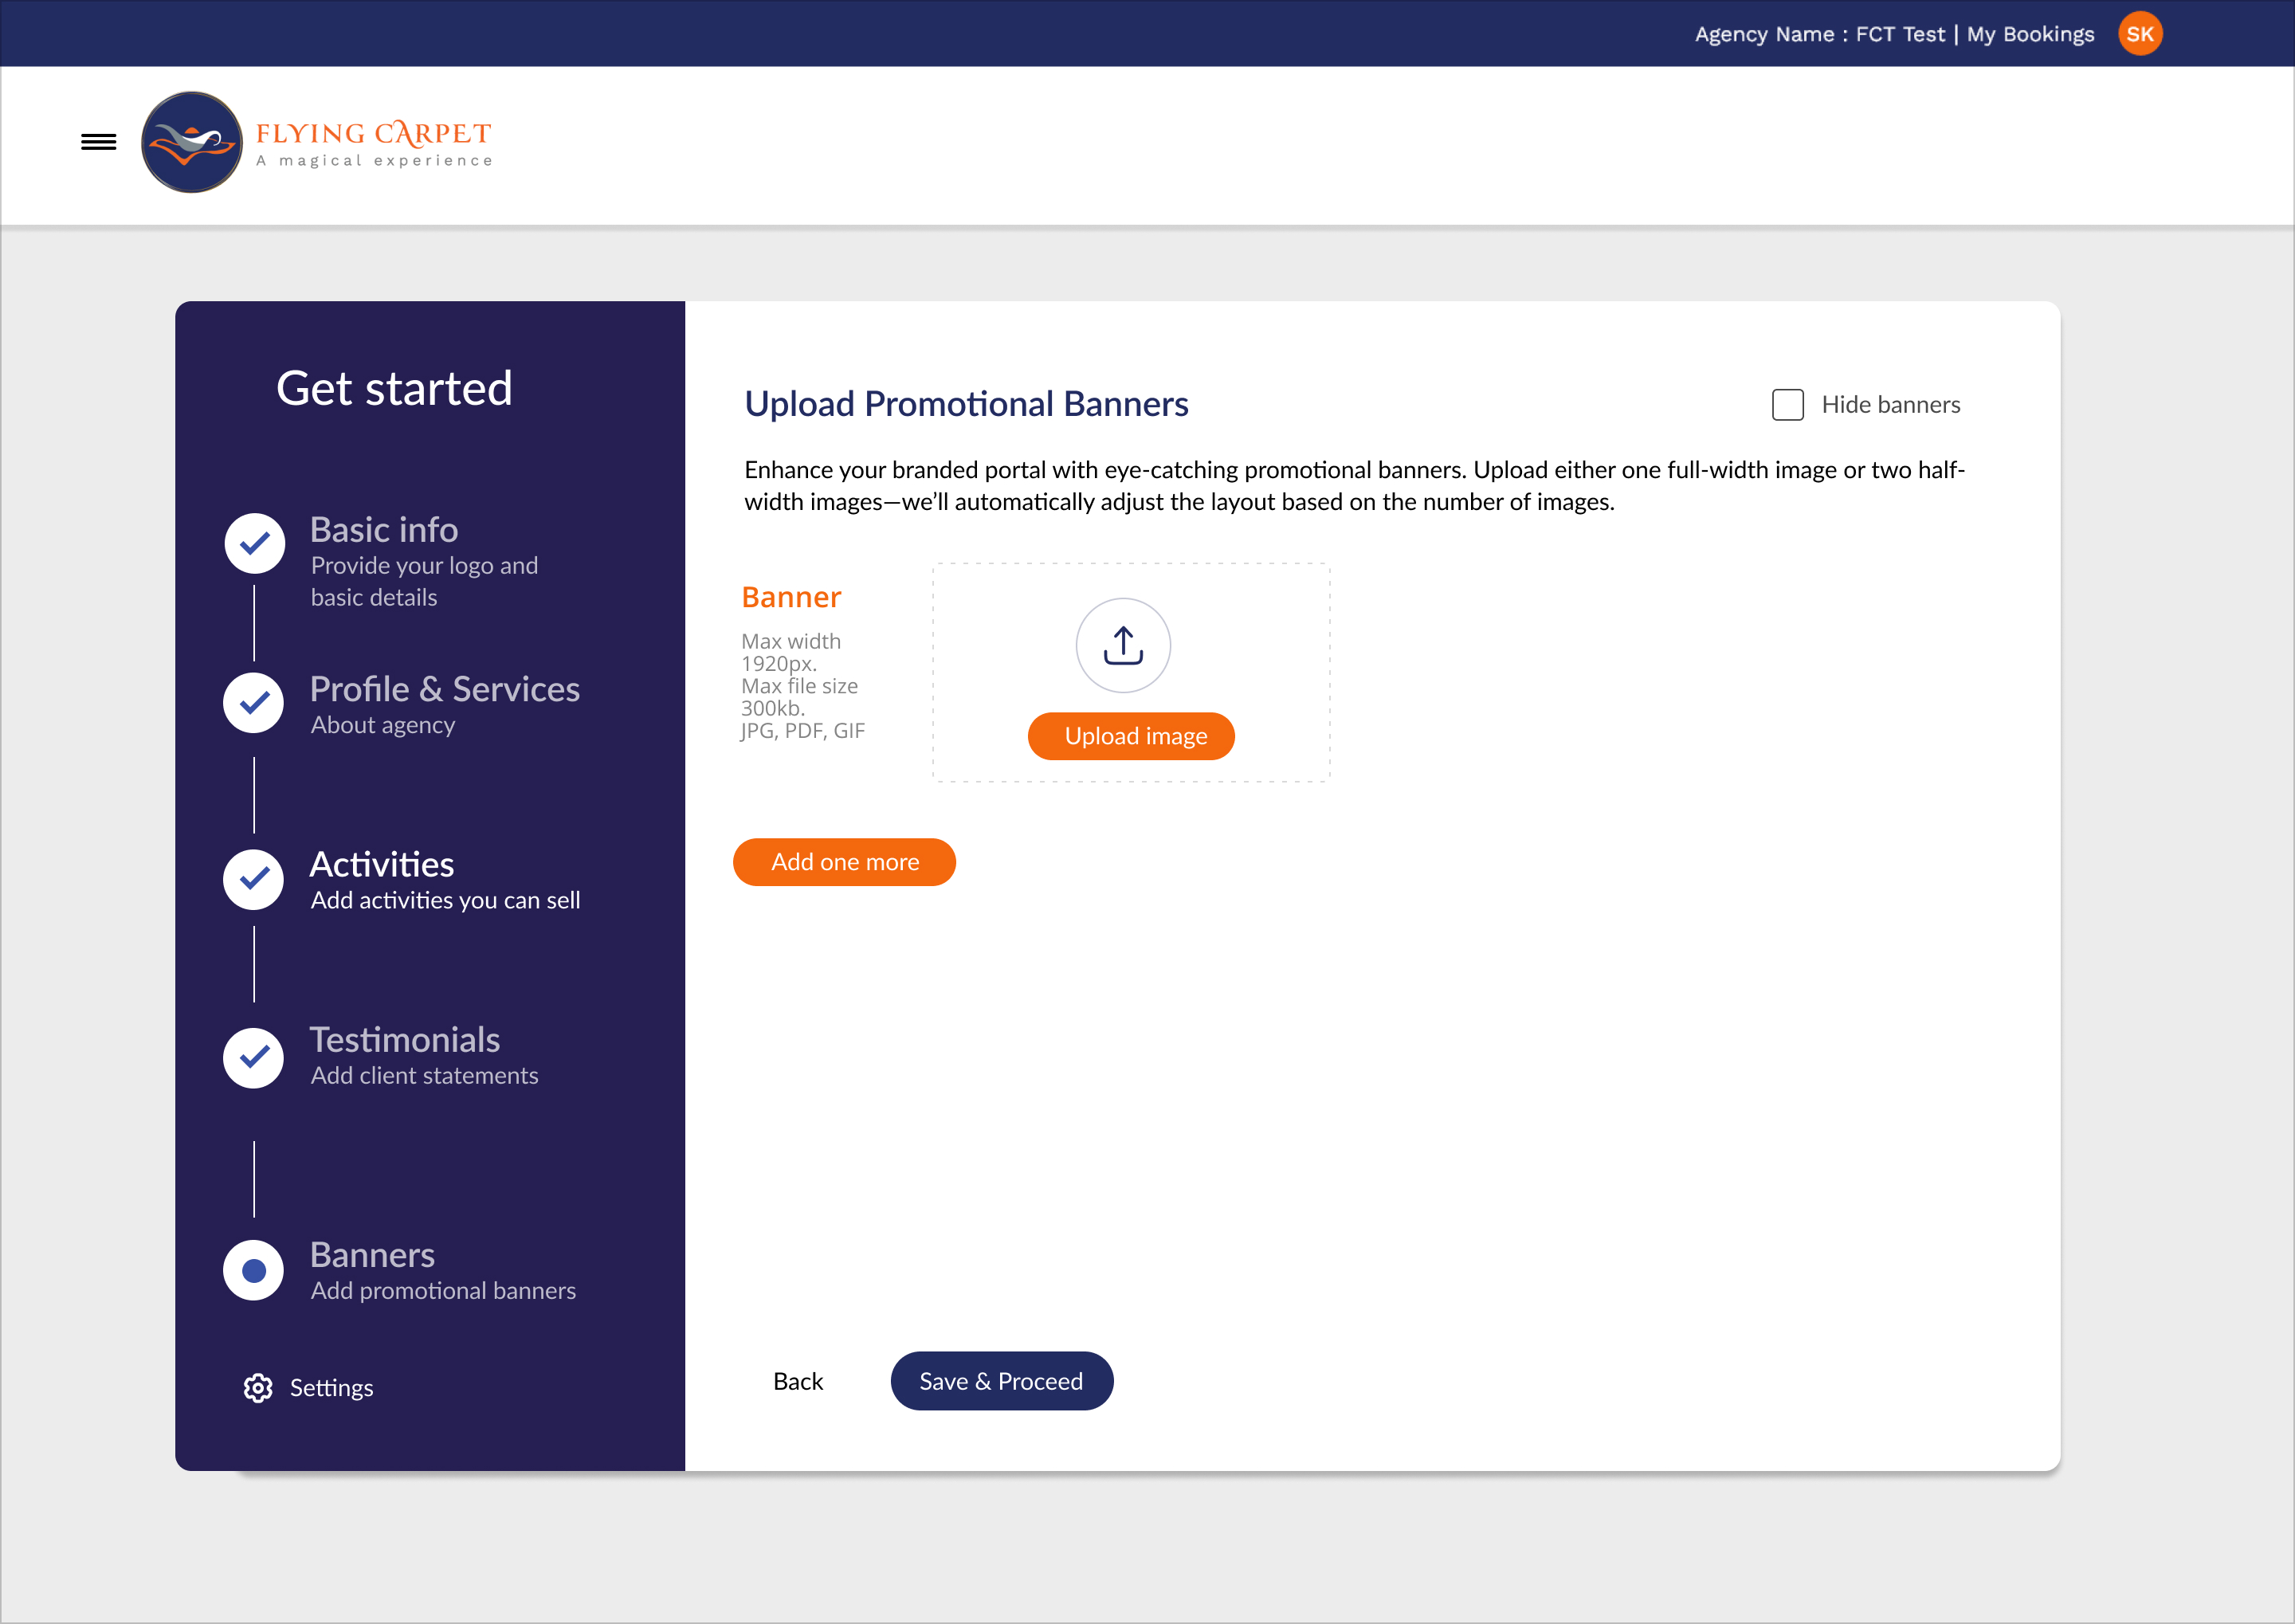
Banner Images: Upload promotional banners.
- Upload one full-width or two half-width banners
- Max dimension: 1920px width
- Max file size: 300kb
- Formats: JPG, PDF, GIF
3.6 Brand Settings
Customize your portal's appearance with brand colors and analytics tracking.
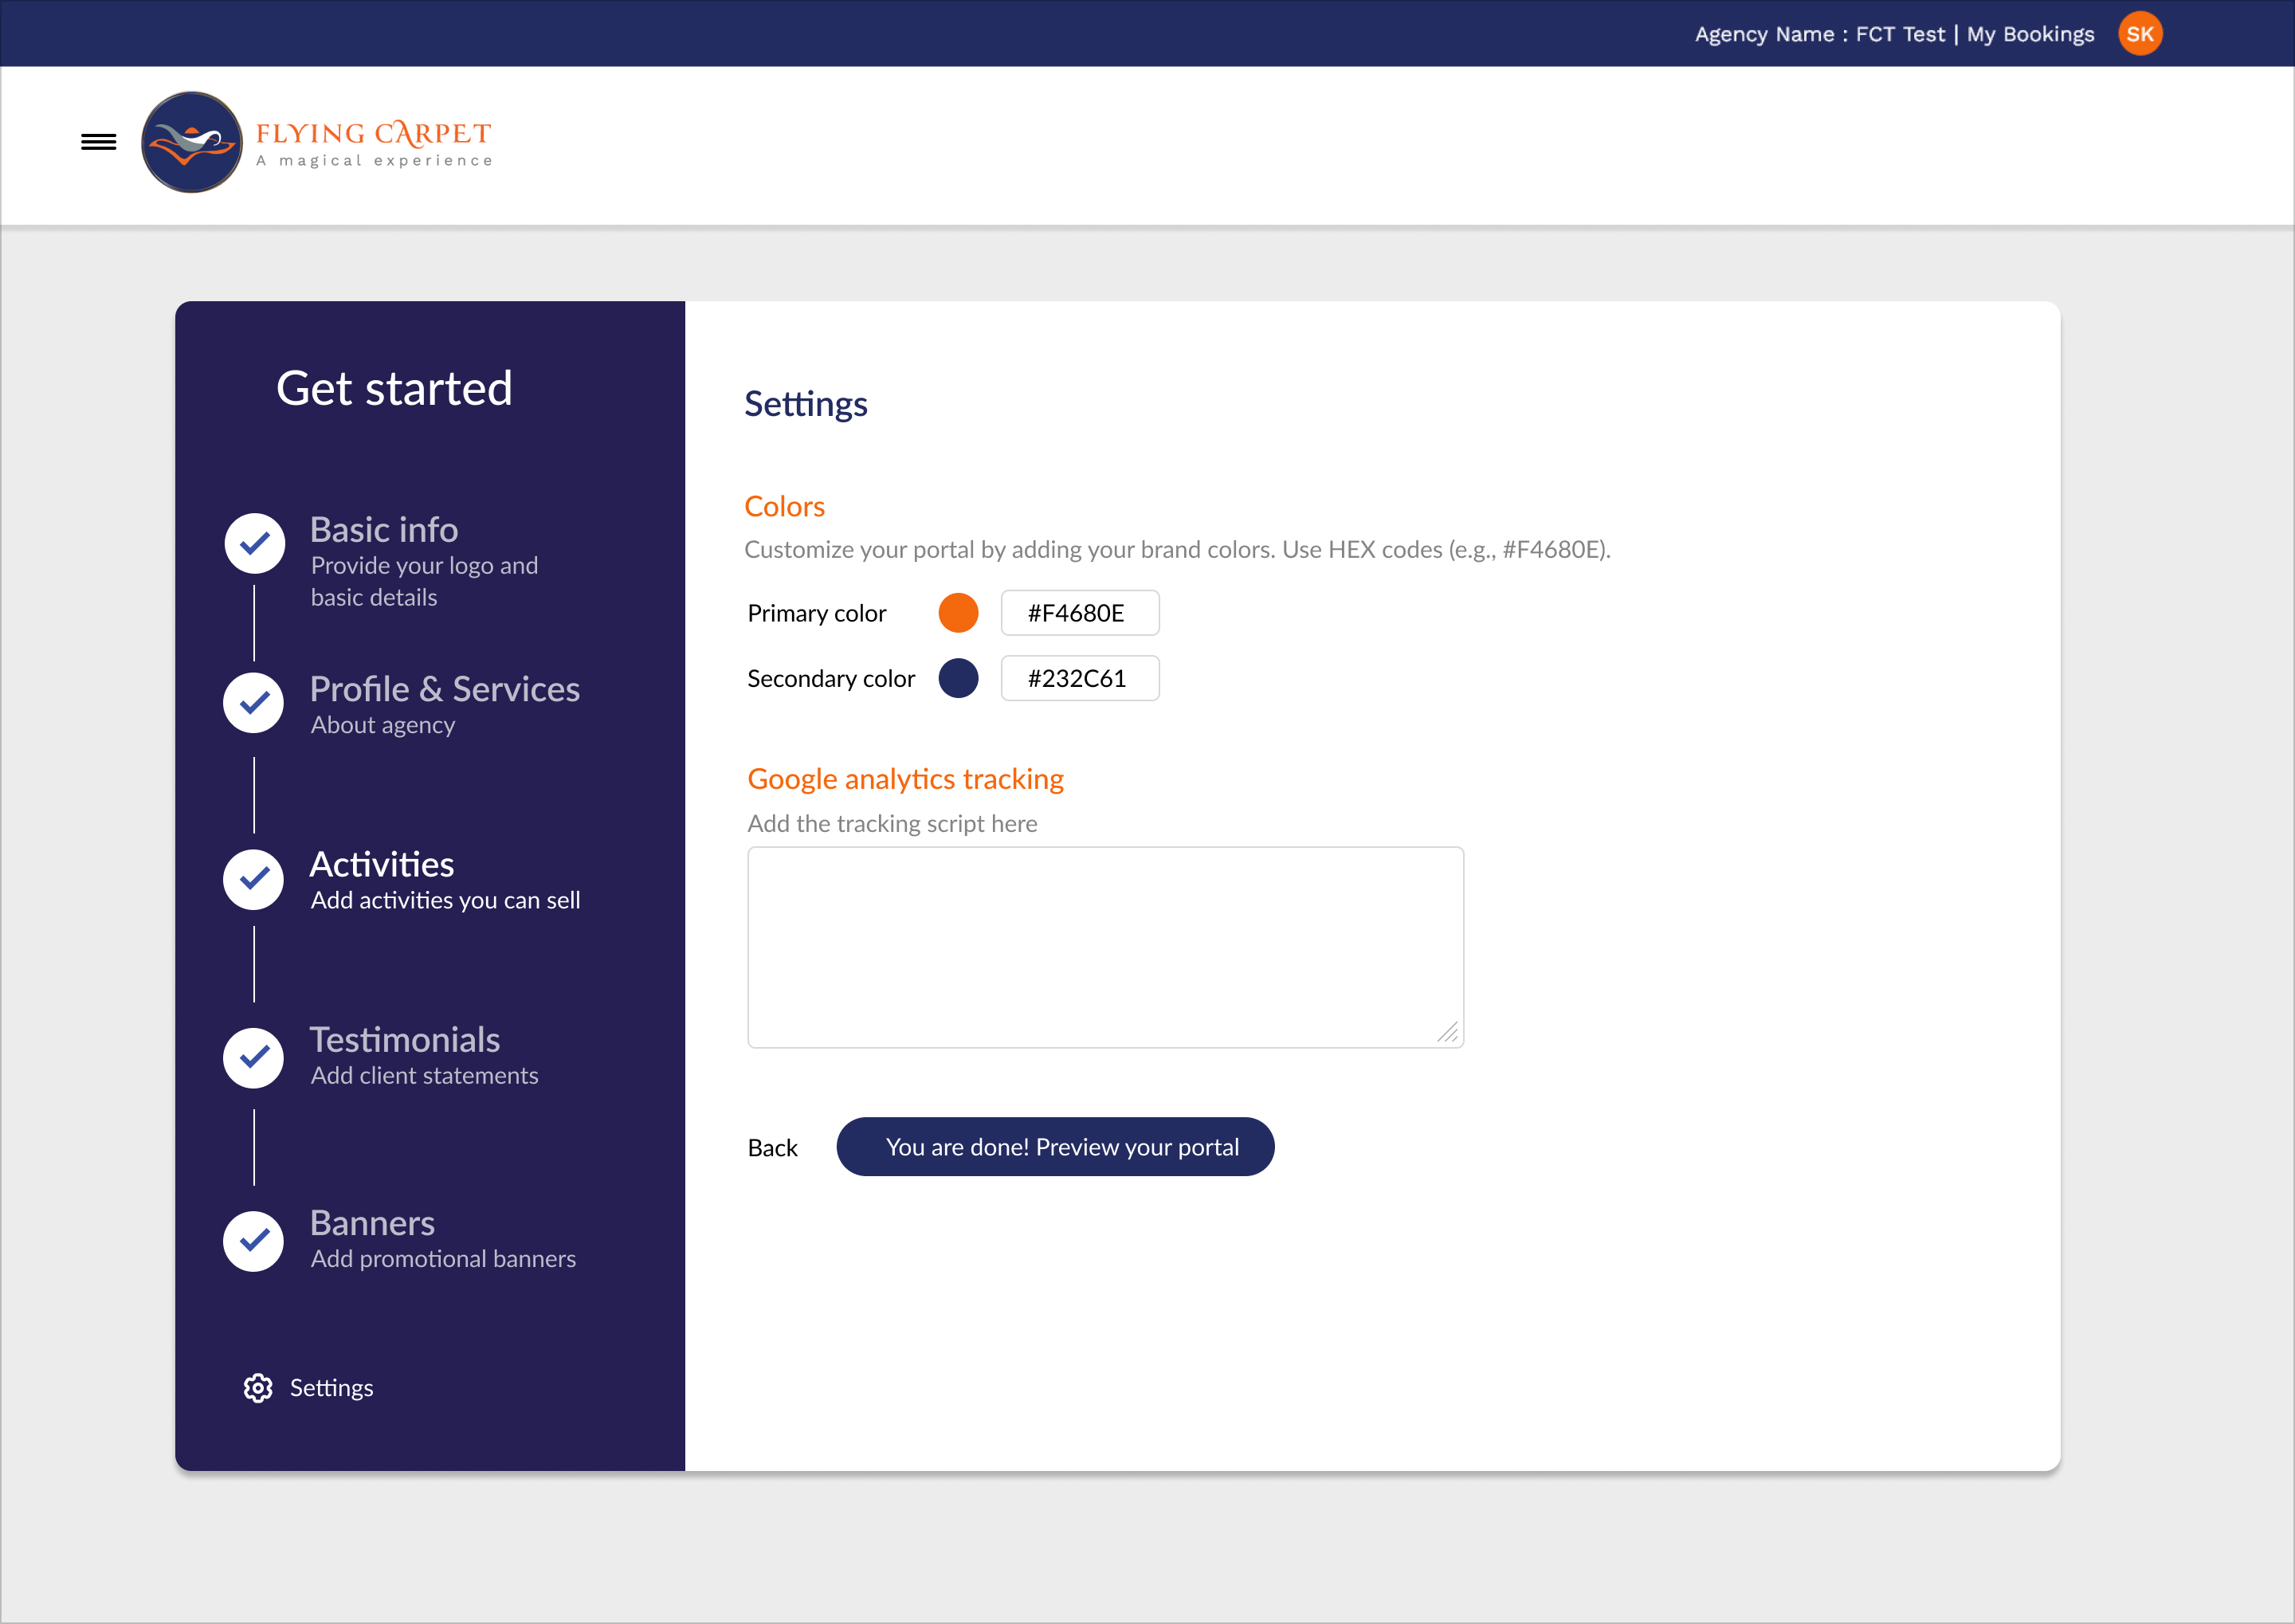
Colors
Customize your portal by adding your brand colors. Use HEX codes (e.g., #F4680E).
- Primary color: Main accent color for buttons and links
- Secondary color: Supporting color for headers and backgrounds
Google Analytics Tracking
Add your Google Analytics tracking script to monitor visitor behavior.
You're almost done! Click "Preview your portal" to review before submission.
Step 4: Preview & Submit
Review your portal to ensure all content is correct and displays as expected.
Note: Your portal will go live after approval by the Flying Carpet team. This typically takes 1-2 business days.
Preview your portal before submission:
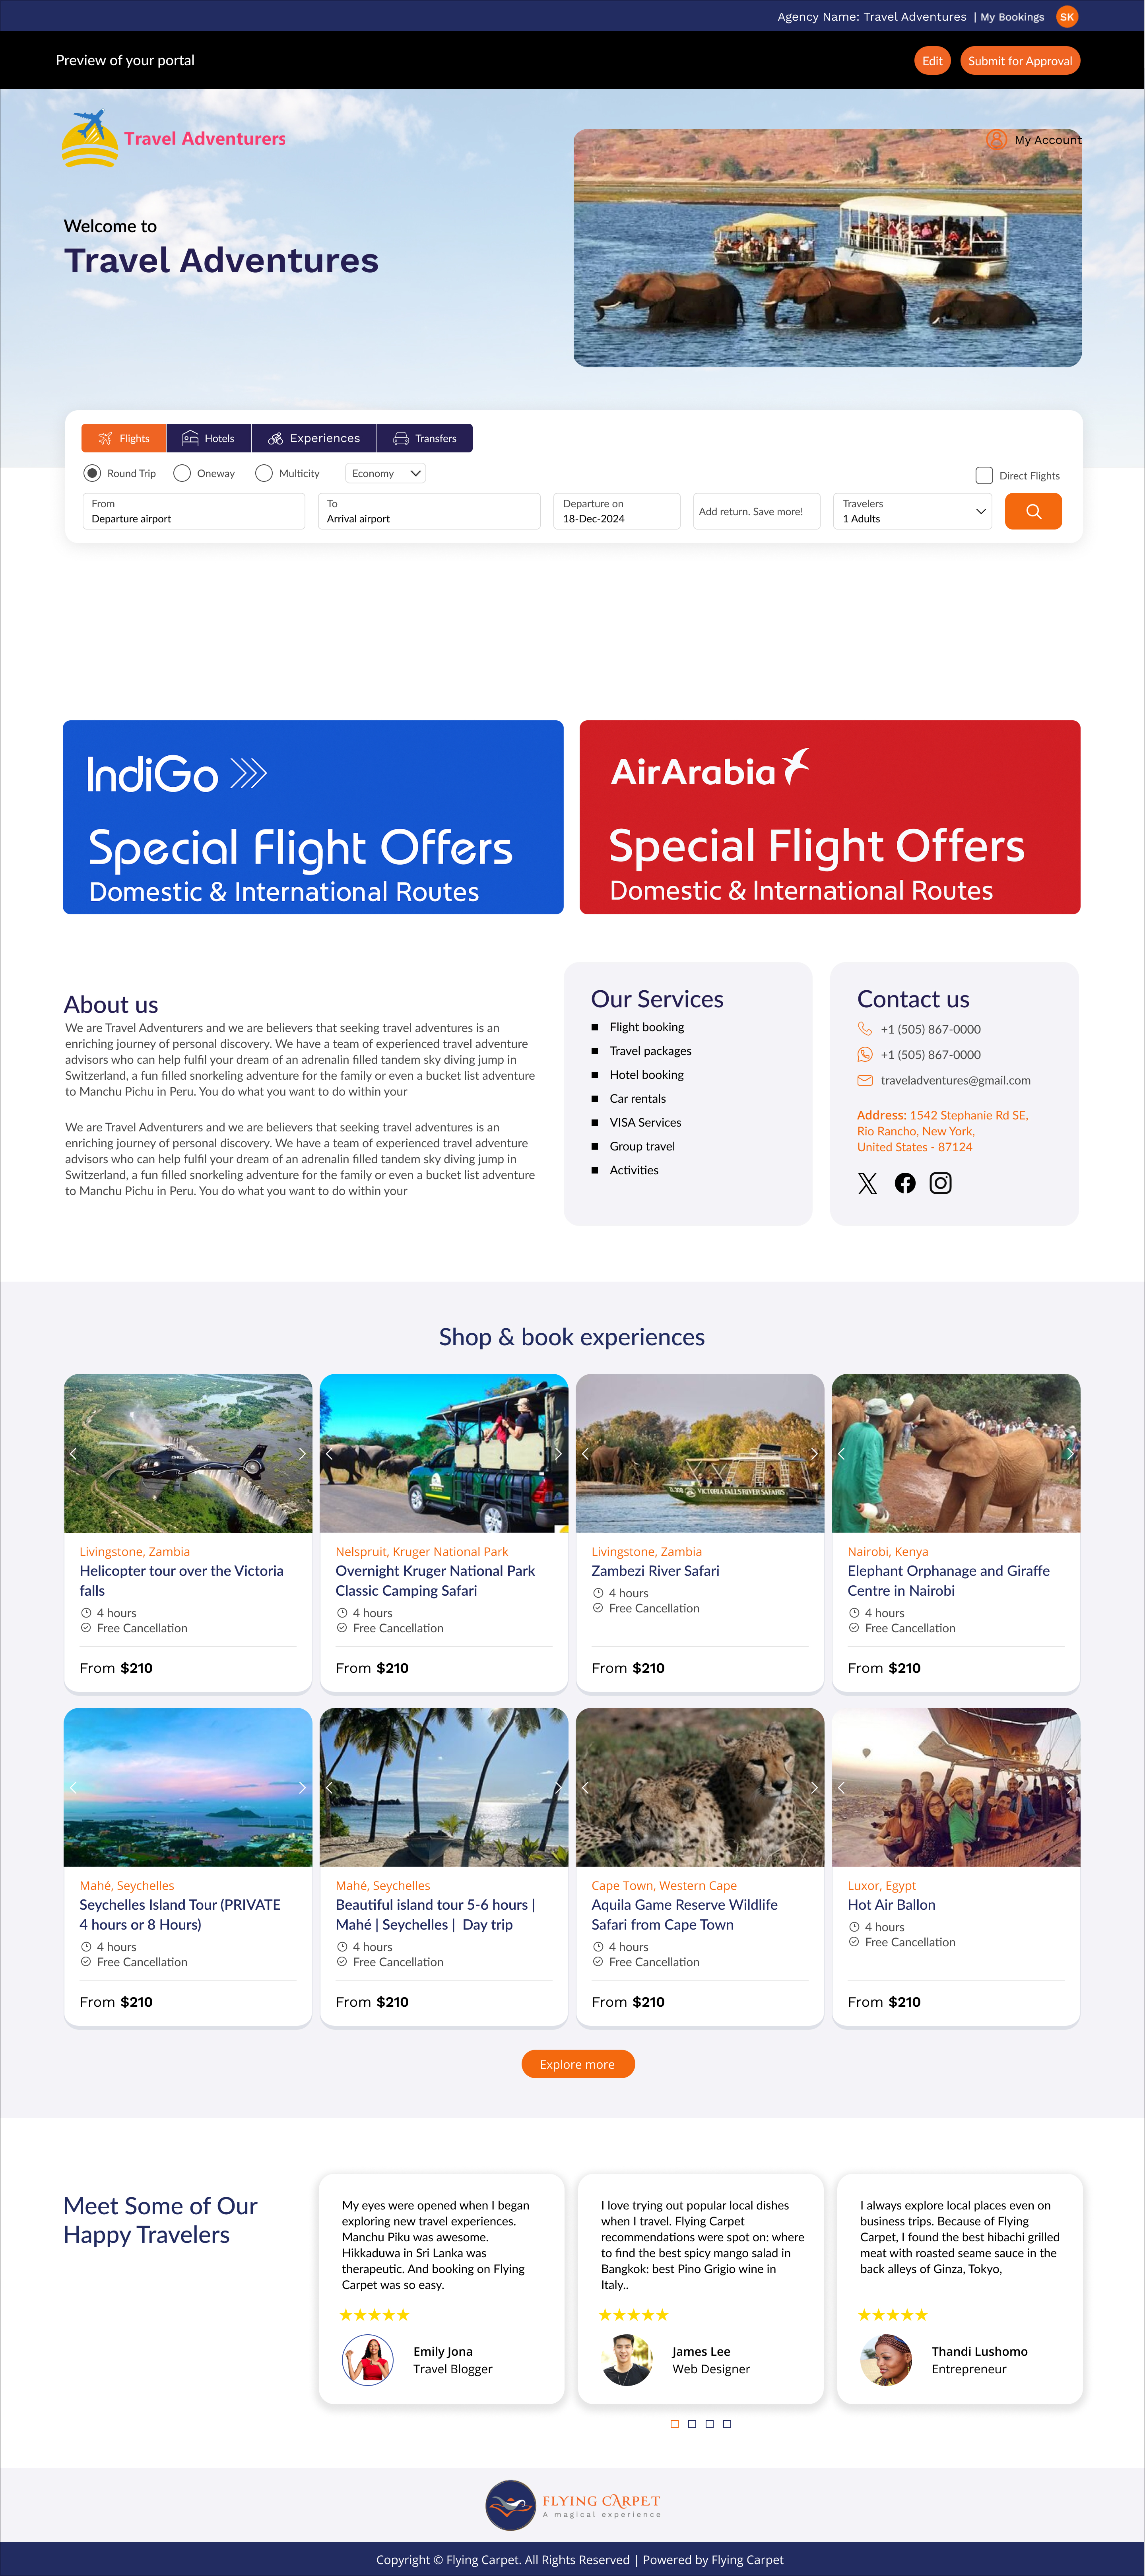
Preview Options:
- Edit: Return to the customization wizard
- Submit for Approval: Send for review
Step 5: Go Live & Start Earning
Once approved, your portal will be live and accessible to customers. You'll receive a notification email confirming that your portal is active.
Share your portal URL through your marketing channels to start receiving bookings.
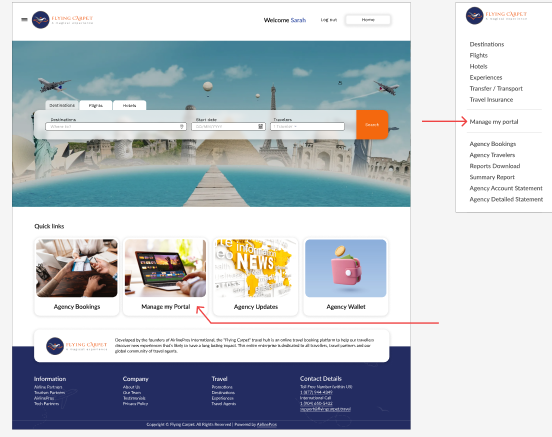
Managing Your Portal
Access & Manage Your Portal
Once your portal is approved, you can manage and update it anytime from your dashboard. You can access dashboard through Manage my portal link in quick links section or side hamburger menu.
Edit Anytime
You can update your portal content at any time from your dashboard. Changes to activities, testimonials, and promotional content are reflected immediately.
Service Fee Setup
Add your service fee on top of the base price. You can set this as a percentage or fixed amount.
Track Bookings
All bookings made through your portal are tracked separately in your dashboard.
Subscription & Access
- Your portal includes a free trial period to explore all features
- After the trial, a monthly subscription fee applies
- Your portal remains active as long as your subscription is valid
Best Practices
Use clear, high-quality banners
Professional imagery creates trust and encourages bookings.
Add real customer testimonials
Authentic reviews build credibility.
Keep your content updated
Regular updates show you're active and engaged.
Promote your portal link actively
Share your portal URL on all marketing channels.