Access the Supplier Portal
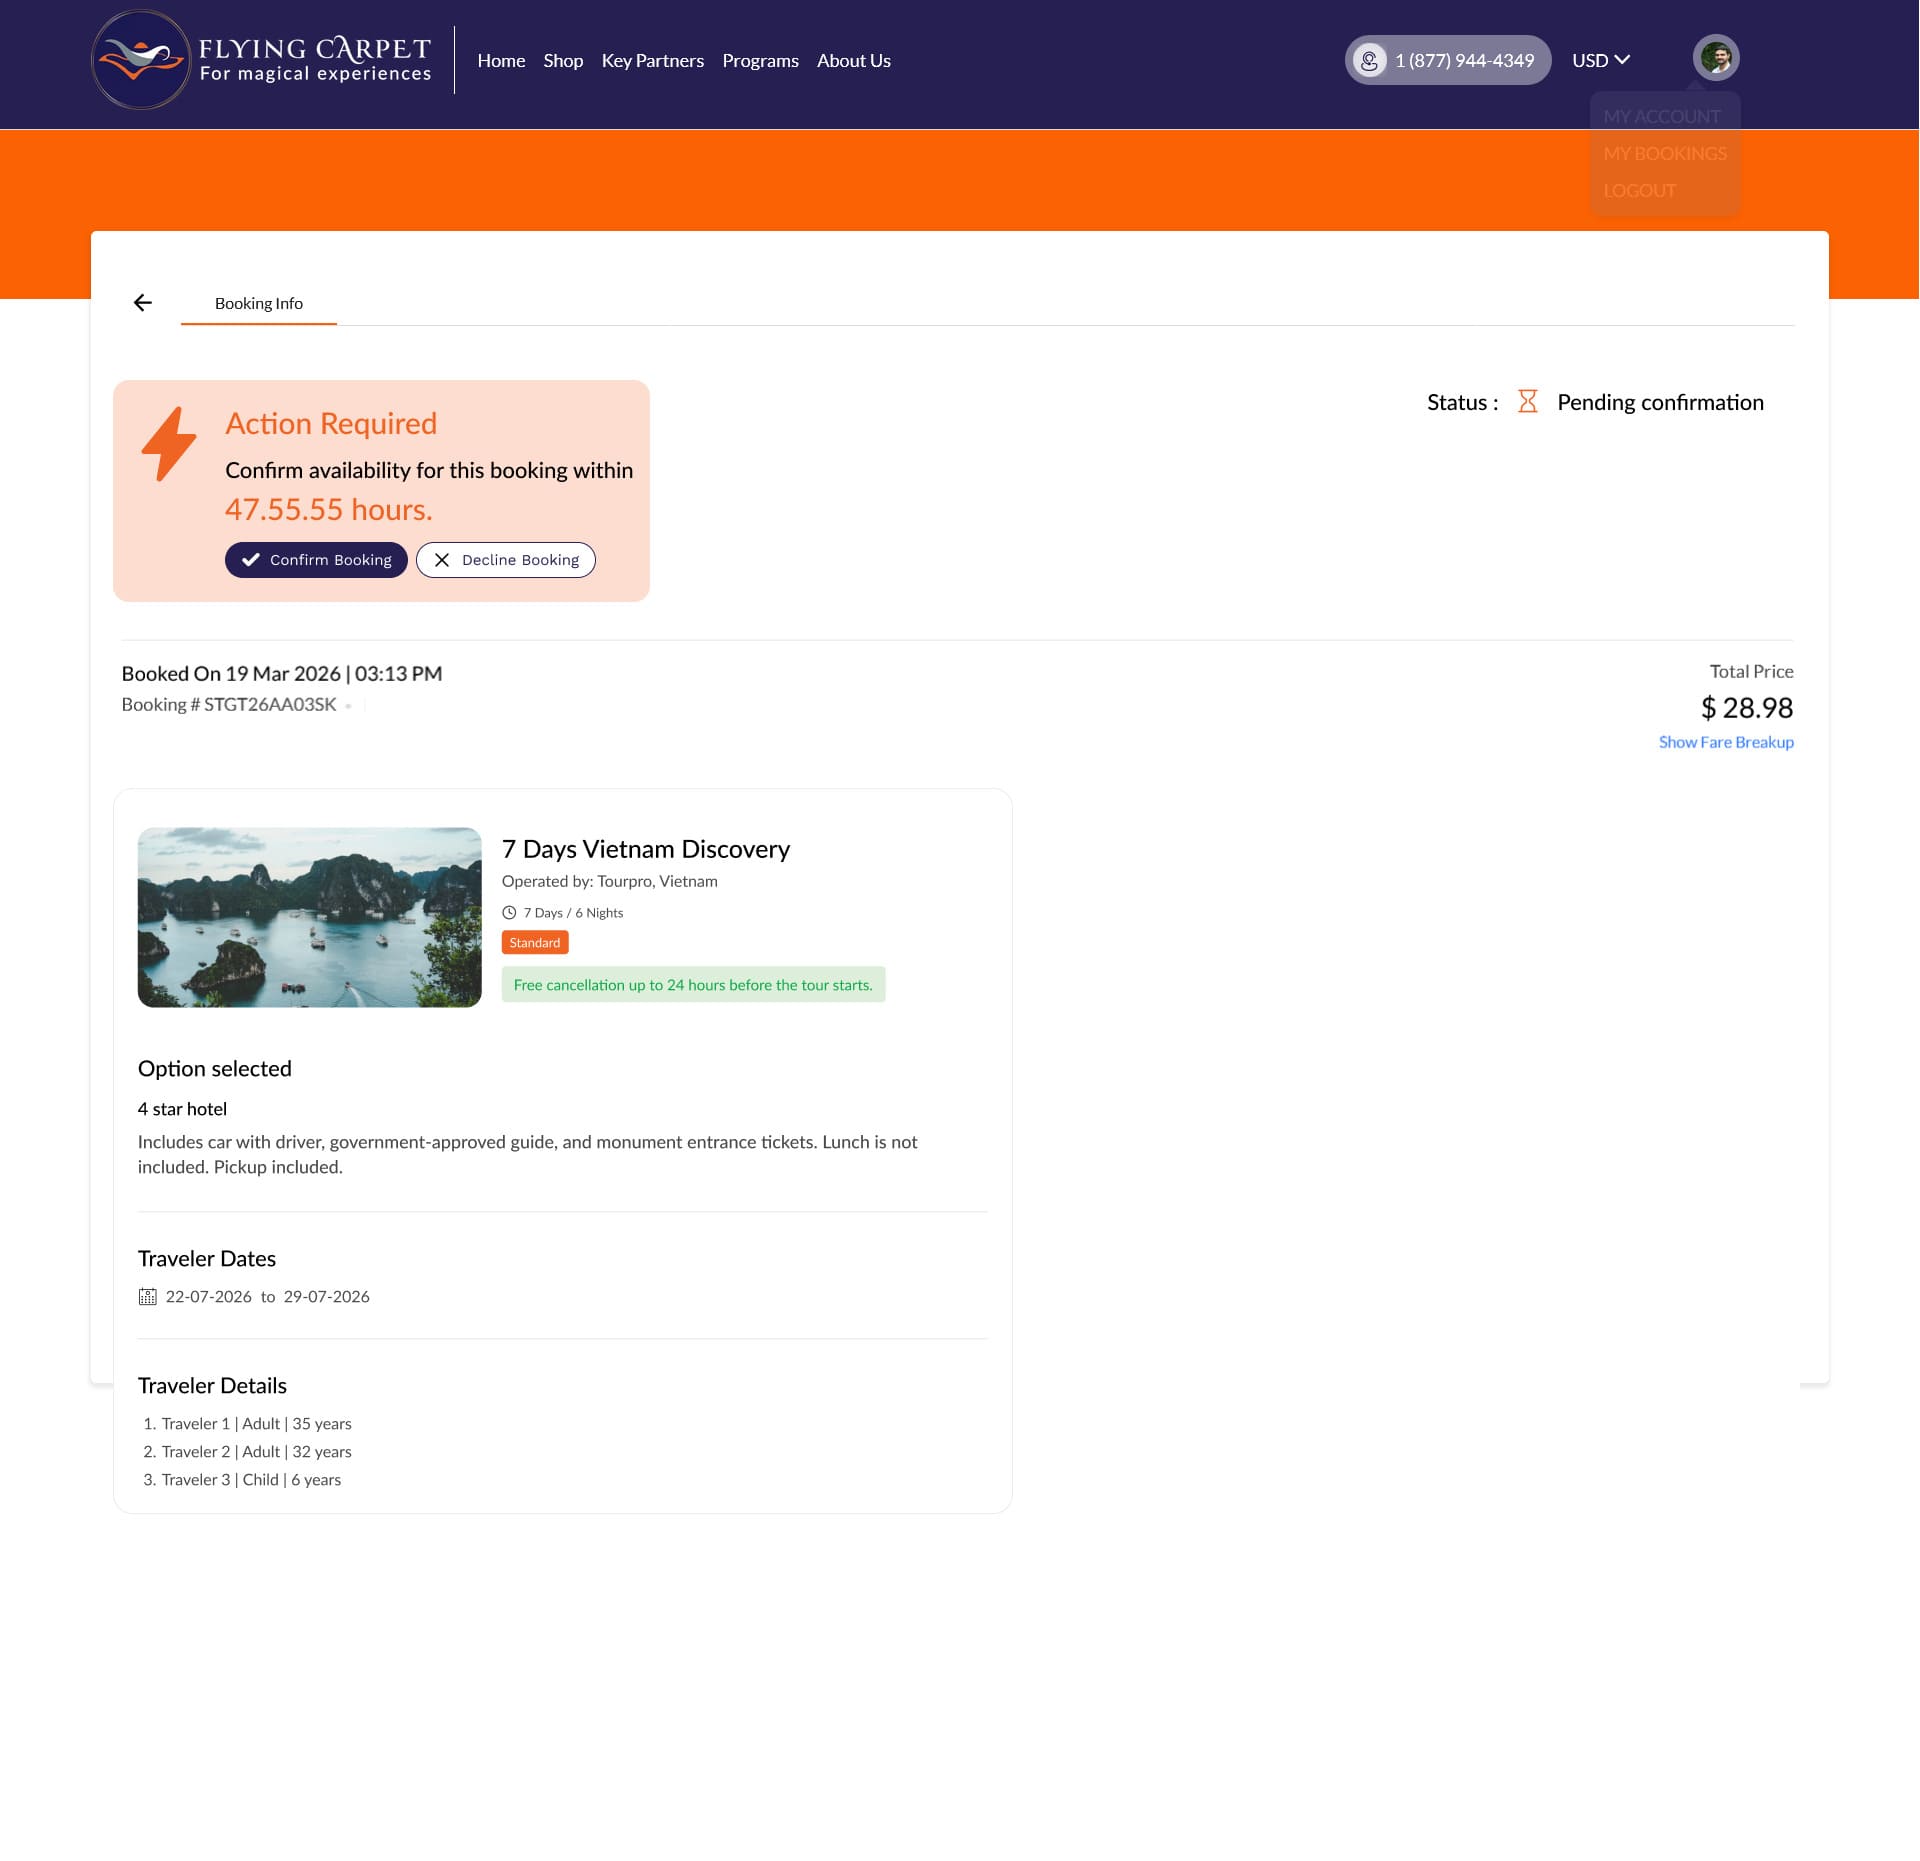
From the Flying Carpet main website, open the Programs menu in the top navigation bar and click Holiday Marketplace. This takes you to the Holiday Package Marketplace landing page.
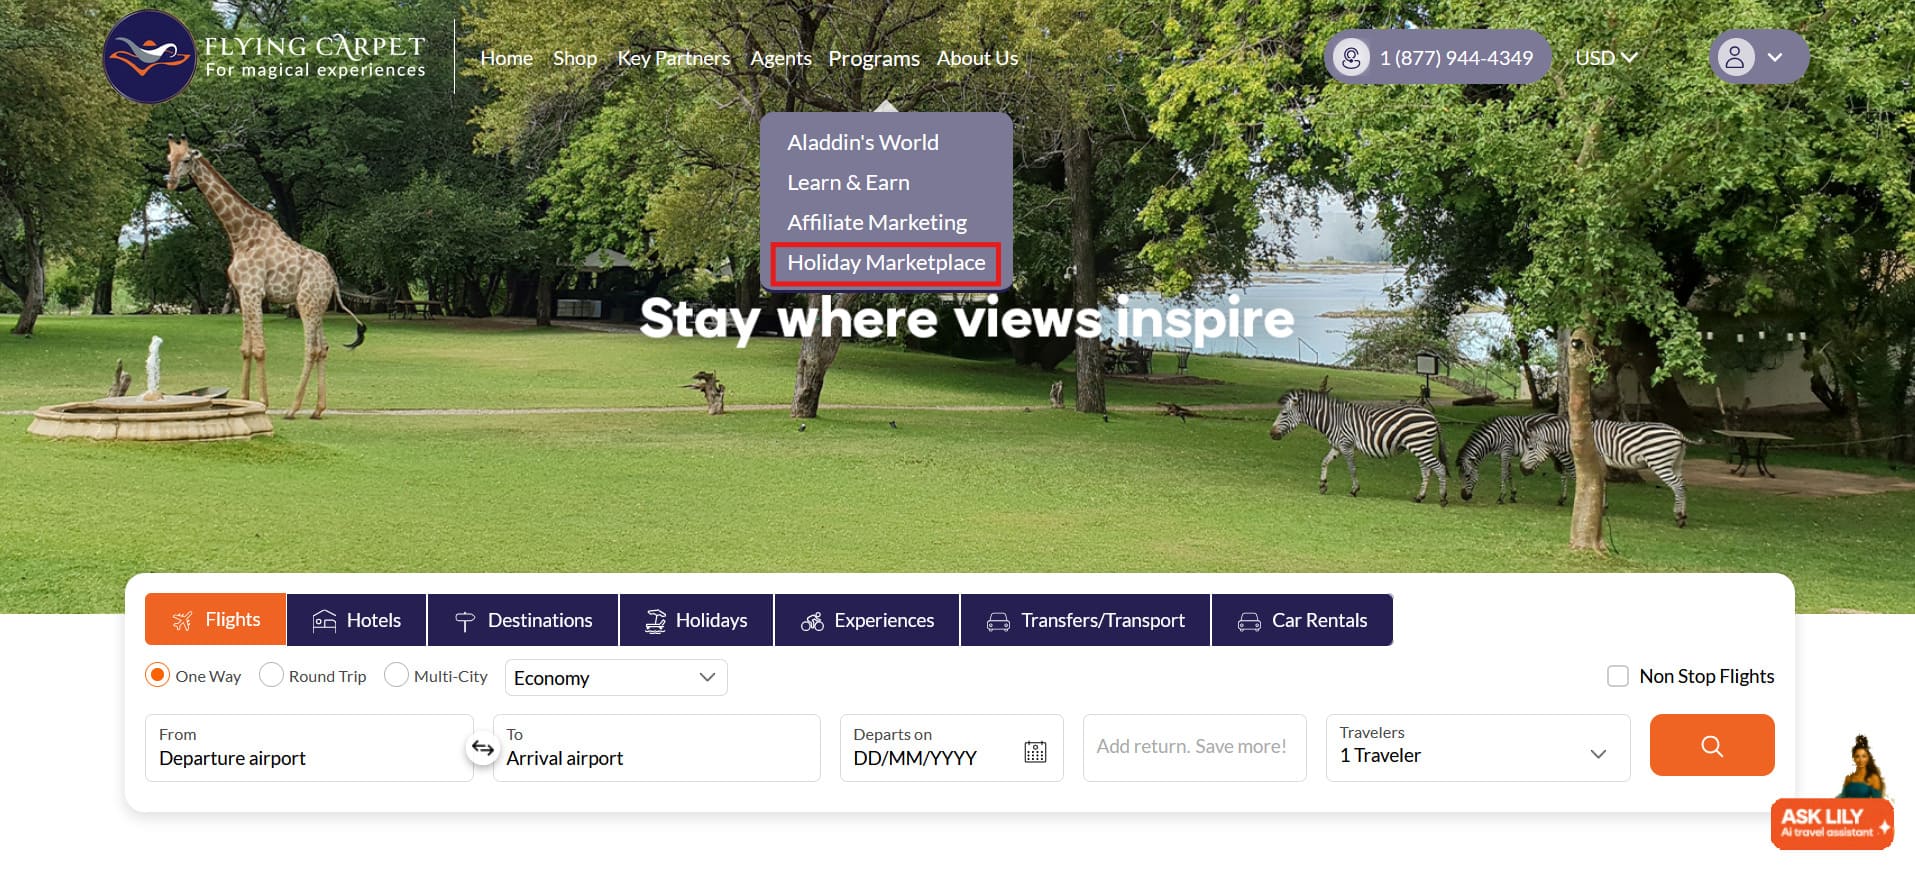
Holiday Marketplace Landing Page
Clicking the menu link opens the Holiday Package Marketplace landing page. Suppliers can log in or sign up using the buttons in the top-right corner. New suppliers can also click Start Listing Your Holidays to go directly to registration.
Complete the Onboarding Form
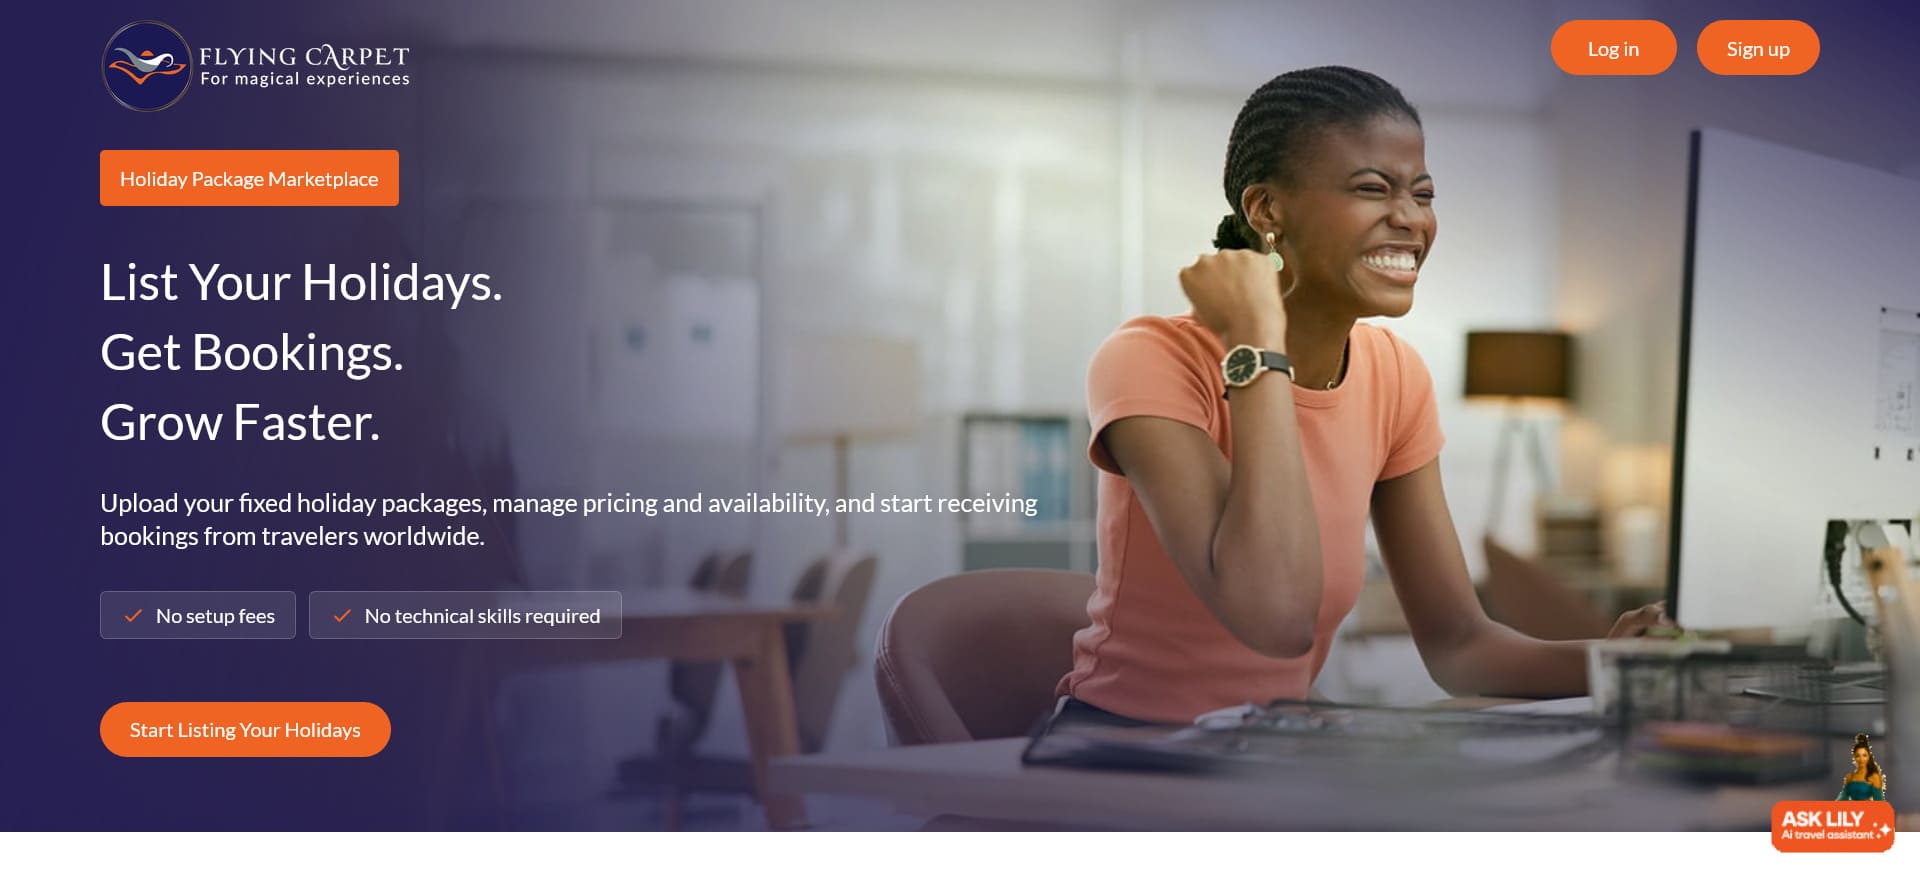
New suppliers are guided through a 3-step sign-up form. Once submitted, the admin team will review the application and, if approved, the supplier will receive an email invitation to create their dashboard login credentials.
Company Information
Enter your company or business name, country/countries of operation, year established, website, and primary source markets.
Contact Details
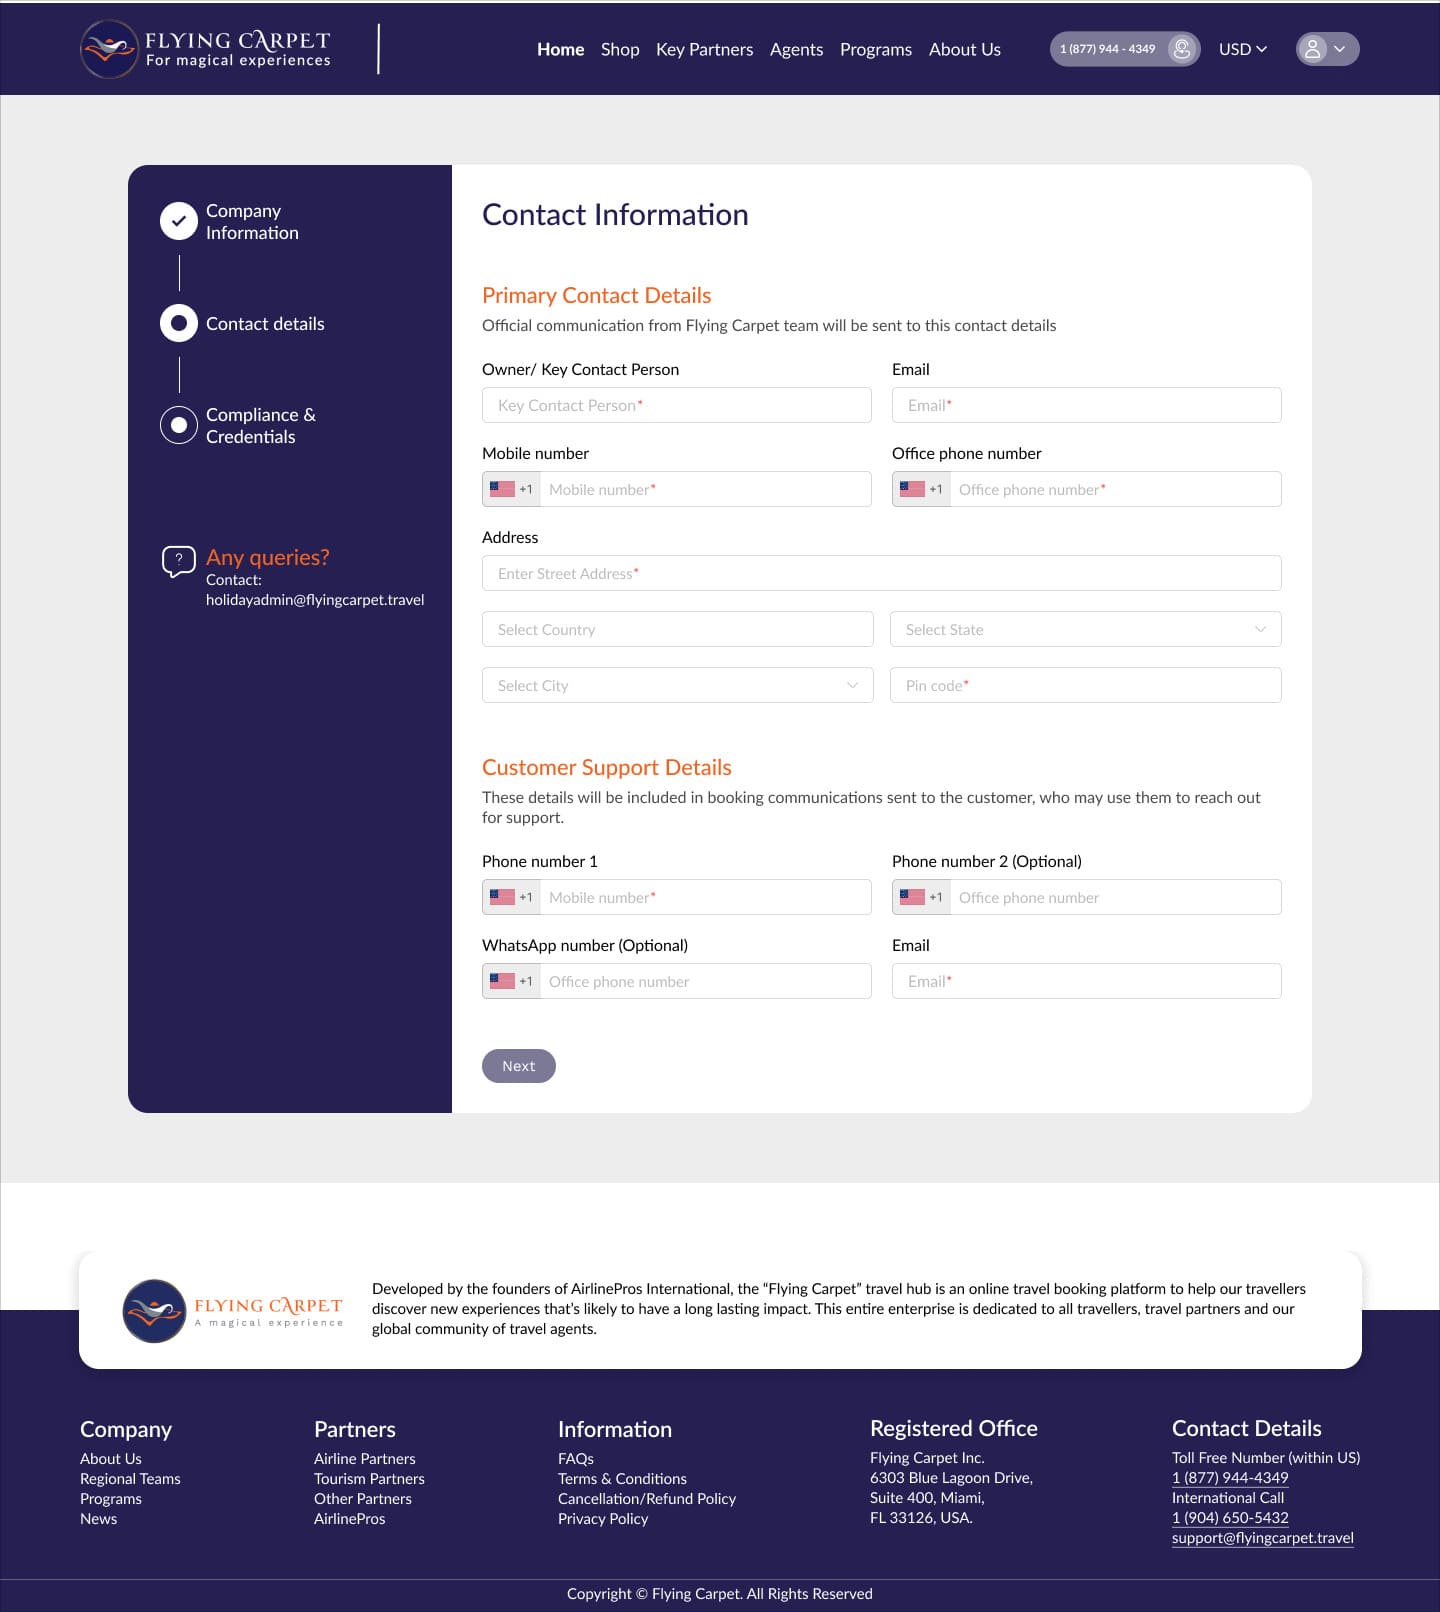
Provide the primary contact person's name, email, phone numbers, and address. Also add customer support contact details used for booking communications.
Compliance & Credentials
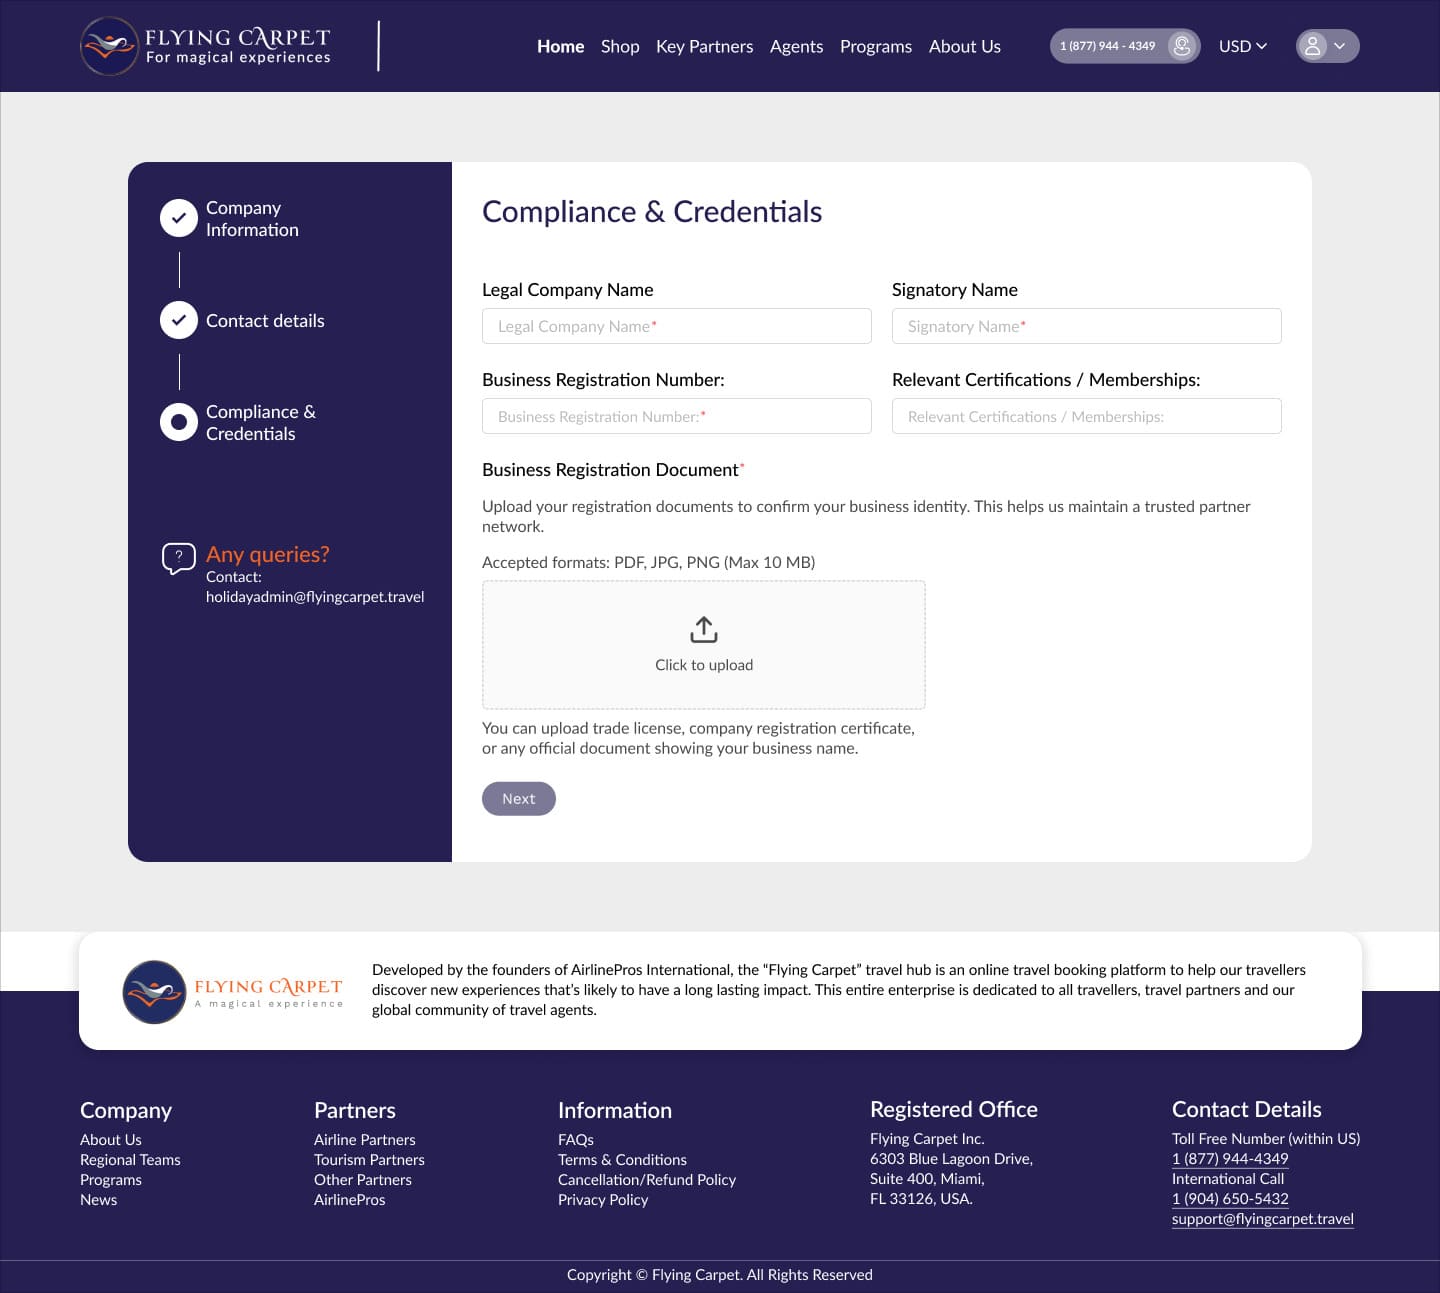
Enter your legal company name, signatory name, business registration number, and any relevant certifications. Upload your business registration document (PDF, JPG, or jpg, max 10 MB).
Supplier Dashboard & Packages
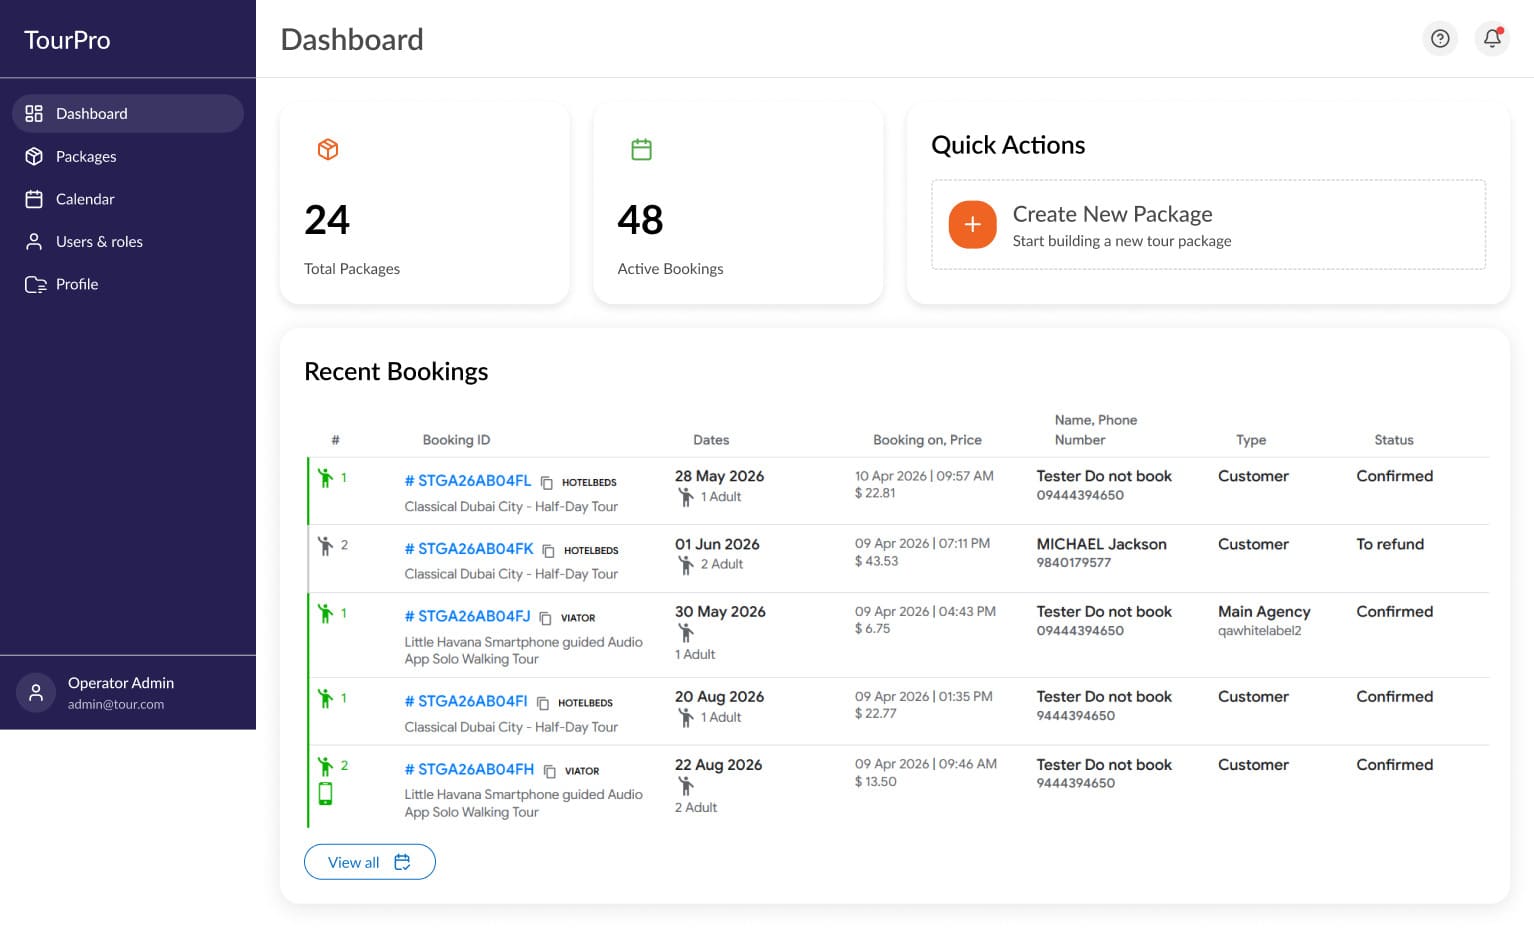
After logging in, suppliers land on the dashboard showing total packages, active bookings, recent booking history, and a Quick Actions panel. The sidebar provides access to Packages, Calendar, Users & Roles, and Profile.
Dashboard Overview
The dashboard shows a snapshot of activity — total packages, active bookings, and recent booking details. Use Create New Package in Quick Actions to start building a package directly from here.
Packages Screen
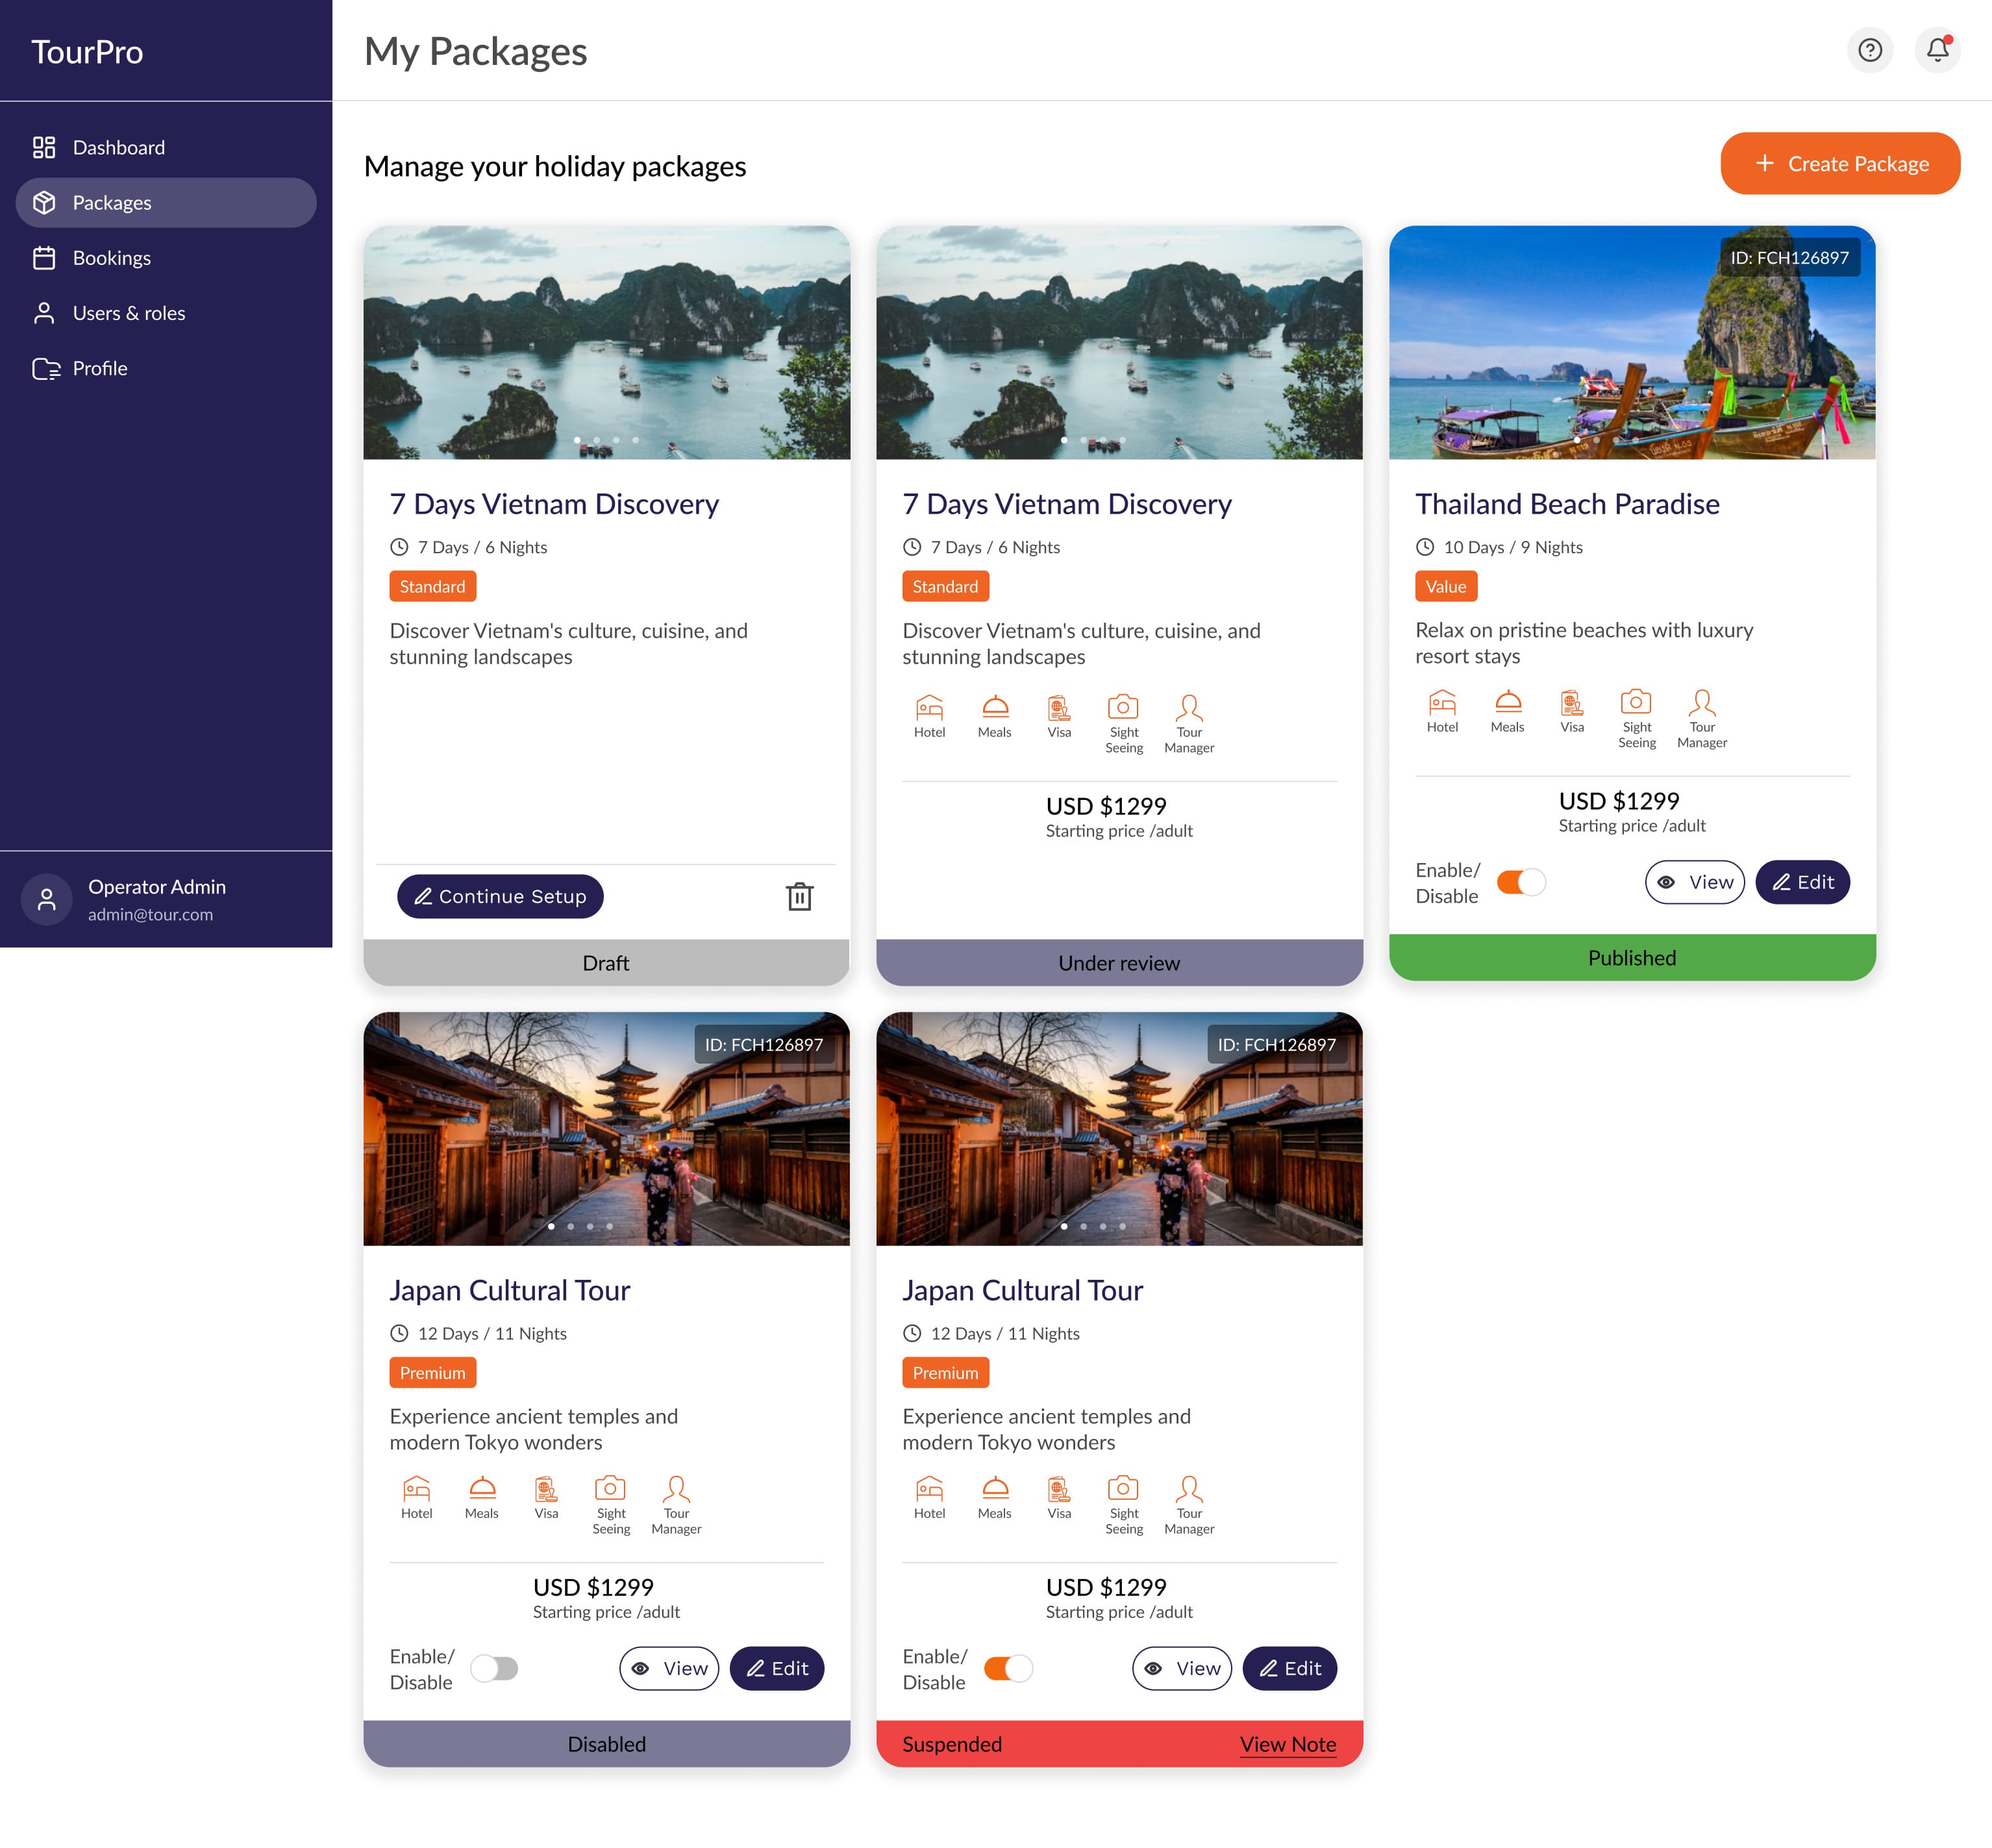
The Packages section lists all holiday packages. Each card shows the name, duration, tier, description, starting price, and current status.
- Draft: Saved but not yet submitted for review.
- Under review: Submitted and awaiting admin approval.
- Published: Approved and visible to travelers on the marketplace.
- Disabled: Manually turned off by the supplier via the Enable/Disable toggle.
- Suspended: Deactivated by the admin. A View Note link provides the reason.
Create a New Package
Package creation is a 7-step wizard. Progress is auto-saved at each step. You can navigate back to any completed step at any time.
Before you begin
Have the following ready to complete the form in one go.
- Package title & destinations — Name and all countries or regions covered.
- Included places & attractions — Cities, sites, or experiences travellers will visit.
- Duration — Total number of days and nights.
- Category & themes — e.g. Adventure, Cultural, Nature, Honeymoon, Family.
- Short description — A brief tagline (max 10 words) for listing cards.
- Cover image — Max 1920px wide, max 500 KB.
- Gallery images — Up to 10 images, max 1440px wide, 500 KB each.
- Day-by-day itinerary — Can be pasted from a Word or PDF document.
- Variants & pricing — At least one variant with adult, child, and infant prices per season.
- Departure dates — Available start dates, up to 6 months in advance.
- Inclusions & exclusions — What is and is not covered in the price.
- Terms & conditions — Booking and payment policies.
- Cancellation policy — Full-refund deadline and partial-refund rules.
Basic Details
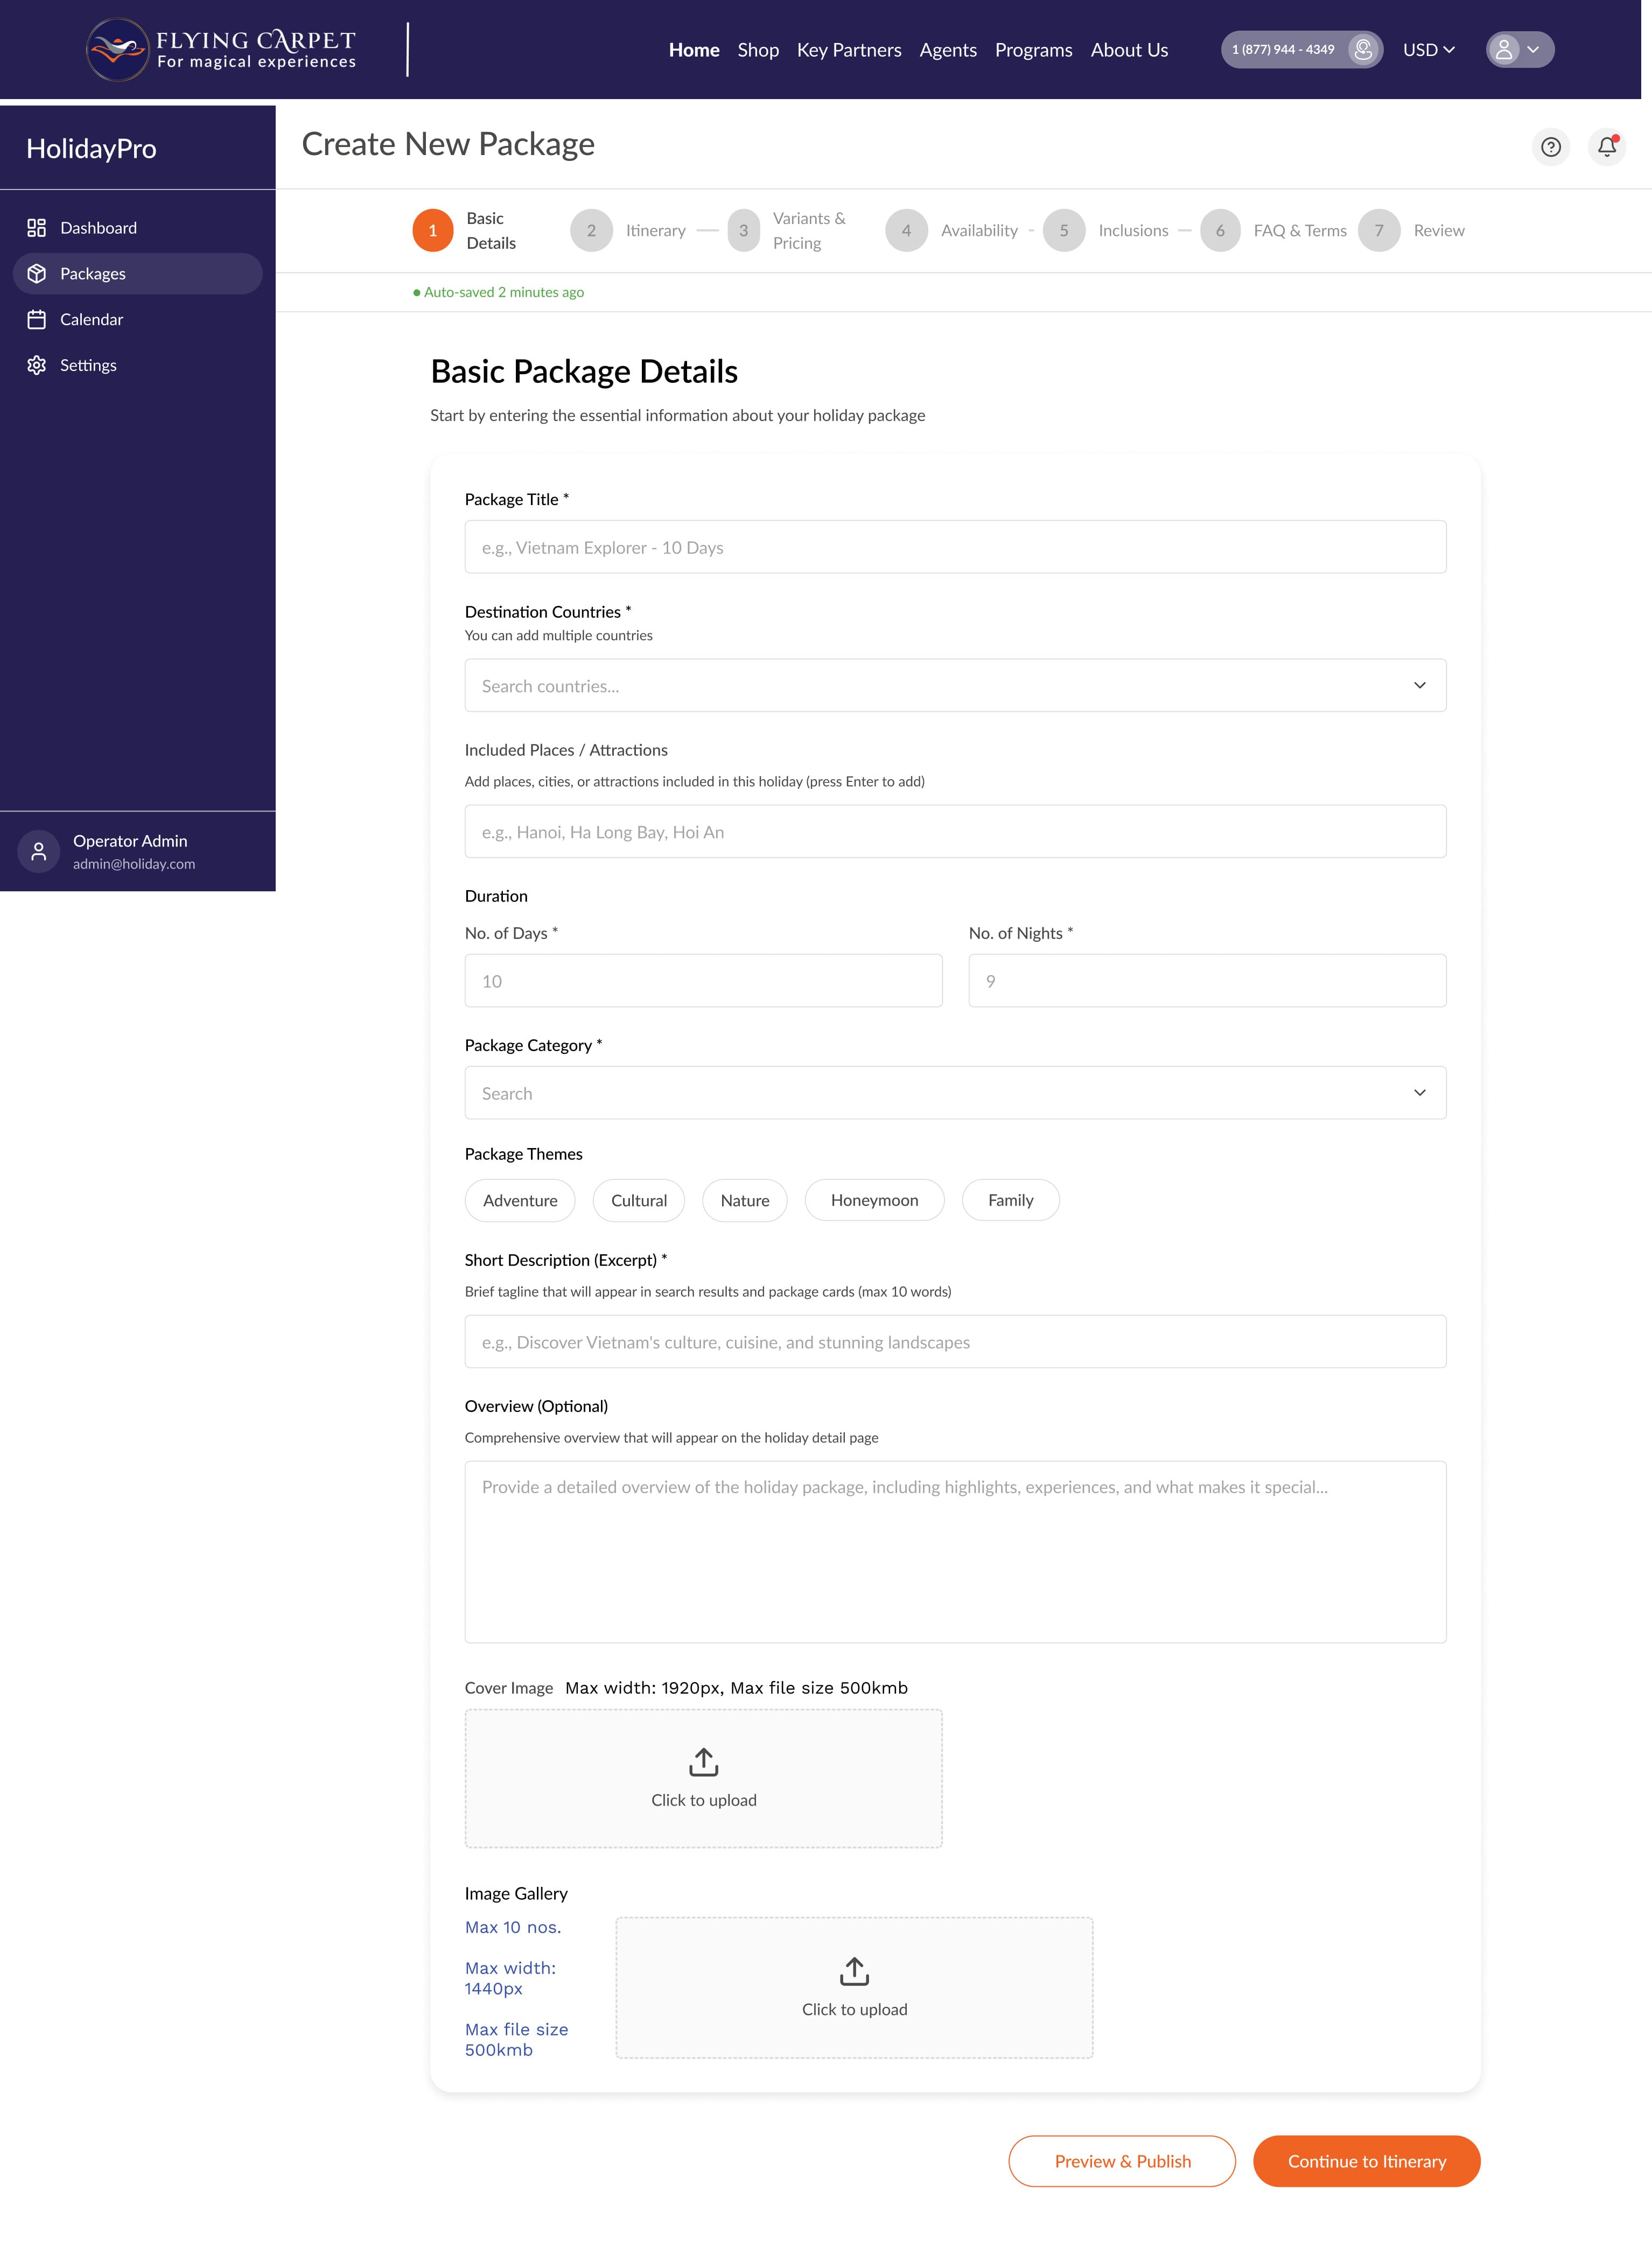
Enter the core information: title, destination countries, included places, duration, package category, themes, a short excerpt, and an optional overview. Upload a cover image (max 1920px, 500 KB) and up to 10 gallery images (max 1440px, 500 KB each).
Itinerary
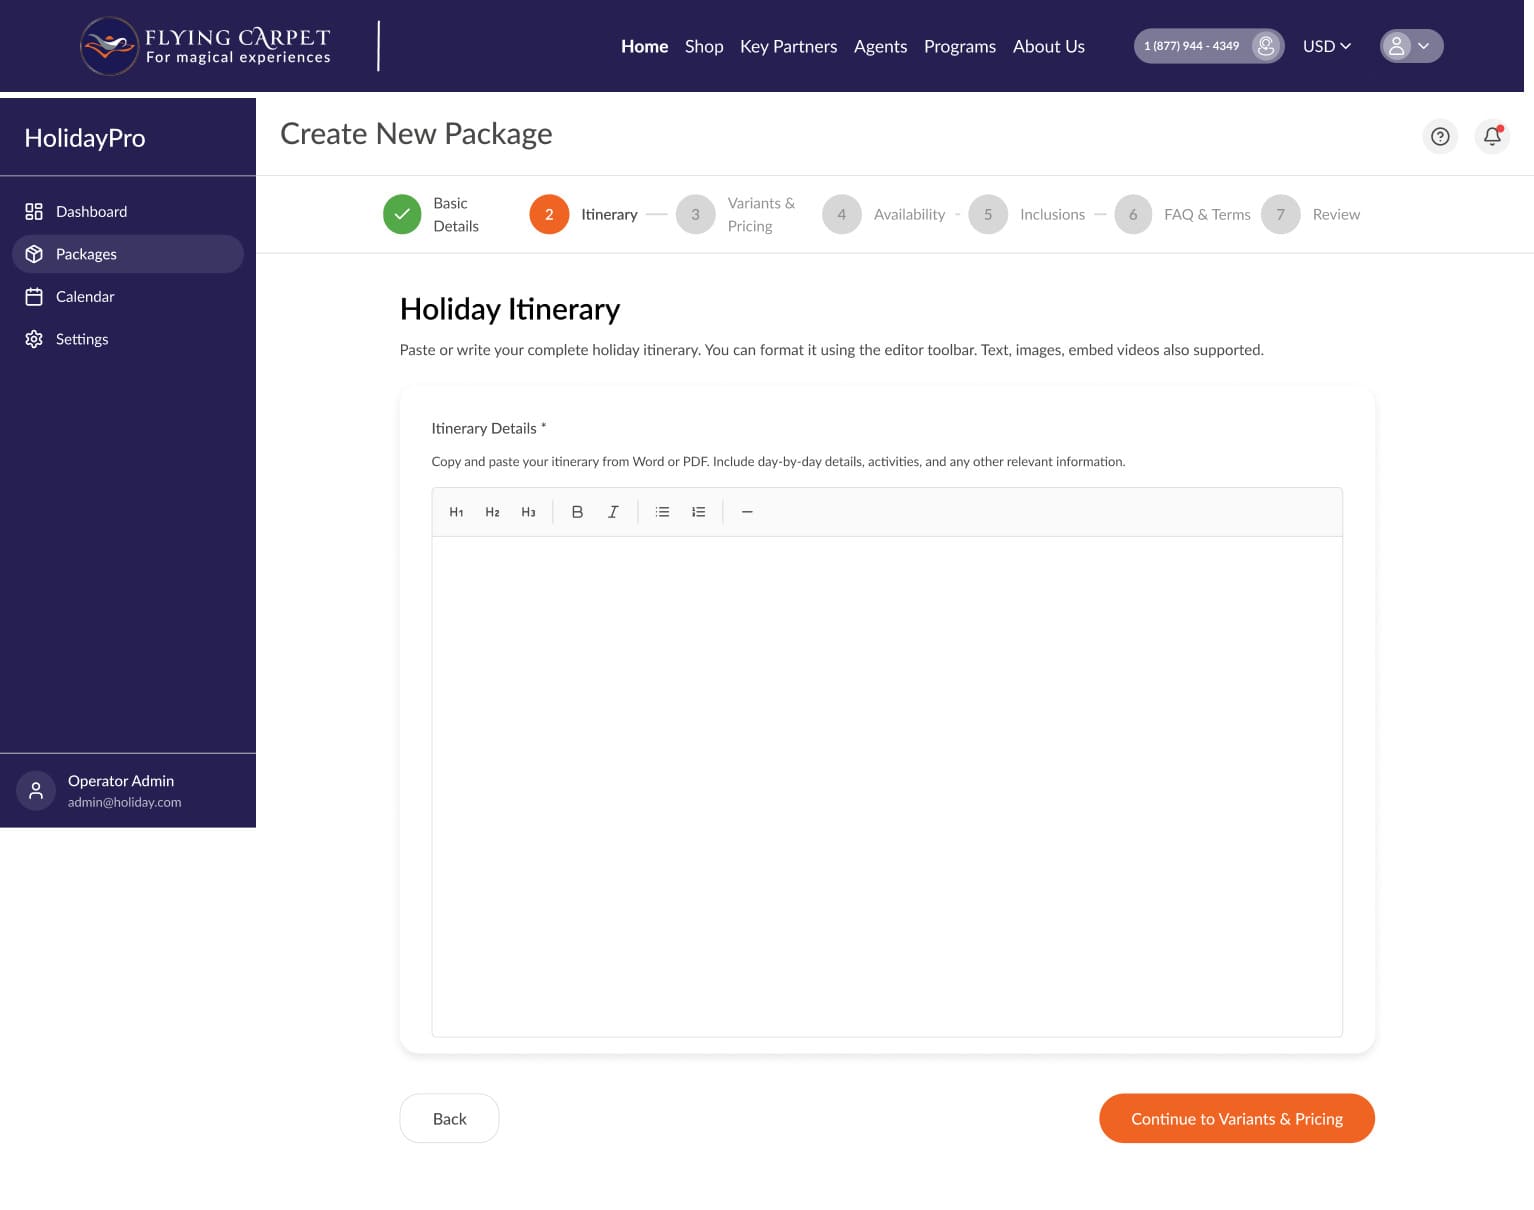
Write or paste your complete day-by-day itinerary using the rich text editor. Supports headings, bold, italic, lists, and embedded videos. You can copy and paste directly from a Word document or PDF.
Variants & Pricing
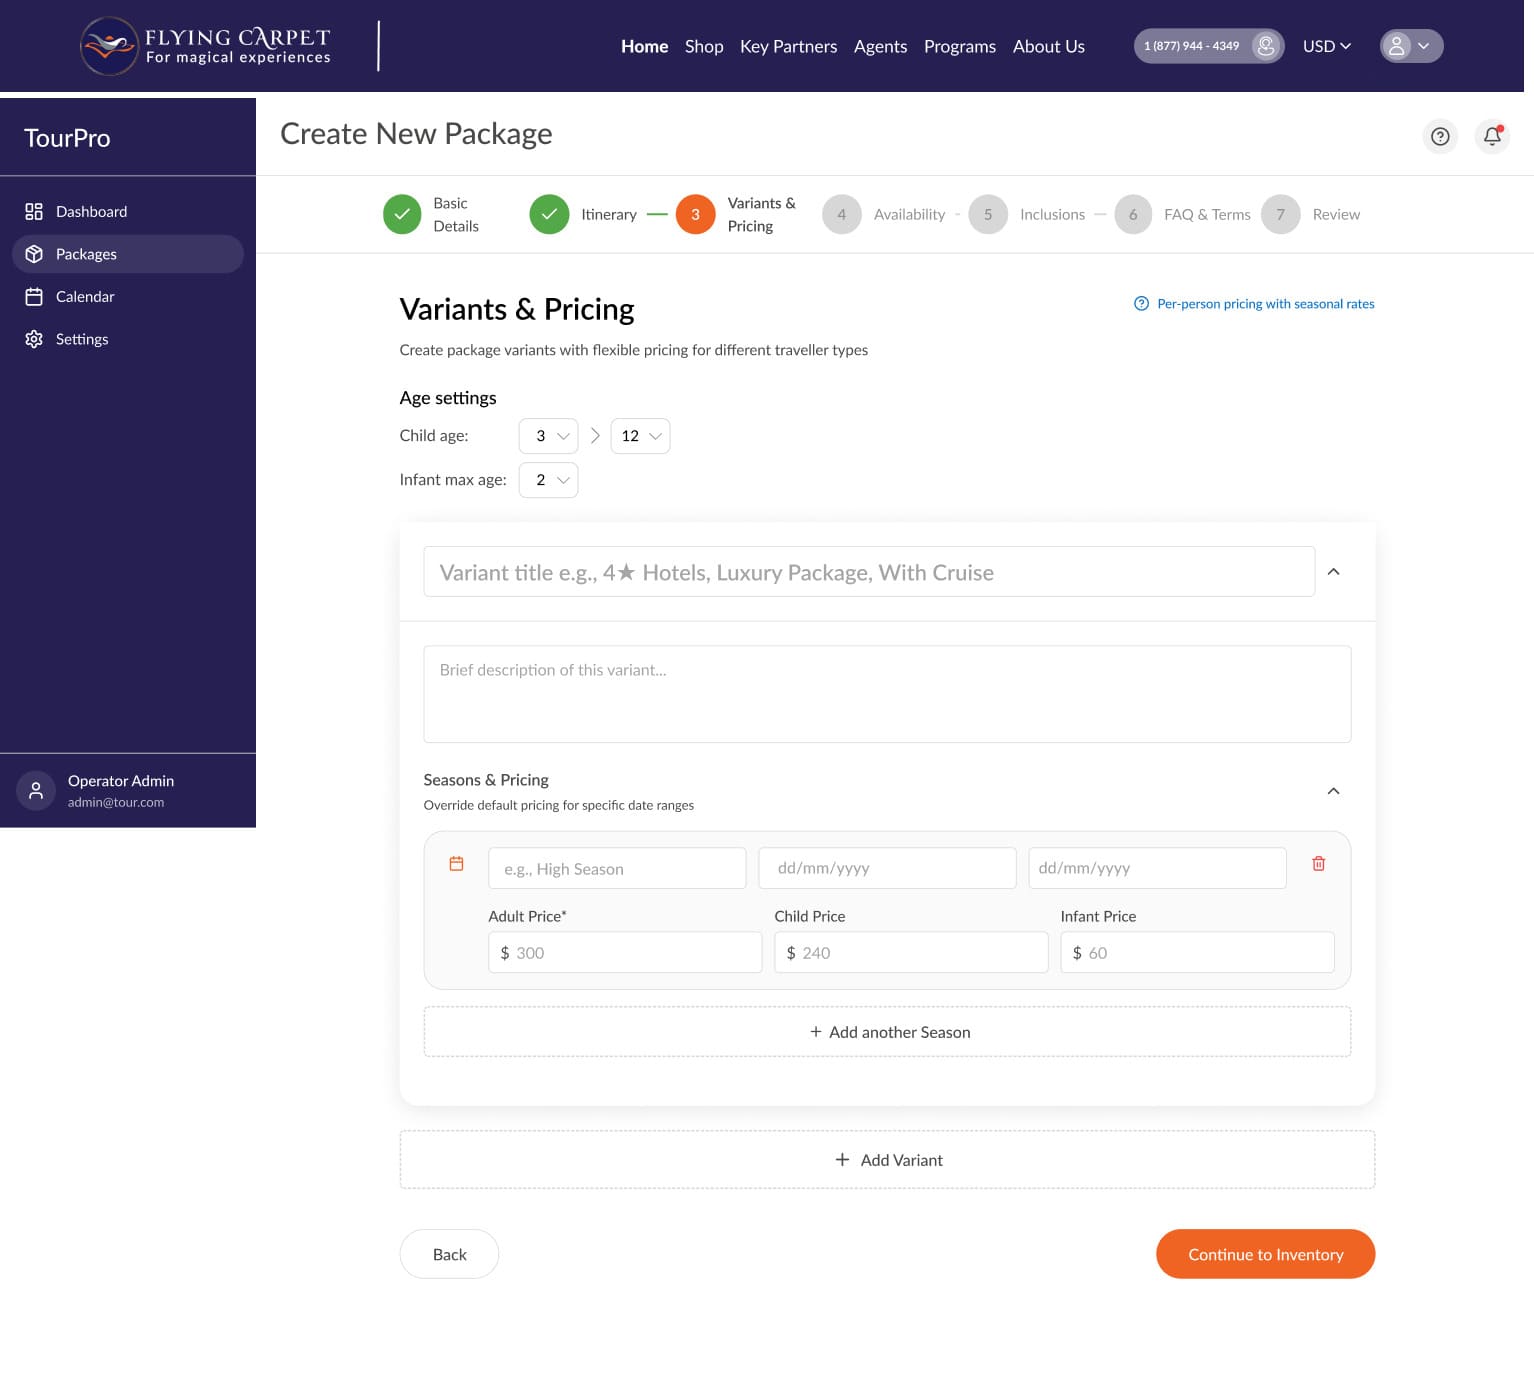
Create one or more package variants (e.g. "4★ Hotels", "Luxury Package") each with its own description and seasonal pricing. Set age ranges for child and infant travellers, then define adult, child, and infant prices per season. Use + Add another Season or + Add Variant to expand.
Availability & Capacity
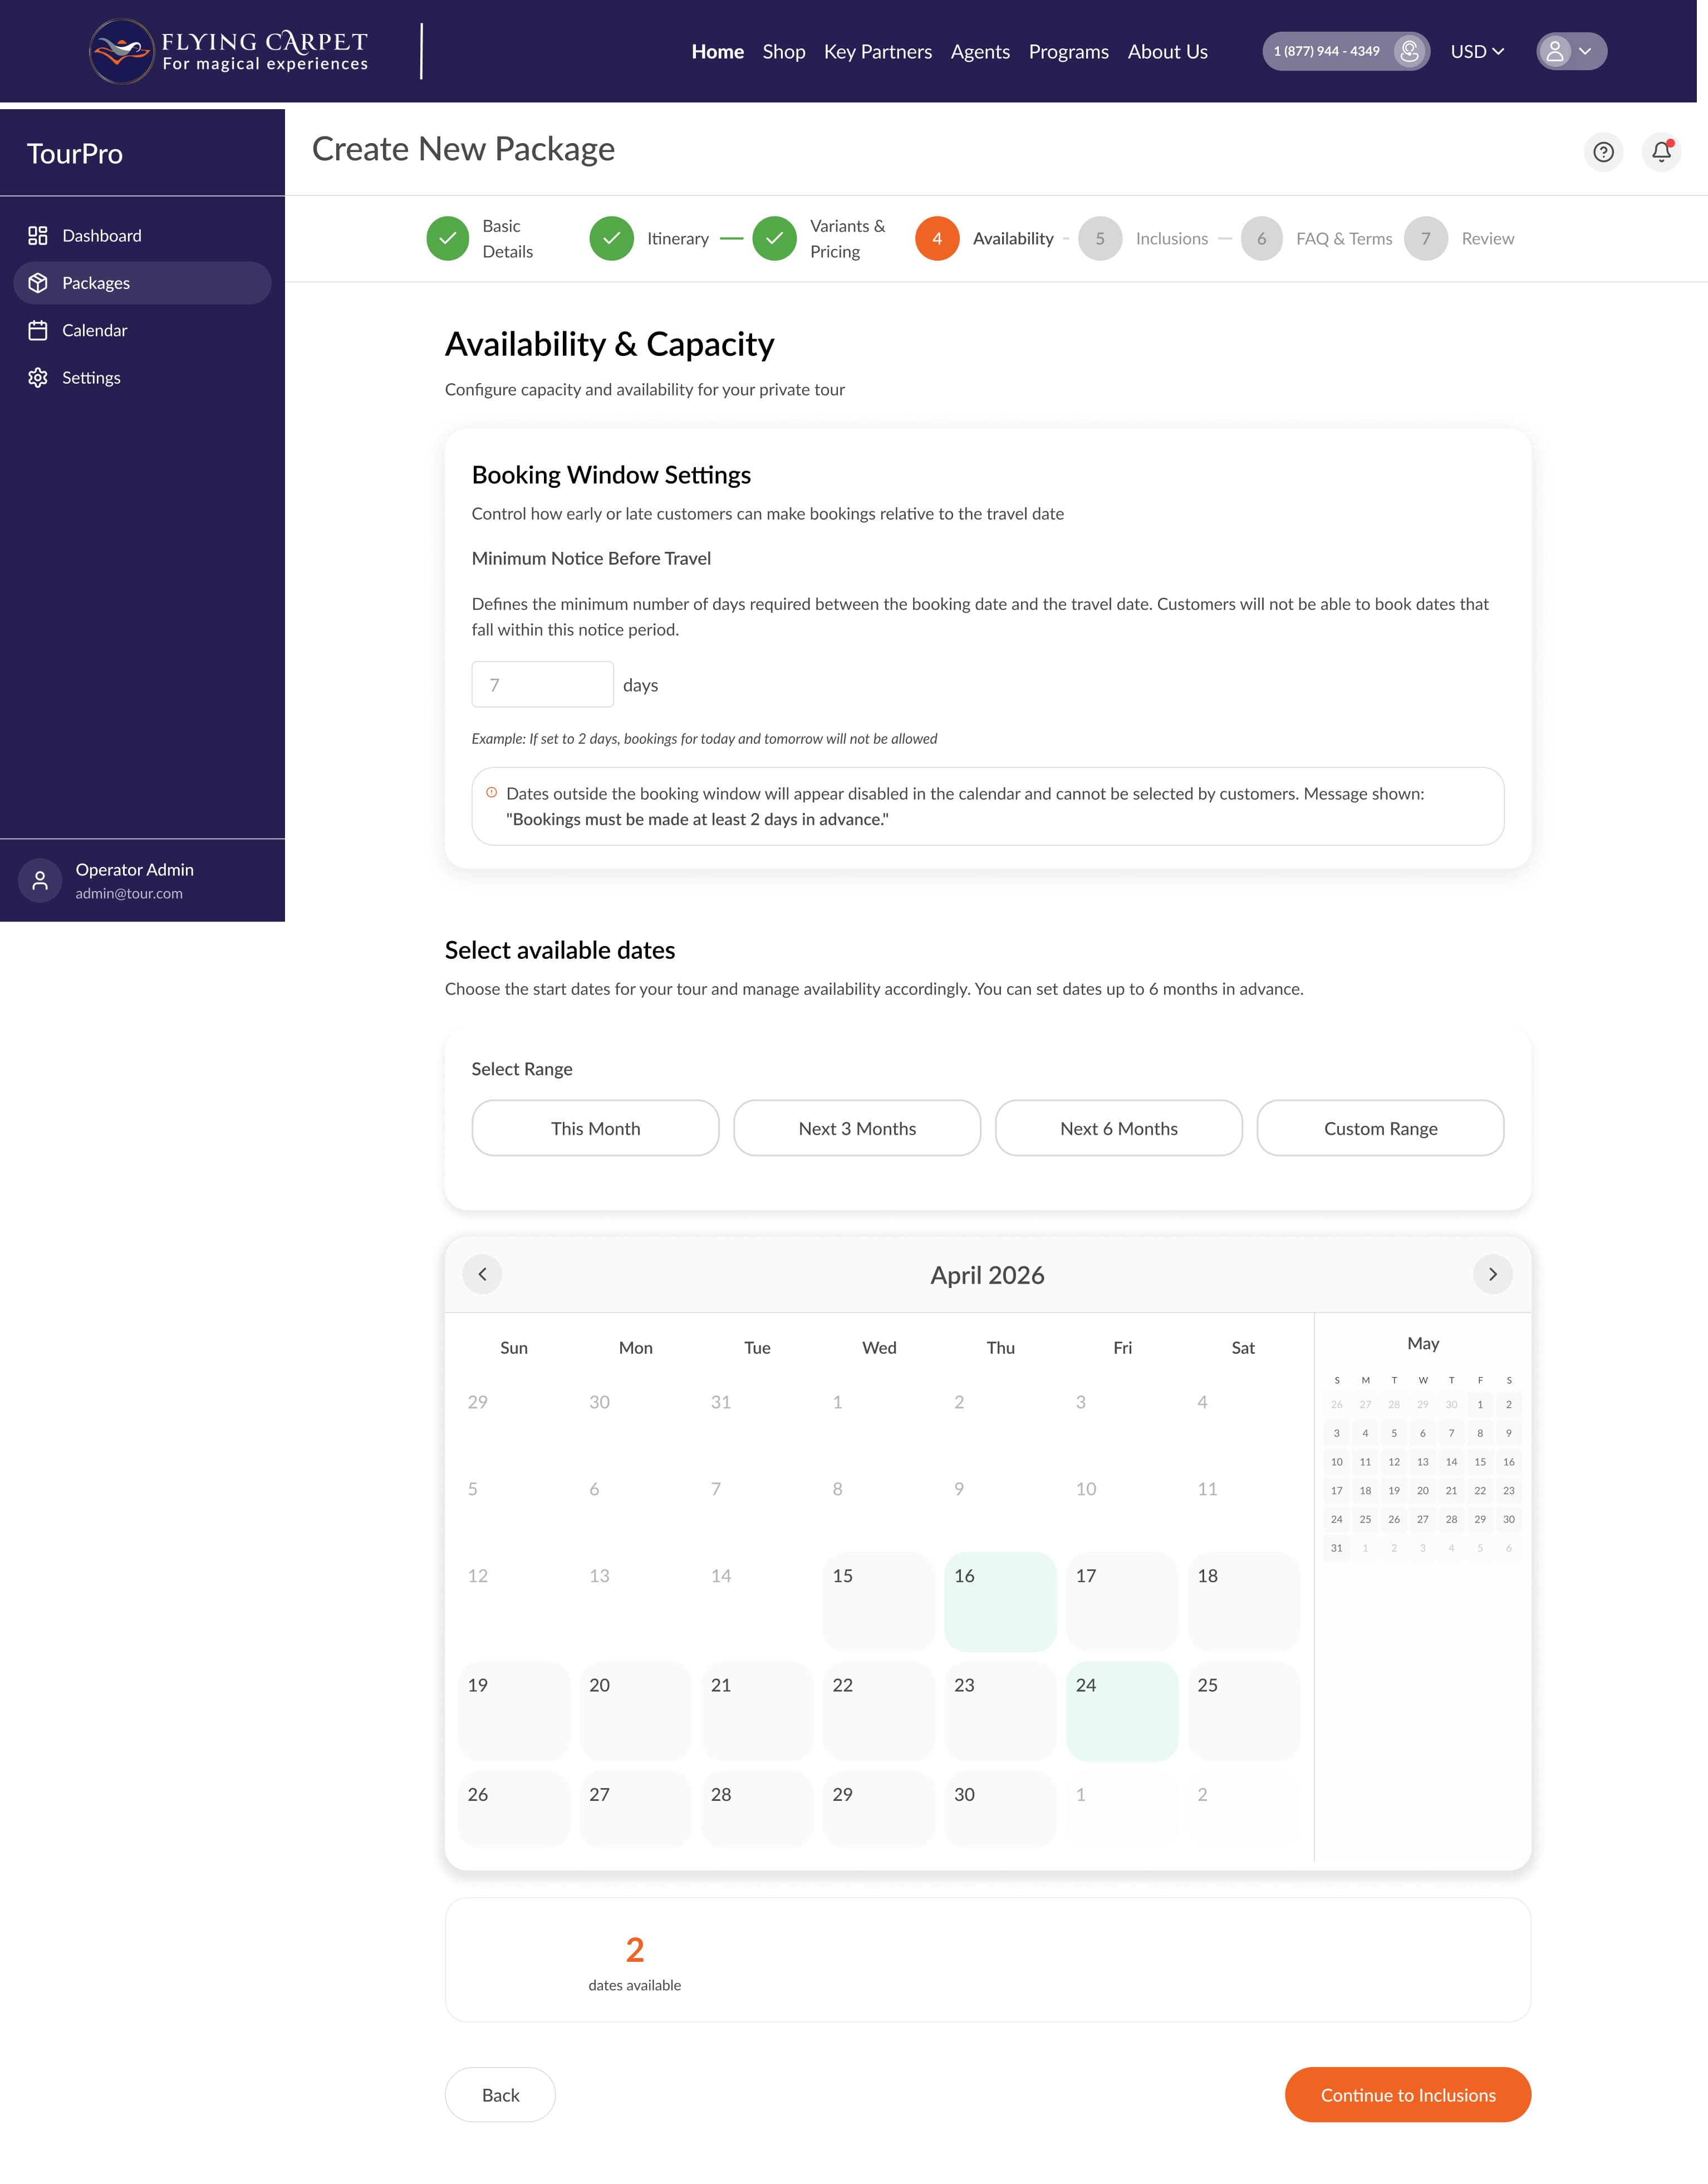
Set the minimum days notice required before travel, then select available departure dates on the calendar — up to 6 months in advance using the This Month, Next 3 Months, Next 6 Months, or Custom Range shortcuts. Dates outside the booking window are automatically disabled for customers.
Inclusions & Exclusions
Select up to 6 feature highlight icons (Flights, Hotels, Sightseeing, Visa, Meals, Tour Manager, Transport, Activities, Cruise, Adventure) to display on the listing card. Then list exactly what is and is not covered using the Included and Excluded rich text fields.

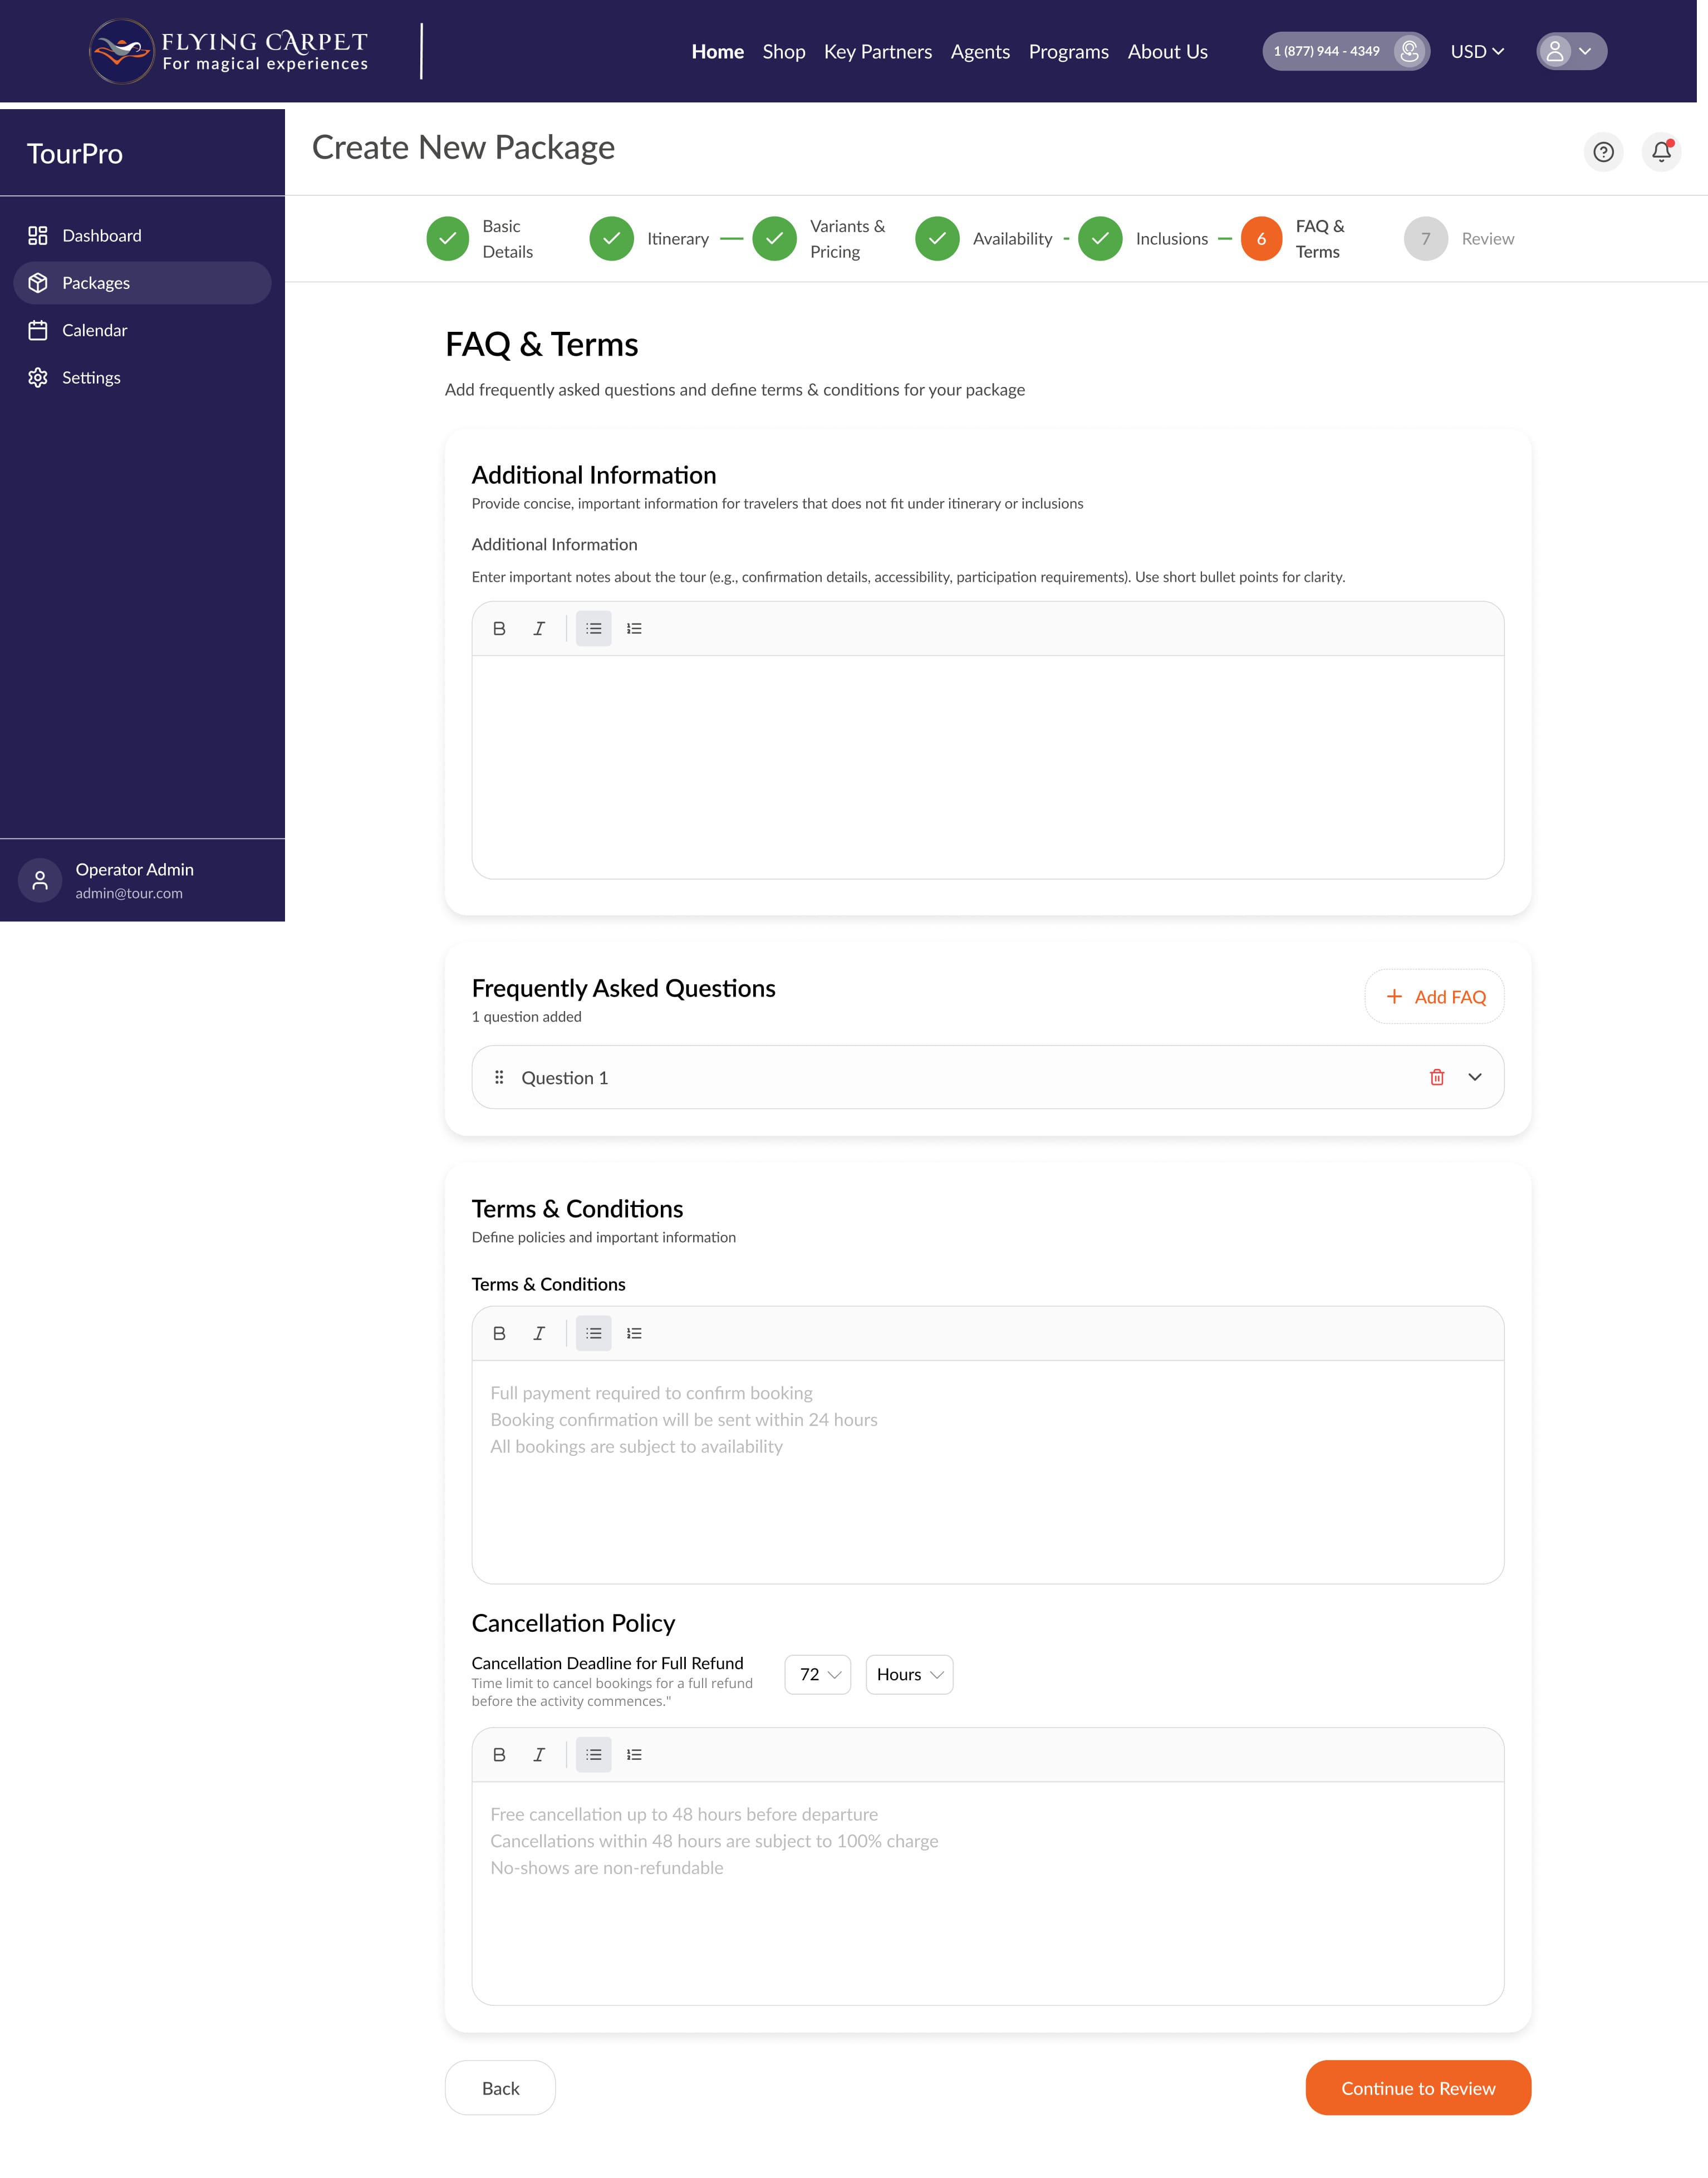
FAQ & Terms
Add additional information not covered in the itinerary (e.g. confirmation details, accessibility requirements). Use + Add FAQ for frequently asked questions. Set your Terms & Conditions and Cancellation Policy — including the full-refund deadline in hours.
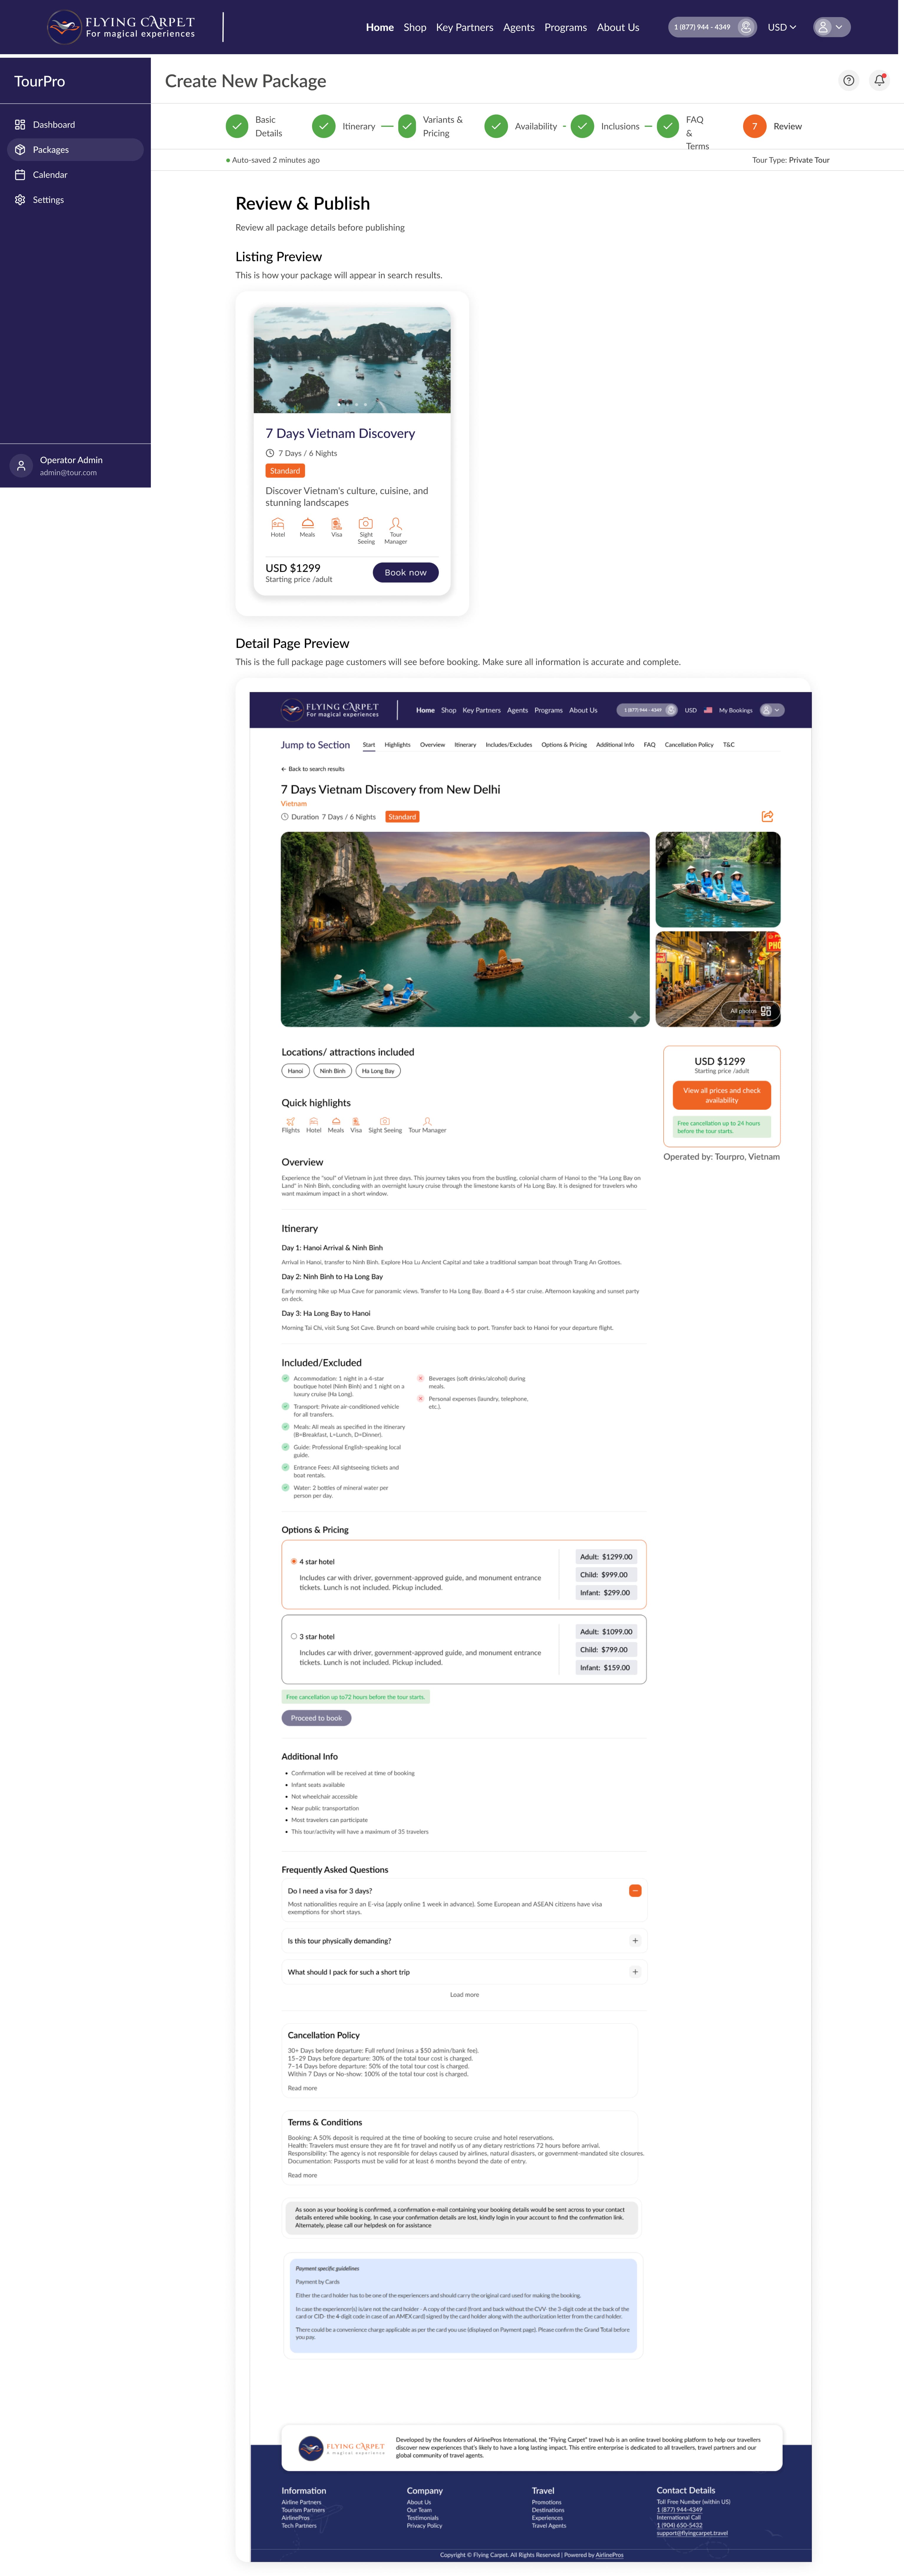
Review & Publish
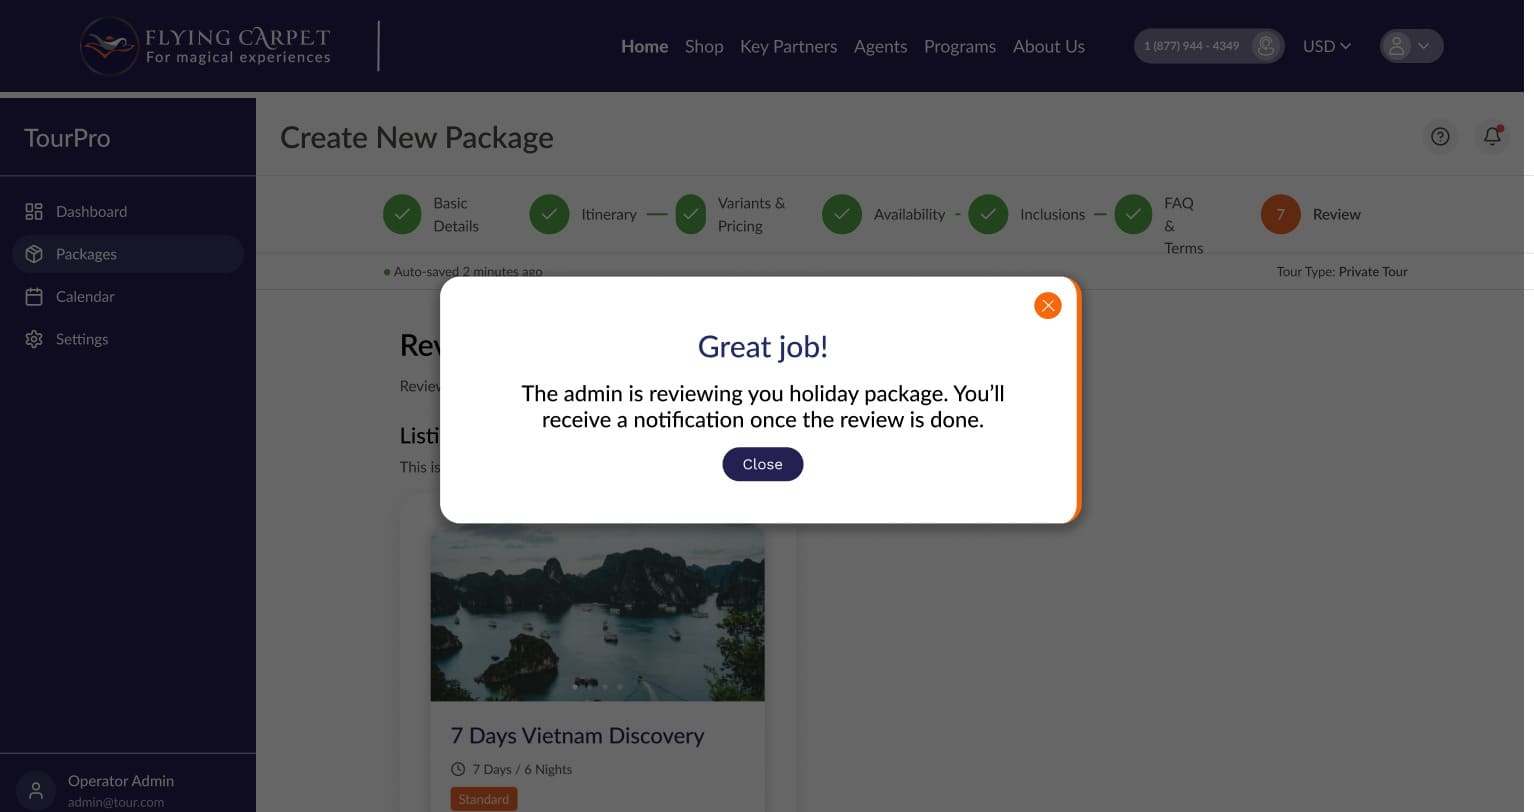
A full preview of your package as it will appear in search listing cards and on the detail page. Review all information carefully, then click Preview & Publish to submit for admin review. A confirmation dialog will appear — you will be notified once the review is complete.
Managing Bookings
When a customer books one of your packages, you will be notified immediately. You must confirm or decline within 72 hours — only after your confirmation will the booking be officially confirmed for the customer.
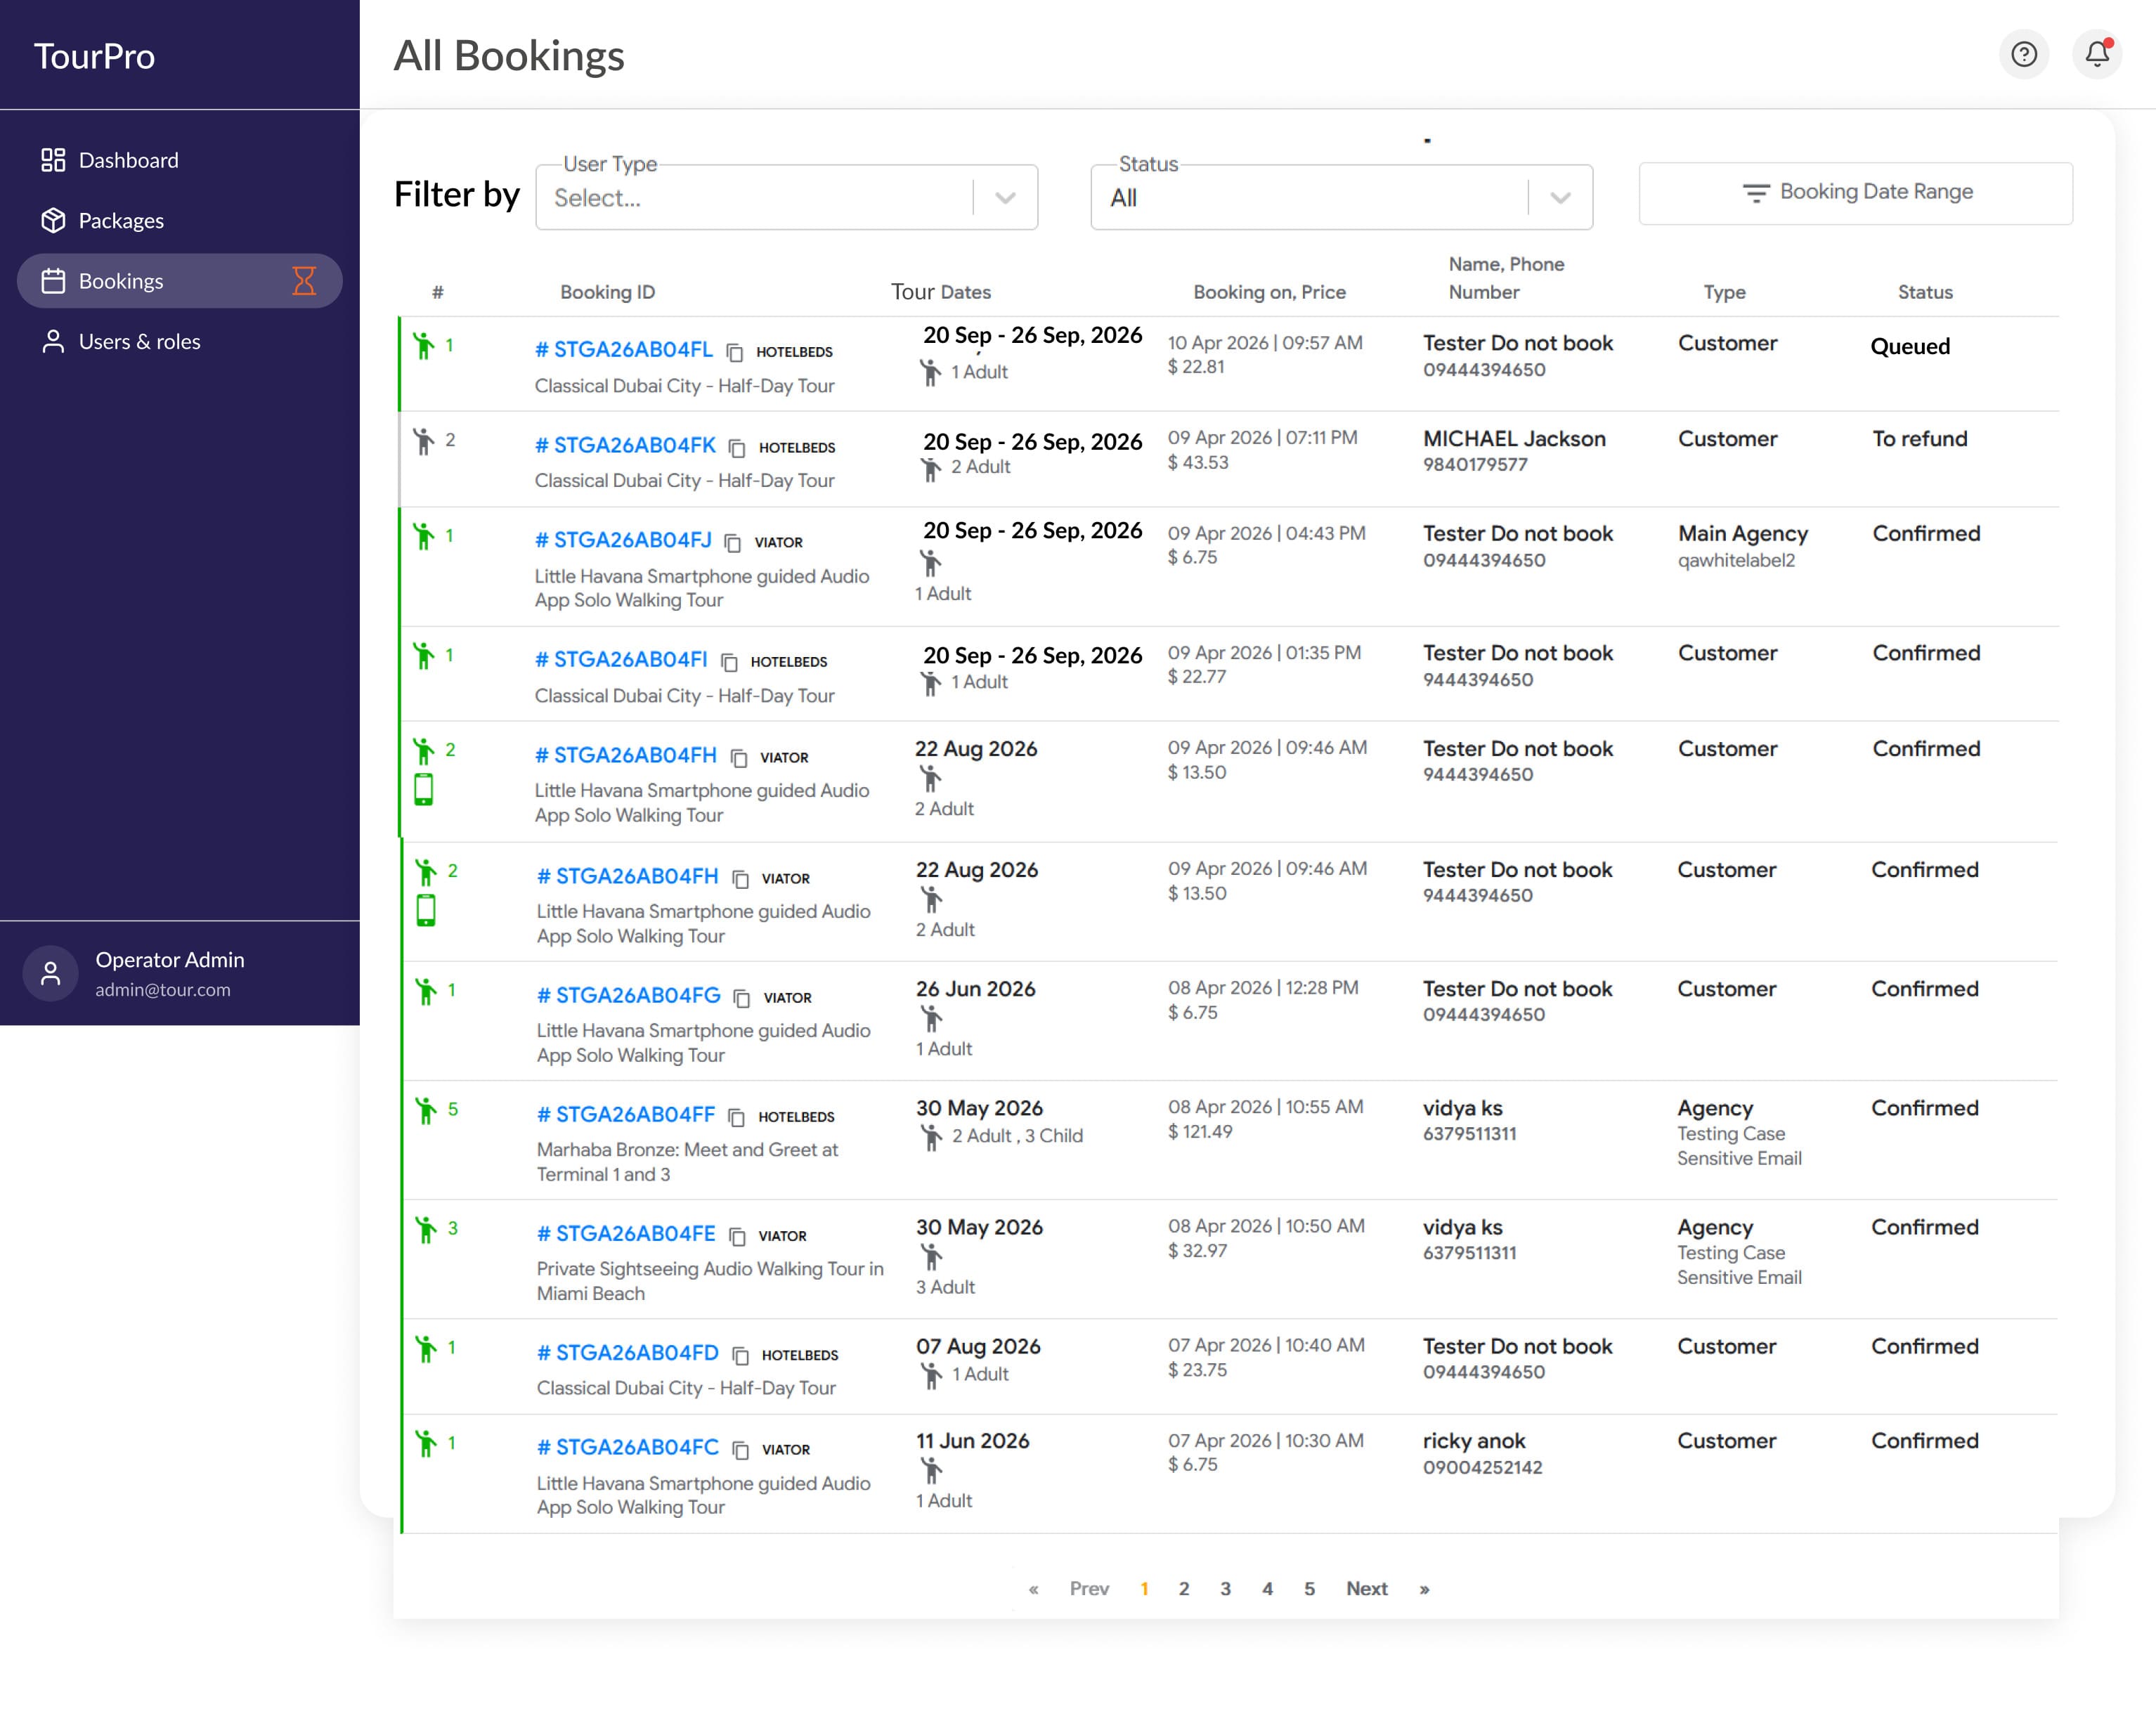
All Bookings
The Bookings section lists all bookings across your packages. Each row shows the booking ID, tour dates, booking date and price, customer name and phone, booking type, and status. Filter by user type, status, or booking date range.
- Queued: Booking received — awaiting your confirmation.
- Confirmed: You have confirmed the booking.
- To refund: Booking was declined or cancelled and a refund is due.
Confirming a Booking
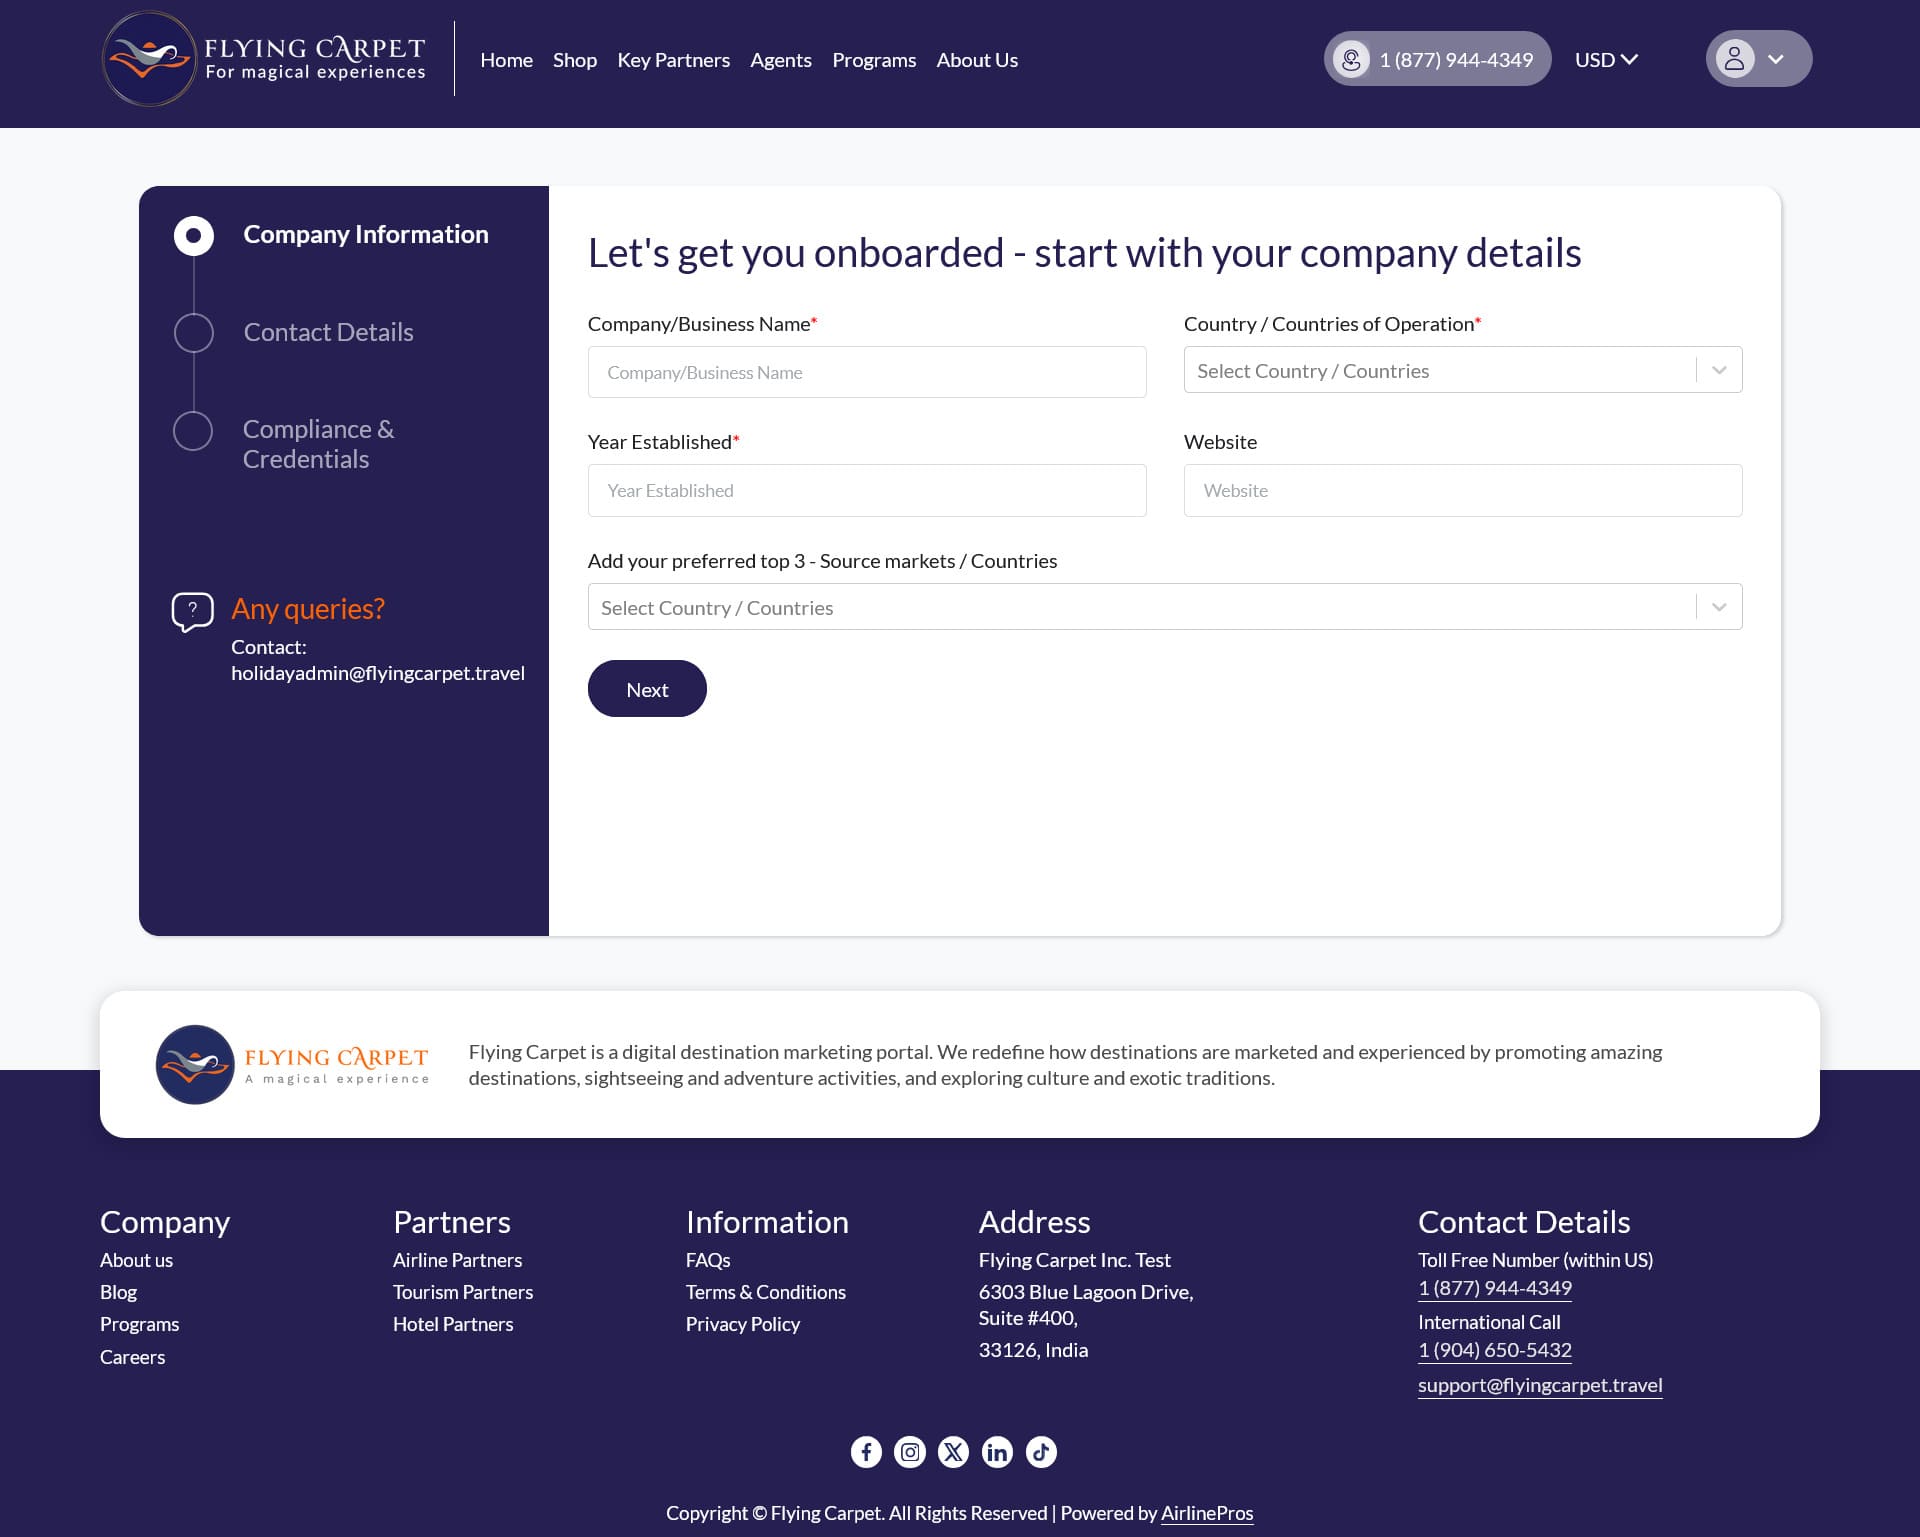
Click any booking row to open the detail page. An Action Required banner appears at the top with a live countdown. The page shows the package name, selected variant, traveller dates, traveller details, and total price.
Click Confirm Booking to accept or Decline Booking to reject. The customer is notified automatically once you take action.